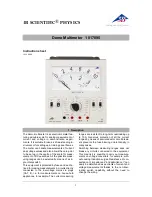
– 15 –
➔
Apply the test leads across the diode terminals and note the
meter reading.
➔
Reverse the diode and note this reading. Based
on the readings the result can be
evaluated as follows:
– If one reading is around 0.5
and the other reading is ʻOLʼ,
the diode is good
– If both readings are ʻOLʼ, the
diode is open (defective)
– If both readings are very
small or 0 (zero), the diode is
shorted (defective)
8. TEMPERATURE MEASUREMENT
WARNING:
REMOVE ALL VOLTAGE SOURCES FROM THE CIRCUIT TO BE TESTED
BEFORE TAKING A TEMPERATURE MEASUREMENT. DO NOT MEASURE TEMPERATURES OF
METAL PARTS WITH A VOLTAGE ON THEM.
➔
Set the function switch to
°C
or
°F
depending on
whether the temperature is to be measured in
degrees Celsius or degrees Fahrenheit.
➔
Plug the ʻKʼ type thermocouple in the TEMP
jack.
NOTE: The ‘K’ type thermocouple supplied with this meter
is rated at 0° to 260°C (-32° to 500°F), although the meter is
capable of measuring up to 1000°C (1830°F).
➔
Touch the probe tip to the component you are
testing and keep it there for about 30 seconds or
until the reading stabilizes.
➔
The digital reading will display the value in
proper decimal point & value.
COM
TEMP
POWER
CIRCUIT-TEST
DMR-4350
20A
RANGE
µA/mA
HOLD
V/Ω/ /
Ω
/
F°
C°
DCV
ACV
µA
mA
20A
µA
mA
20A
TE
M
P
AC A
MP
S
D
C A
M
PS
VOLTS
O
HM
S
COM
TEMP
POWER
CIRCUIT-TEST
DMR-4350
20A
RANGE
µA/mA
HOLD
V/Ω/ /
Ω
/
F°
C°
DCV
ACV
µA
mA
20A
µA
mA
20A
TE
M
P
AC A
MP
S
D
C A
M
PS
VOLTS
O
HM
S


