Cineroid TL120 User'S Manual And Safety Manual Download Page 2

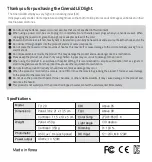
Thank you for purchasing the Cineroid LED light. 

 The Cineroid LED employs a very high color rendering index (CRI).

 It displays a very stable color temperature and brightness so that both motion pictures and still images can be taken in their 

most natural color tones. 

Specifications

Above 95 

Above 98

2700~6500°K

130 degree

0~100 %

12~24V, Min 120W

TL120

Panel: 36 x 21 x 13.5 cm

Controller: 11.5 x 19 x 5 cm

Panel: 450 g

Controller: 350 g

950 Lux / 1m (each panel)

40W x 3 = 120W

Made in Korea

Do not use any batteries, power cord, or accessories that are not specified in this document.

When using a power cord, be sure to plug it in completely. Do not handle power plugs when your hands are wet. When 

unplugging the power cord, grasp the plug body or adapter instead of the cord.

Power cords that are scratched, heavily bent or twisted can potentially be hazardous and a source of electric shock and/or fire.

Do not insert foreign objects into the product’s electric or cable components.

Do not place the power cord near sources of heat as this may melt or cause damage to the cord potentially causing fire or 

electric shock.

Do not disassemble or modify the product. This may damage the product and cause danger due to a malfunction.

Please keep the product out of reach of young children. Injuries may occur due to damage to the product.

When using the product in an airplane or hospital setting, it is recommended to acquire authorization first as signals or 

electro-magnetic waves from the product may cause other equipment to malfunction.

Do not store the product in a dusty or humid environment as damage may occur.

When the product is mounted on a camera, do not lift or move the camera by grabbing the product. This may cause damage 

to the product or the camera mount.

Do not clean the product with paint thinner, benzene, or other volatile solvents. It may cause damage to the product and 

become a fire hazard.

This product is not waterproof. If the product is dropped in water, contact the service center immediately

Model

Dimensions

Weight

Photometric

Power output

CRI

TLCI

Color Temp

Light Angle

Dimming

DC Input

Summary of Contents for TL120

Page 1: ...English Safety Instructions User s Manual ...

Page 2: ...c or cable components Do not place the power cord near sources of heat as this may melt or cause damage to the cord potentially causing fire or electric shock Do not disassemble or modify the product This may damage the product and cause danger due to a malfunction Please keep the product out of reach of young children Injuries may occur due to damage to the product When using the product in an ai...

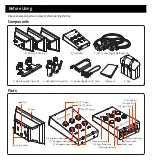
Page 3: ...3Ch Brigtness Adust 1Ch CCT Adjust 2Ch CCT Adjust 3Ch CCT Adjust Power Lamp 1Ch Cable Port Power Cable Port 2Ch Cable Port Power Switch 3Ch Cable Port 3Ch Sleep Button Lamp 2Ch Sleep Button Lamp 1Ch Sleep Button Lamp E Ball Head for Tripod X2 G Power Adapter AC Cord F Bag G Manual Components Before Using Please ensure all parts are present after opening the box Parts ...

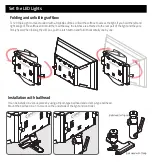
Page 4: ... wings of the softbox and unfold them all the way the latches are attached to the rear part of the light and they are firmly fixed When folding the soft box pull the latch button and fold it horizontally one by one Installation with ball head It can be installed in various places by using a tripod type ball head and a clamp type ball head Mount the ball head in a 1 4 mount on the underside of the ...

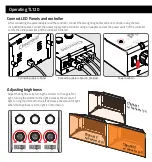
Page 5: ...and set the power switch of the controller to ON then the power lamp of the controller turns red Operating Operating TL120 Connect LED Panels and controller Adjusting brightness Adjust the brightness by turning the dimmer to change left or right Turning the dimmer to the right increases the amount of light turning the dimmer to the left decreases the amount of light When the brightness is 0 the li...

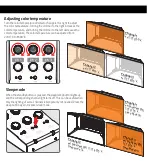
Page 6: ... K Sleep mode When the standby button is pressed the sleep lamp button lights up and the corresponding channel light turns off This can be useful when only the lighting of some channels is temporarily not needed Press the sleep button again to cancel sleep mode Ch 1 Ch 2 Ch 3 Channel 1 ex CCT 2700 K Channel 2 ex CCT 4800 K Channel 3 ex CCT 6500 K Channel 1 ex Brightness 90 CCT 2700 K Sleep Mode Of...

Reviews: