Section 4: Parts and Module Replacement
Entero RPMSP/RPMWU/RPMHD-LED01 Service Manual
4-3
020-100368-05 Rev. 1 (06-2012)
4.4
Projection Head Module (PHM)
4.4.1 Lens Replacement
Estimated Replacement Time: 1 minute
The projector is a class 2M source of visible LED radiation. Directly viewing
the LED output with certain optical instruments within a distance of 100 mm
may pose an eye hazard.
NOTE:
This projector comes shipped with the lens.
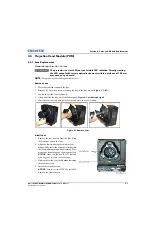
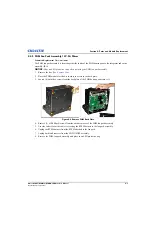
Remove Lens
1. Place the front lens cap onto the lens.
2. Remove (2) 5 mm hex screws securing the lens to the lens mount (
).
3. Loosen the yellow lens lock knob.
4. Grasp and slide the lens out of the lens mount (
).
5. Place the rear lens cap back onto the lens and store in a safe location.
Figure 4-1 Remove Lens
Install Lens
1. Remove the rear lens cap from the lens. Keep
the front lens cap on the lens.
2. Align the lens interface plate with the lens
mount. Fully insert the assembly straight into
the lens mount opening without turning. Press
using your hand to engage the magnetic lock.
NOTICE:
Make sure the lens IS NOT inserted
at an angle as this can cause damage.
3. Tighten the yellow lens lock
before
fastening
the security screws.
4. Fasten the security screws.
NOTICE:
Security screws MUST be installed.
5. Remove the front lens cap.
Summary of Contents for Entero RPMHD-LED01
Page 1: ...Entero RPMWU RPMSP RPMHD LED01 S E R V I C E M A N U A L 020 100368 05 ...
Page 2: ......
Page 3: ...Entero RPMWU RPMSP RPMHD LED01 S E R V I C E M A N U A L 020 100368 05 ...
Page 56: ......
Page 58: ......
Page 68: ......
Page 69: ......

