Section 3: Operation
3-38
013-100199-04
SPLASH SCREEN SETUP —
Use the Splash Screen to choose when you would like to
display a special introductory splash screen image, such as your company logo,
graphic or message.
•
Always Off = A splash screen never appears
•
Always On = A splash screen is always on behind the current display image,
similar to wallpaper.
•
Start-up Only – The splash screen logo appears at projector start-up only.
•
Start-up And No Signal – A splash screen appears at start-up only if there is no
source signal.
To replace the default “Christie logo” splash screen (or other) with one of your own,
use
KoRE Librarian
to download the desired .bmp to the projector. This will
overwrite the current splash screen content in projector memory.
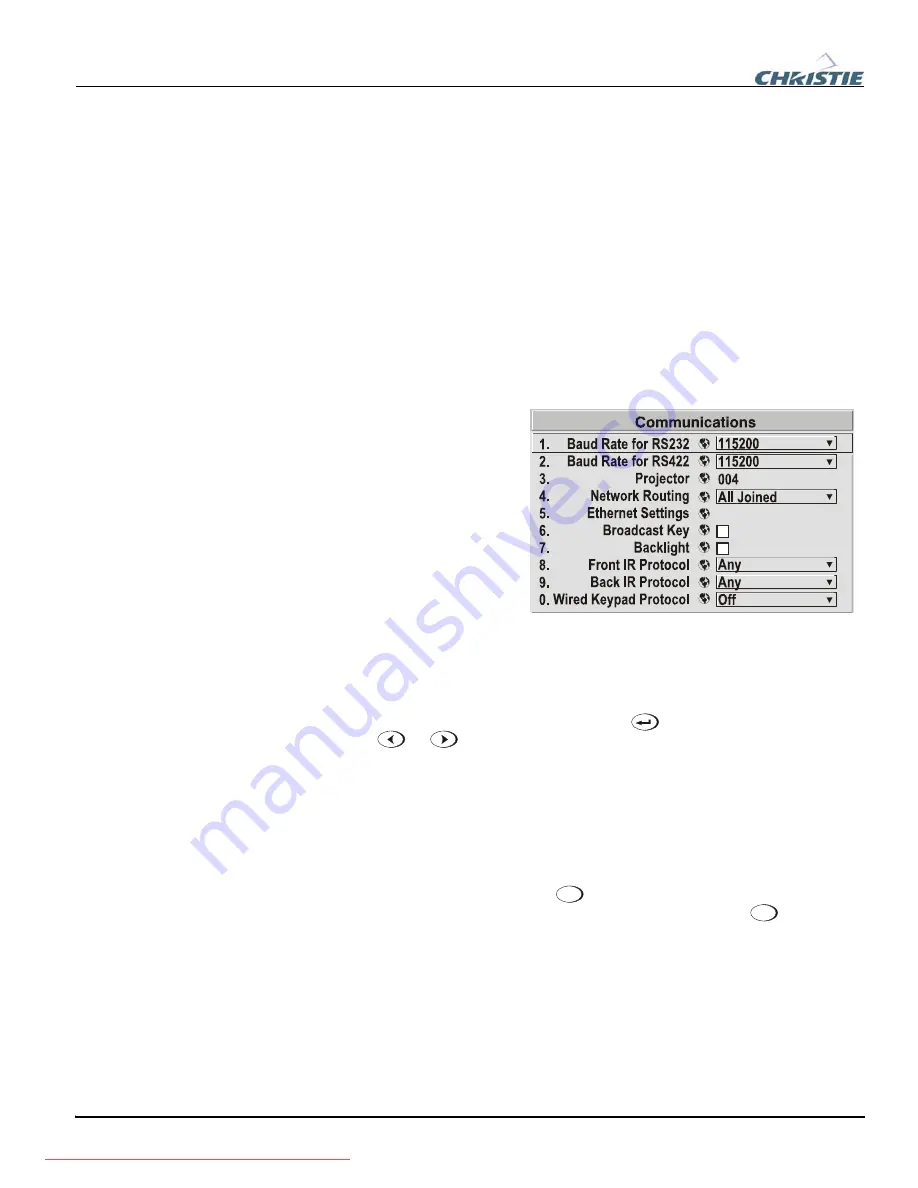
Settings in the
Communications
submenu define and control how
single or multiple projectors are
linked with each other and with
a controlling device.
Baud Rates
The baud rate setting determines
the speed of communication to
and from the projector on the
RS232 or RS422 links. The
maximum rate for the RS232 is
115200; for RS422 it is 19200.
Set the baud rate to match that
of your controlling device, such as your PC. If you are unsure about what baud rate to
choose, refer to the documentation for the controlling device. In an existing network
of projectors, if you discover that a projector has a different baud rate, use the pull-
down list and select the correct baud rate using the
key—do not just scroll this
control with
or
keys. Serial communication is always eight data bits, no
parity.
Projector
Enter a three-digit number (such as “001”) to assign or change a number to the
projector currently in use. If the current projector already has a number assigned, that
number will appear here (for example, “004” in the menu shown above). Numerical
identity for projectors enables you to communicate with a single projector within a
multiple-projector application (see also
Proj
key in
3.2, Using the Keypads
). If you
make a mistake in assigning or changing the projector number, press
Exit
to cancel.
NOTE: When multiple projectors are being used and you want to adjust the color and
edge blending settings for individual projectors to create one seamless image, you
must assign different numbers for each projector to allow toggling back and forth
between projectors while adjustments are being made.
Network Routing
NOTE: Not applicable for stand-alone projectors or simple serial networks with only
one type of controller and linking.
System
Configuration
f
— COMMUNICATIONS —
Summary of Contents for 1920-DX
Page 2: ...Downloaded from ProjectorsManual com Manuals ...
Page 4: ...Downloaded from ProjectorsManual com Manuals ...
Page 8: ...Downloaded from ProjectorsManual com Manuals ...
Page 116: ...Downloaded from ProjectorsManual com Manuals ...
Page 130: ...Downloaded from ProjectorsManual com Manuals ...
Page 132: ...Downloaded from ProjectorsManual com Manuals ...
Page 134: ...Downloaded from ProjectorsManual com Manuals ...
Page 137: ...Appendix D Throw Distance 013 100199 04 D 3 Downloaded from ProjectorsManual com Manuals ...
Page 138: ...Appendix D Throw Distance D 4 013 100199 04 Downloaded from ProjectorsManual com Manuals ...
Page 139: ...Appendix D Throw Distance 013 100199 04 D 5 Downloaded from ProjectorsManual com Manuals ...
Page 140: ...Appendix D Throw Distance D 6 013 100199 04 Downloaded from ProjectorsManual com Manuals ...
Page 141: ...Appendix D Throw Distance 013 100199 04 D 7 Downloaded from ProjectorsManual com Manuals ...
Page 142: ...Appendix D Throw Distance D 8 013 100199 04 Downloaded from ProjectorsManual com Manuals ...
Page 143: ...Appendix D Throw Distance 013 100199 04 D 9 Downloaded from ProjectorsManual com Manuals ...
Page 144: ...Appendix D Throw Distance D 10 013 100199 04 Downloaded from ProjectorsManual com Manuals ...
Page 168: ...Downloaded from ProjectorsManual com Manuals ...


