


Wiring
48" and 52" HyfloTM Fans Installation and Operators Instruction Manual
6
MV1747D
1.Check that the electrical power being supplied to the Fan matches the electrical Specifications on the Fan
Decal.
2. Remove the Motor Access Cover.
3. Install an electrical disconnect within reach of each Fan installed.
4. Connect the cord to the motor according to the wiring diagram on the motor. Verify that the motor is
connected for counter clockwise rotation (viewing the back of the motor, opposite the shaft end.)
Follow local, state, and national electrical codes for wiring.
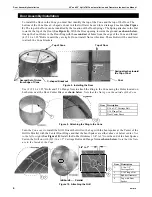
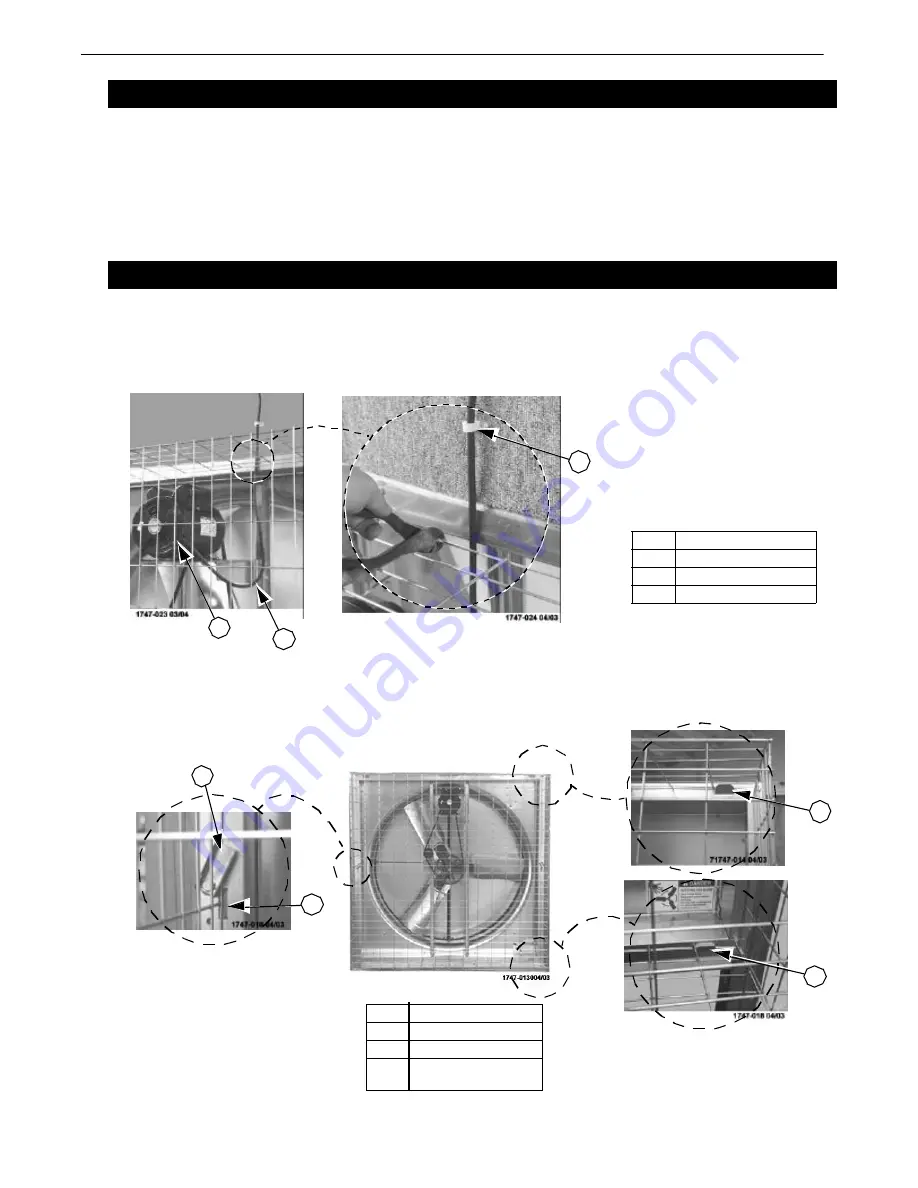
Cut out one section of the Screen to route the cord out of the Fan: This will allow for the Screen to be
removed without interfering with the Cord.
(See Figure 13)
. Attach the cord to the Wall using a Lag Screw
and Cord Clip
.
Allow enough slack in the cord to form a "drip loop" for moisture to fall away from the cord
and not into the motor.
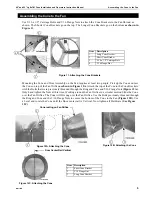
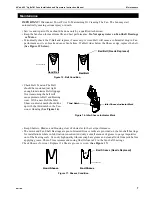
Hang the Rear Screen on the four tabs located in the corners of the Fan Mounting Flange. Position the Screen
so that the Screen wire is captured between the 1/8" tall tabs and the Screen Clips. Rotate the two Screen
Clips to capture the Screen
(See Figure 14)
.
Wiring
Installing the Screen
Item
Description
1
Motor Access Cover
2
Cord Clip
3
Drip Loop
3
1
3
2
3
3
Figure 13. Cut out Screen for Motor Wiring
32
3
1
3
3
3
3
Item
Description
1
Screen Clip
2
1/8" tall Tab
3
Screen Mounting
Tabs
Figure 14. Installing the Screen