Installation Instructions
PL-1
4
INSTALLATION
This manual contains installation procedures that cover
pole-mounted applications:
NOTE:
Omit Step1 thru 3 and proceed to Step 4 if the
projector is already installed on the 1-1/2” NPT pipe.
1. If projector is mounted, remove projector and SLB.
2. Loosen the thumbnuts and disconnect your projector
from the RPA.
3. Install the RPA mount on the 1-1/2” NPT pipe as
described in the instructions for your RPA mount.
4. Unlock and open the PL-1.
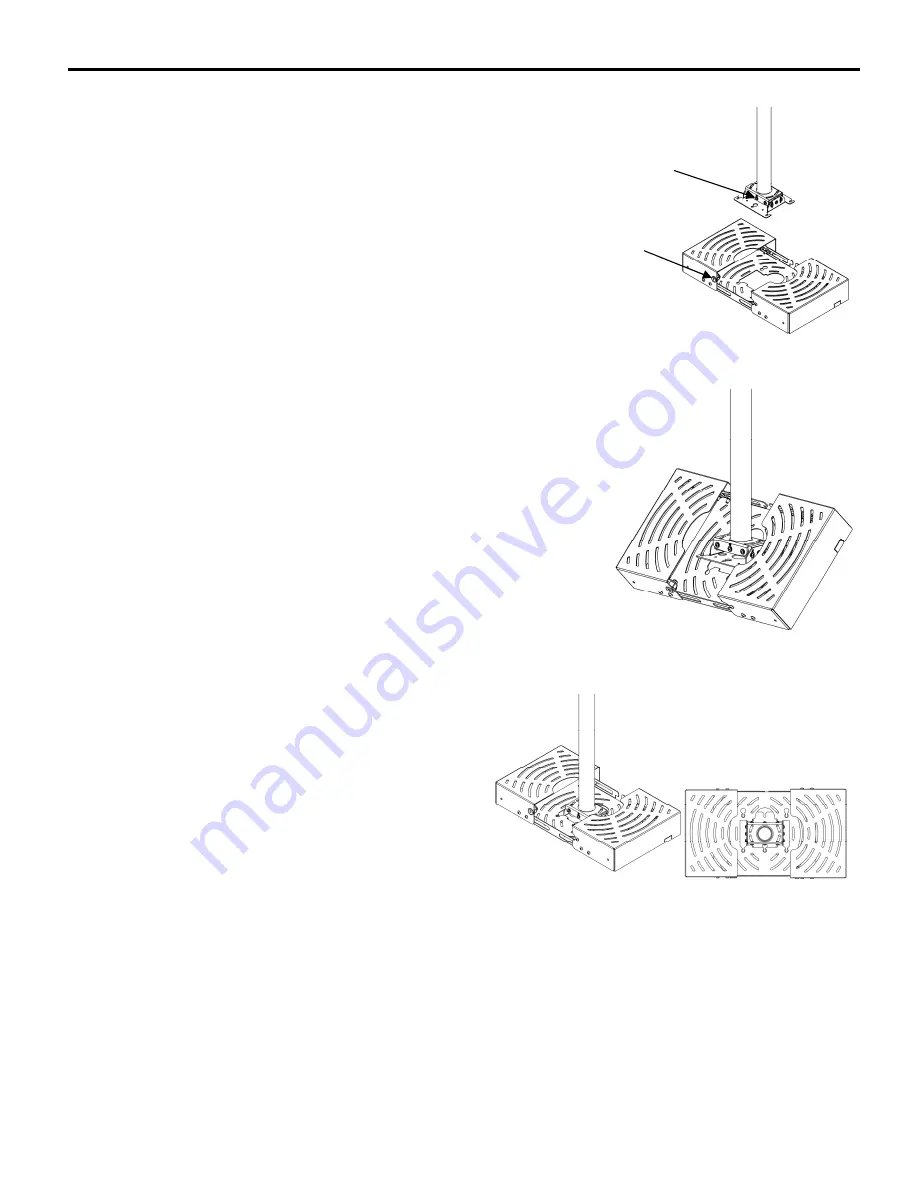
5. Align set screw of RPA with key lock of cage (see
Figure 1).
6. Tilt the lock side of the PL-1 down and route the RPA
thru the hole in the PL-1 (see Figure 2).
7. Set PL-1 on RPA (see Figure 3).
Figure 1. Align Set Screw & Key Lock
Figure 2. Place PL-1 on RPA
Figure 3. PL-1 on RPA
Set Screw
Key Lock


