I N S T A L L A T I O N I N S T R U C T I O N S
IN-WALL ENCLOSURE
Spanish Product DescriptionGerman Product Description
Portuguese Product Description
Italian Product Description
Dutch Product Description
French Product Description
PAC501
Page 1: ... O N I N S T R U C T I O N S IN WALL ENCLOSURE Spanish Product Description German Product Description Portuguese Product Description Italian Product Description Dutch Product Description French Product Description PAC501 ...
Page 2: ...this accessory can result in serious personal injury or damage to equipment It is the installer s responsibility to make sure the structure to which this accessory is attached can support five times the combined weight of all equipment Reinforce the structure as required before installing the accessory The wall to which the accessory is being attached may have a maximum drywall thickness of 5 8 1 ...
Page 3: ...DIMENSIONS MILLIMETERS INCHES Tighten Fastener Apretar elemento de fijación Befestigungsteil festziehen Apertar fixador Serrare il fissaggio Bevestiging vastdraaien Serrez les fixations Loosen Fastener Aflojar elemento de fijación Befestigungsteil lösen Desapertar fixador Allentare il fissaggio Bevestiging losdraaien Desserrez les fixations Phillips Screwdriver Destornillador Phillips Kreuzschlitz...
Page 4: ... support blocks wood studs jamb studs and cripple studs for steel stud framework 2 1 2 drywall screws Qty 16 for steel stud framework B 4 C 8 M7 x 40mm F 6 08 x 1 2 Grounding screw and washer installed at factory Earthing symbol IEC 60417 No 5019 affixed adjacent to grounding terminal D 4 M7 x 50mm A 1 PAC501 Mounting Spacers Extras if needed for installing electrical box E 1 M4 Allen driver bit ...
Page 5: ...studs 3 Center and level housing between marked studs 4 Using PAC501 A as a template draw pencil line completely around housing See Figure 1 5 Cut drywall on outside edge of line and remove Figure 1 Frame Housing Wood Studs The exposed portion of the center wood stud must be removed and the resulting cavity completely framed with wood The following steps are suggested The actual procedure is depen...
Page 6: ...6 on center Studs If back side of wall is unfinished drywall must be installed to a minimum of one stud left and right of the studs being used to install the mount Drywall must be secured to studs with screws 12 on center Steel Stud 2 x 4 25ga minimum Stud type and structural strength must conform to the North American Specification for the Design of Cold Formed Steel Structural Members See hazard...
Page 7: ...l framing to accommodate a UL Listed electrical box accessory not included 5 Attach 25 ga horizontal steel runner header framing to each jamb stud with 2 1 2 drywall screws not included See Figure 3 In Wall Enclosure Installation 1 Install UL Listed electrical box accessory not included into the PAC501 A following instructions included with the UL Listed electrical box 2 Connect electrical wiring ...
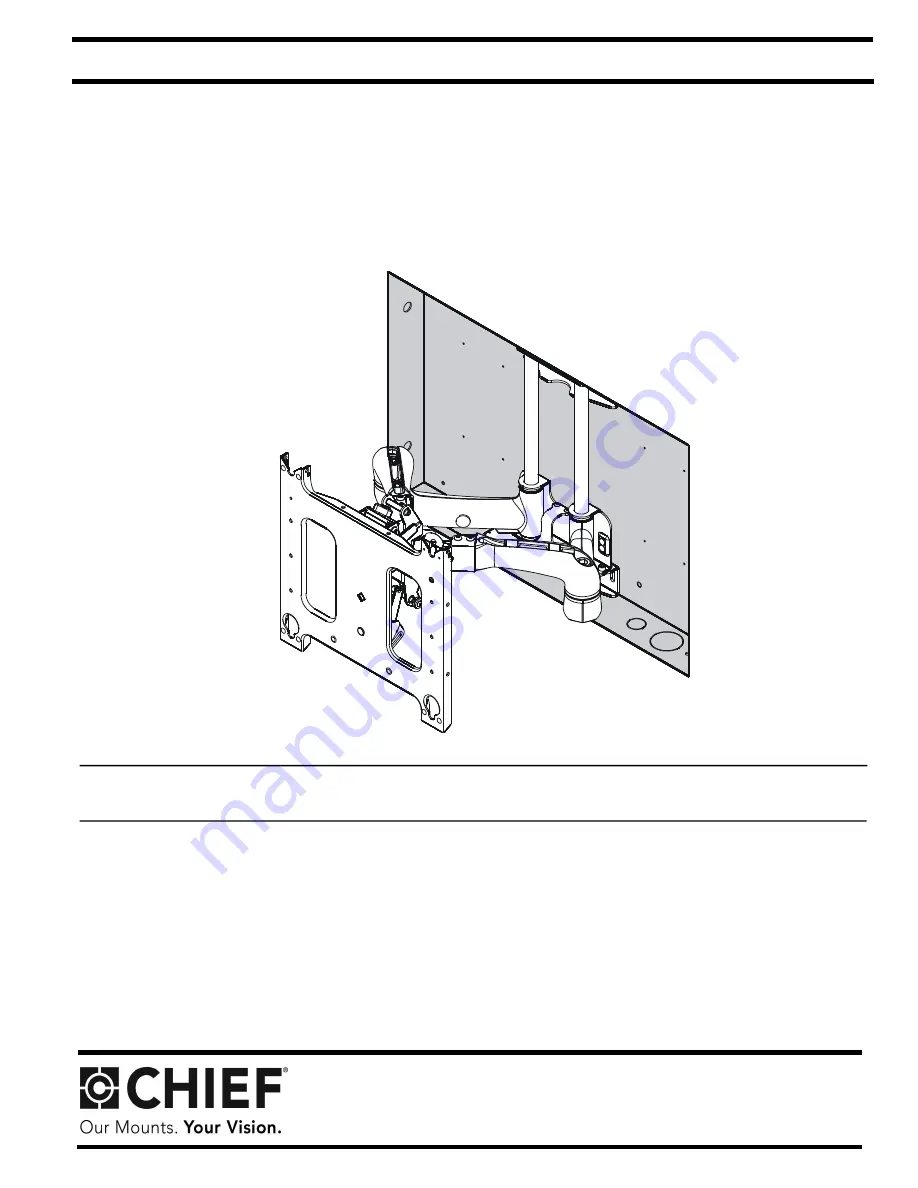
Page 8: ...ontal framing using eight M7 x 40mm Allen head connector screws C using an M4 Allen head drill bit E See Figure 6 Figure 6 DANGER IMPROPER WIRING CAN LEAD TO DEATH OR SEVERE PERSONAL INJURY Grounding must be installed by qualified personnel using a UL Recognized No 12AWG Green and Yellow grounding wire connected to grounding lug on mount Figure 7 Installing Arm Kit Install arm kit following instru...
Page 9: ...Installation Instructions PAC501 9 ...
Page 10: ...PAC501 Installation Instructions 10 ...
Page 11: ...Installation Instructions PAC501 11 ...
Page 12: ...03 DK Weert Netherlands P 31 0 495 580 852 F 31 0 495 580 845 Asia Pacific A Office No 918 on 9 F Shatin Galleria 18 24 Shan Mei Street Fotan Shatin Hong Kong P 852 2145 4099 F 852 2145 4477 PAC501 Installation Instructions Chief a products division of Milestone AV Technologies 8800 003091 Rev00 2018 Milestone AV Technologies www milestone com 08 18 ...