background image

18

BASIC OPERATIONS

Adjusting the Volume

Turn the Volume Control dial to adjust the volume level up or down.

• 

Disc Error Messages

The following messages will be displayed on-screen if there is a problem with the format of the loaded disc.

WRONG REGIONAL DISC. 

• 

The region code of the disc does not match the player’s region code (Region 

1).

WRONG PASSWORD. 

• 

The parental rating level of the disc is higher than the parental rating level setting 

of the player. The player will not play the disc.

BAD DISC. T

• 

he player is equipped with automatic disc quality detection software. If the player detects 

a disc that is damaged or has a format problem, it may play the disc at a lower quality or stop play com

-

pletely, depending on how damaged the disc is.

Note:

DVD disc production quality may vary; some discs may deviate from the industry standard.

Some incorrectly-formatted discs may still play, however, the playback and operational quality of the disc may 

be substandard.

Power Management

If the player will not be in use for a long period of time, set the Power Switch to the OFF position and unplug 

the player.

Summary of Contents for TFDVD7002D

Page 1: ...Instruction Manual Please read this manual carefully before operation 7 Widescreen TFT LCD Portable DVD CD MP3 Player TFDVD7002D ...

Page 2: ...ARE INTO THE BEAM NOTICE This product incorporates copyright protection technology that is protected by U S patents and other intellectual property rights Use of this copyright protection technology must be authorized by Macrovision and is intended for home and other limited viewing uses only unless otherwise authorized by Macrovision Reverse engineering or disassembly is prohibited FCC Notice PRE...

Page 3: ...ocal authorities or the Electronics Industries Alliance www eiae org PRECAUTIONS Do not make any changes or modifications to the equipment unless otherwise specified in the manual If such changes or modifications should be made you could be required to stop operation of the equipment ...

Page 4: ...rovided for ventilation 11 to ensure reliable operation of the product and to protect it from overheating These openings should never be blocked by placing the product on a bed sofa rug or other similar surface This product should not be placed in a built in installation such as a bookcase or rack unless proper ventilation is provided or the manufacturer instructions have been adhered to Power Sou...

Page 5: ...ord Protection Power supply cords should be routed so that they are not likely to 20 be walked on or pinched by items placed upon or against them paying particular attention to cords at plugs convenience receptacles and at the point which they exit from the product Protective Attachment Plug The product may be equipped with an attachment plug with 21 overload protection This is a safety feature Se...

Page 6: ...refer servicing to 28 qualified service personnel under the following conditions a when the power supply or plug is damaged b if liquid has been spilled or if objects have fallen into the product c if the product has been exposed to rain or water d if the product does not operate normally by fol lowing the operating instructions Adjust only those controls that are covered by the operating instruct...

Page 7: ...Video Connections 14 USB Connection 14 Headphone Connection 14 Power Connection 15 Connecting to the wall outlet 15 Using the car plug 15 Using the Built in battery 15 getting started 16 Using the Remote Control 16 Power Supply 16 BASIC OPERATIONS 17 Basic Playback 17 Play Pause Stop 17 Next Previous Skip 17 Forward Reverse Search 17 Slow 17 Menu Navigation 17 Numeric Keypad 18 Adjusting the Volum...

Page 8: ...8 Repeat A B Mode 19 Repeat Playback of a chapter Title All of a Disc 19 LCD Menu 20 SETUP 21 Language 21 Video 21 Audio 22 Rating 22 Misc 22 SPECIFICATIONS 23 TROUBLESHOOTING 24 TABLE OF CONTENTS ...

Page 9: ...lease make sure the following items are included in the package If any items are missing please contact your local dealer PACKAGE CONTENTS 1 2 AC Adapter Menu Title 3 Main Unit Remote Control Earphones L R ...

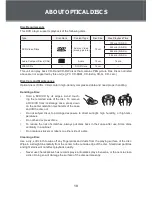
Page 10: ...ng the recorded side of the disc To remove a DVD CD from its storage case press down on the center retention mechanism of the case and lift the disc out Do not subject discs to prolonged exposure to direct sunlight high humidity or high tem peratures Do not bend or press discs To reduce the risk of scratches always put discs back in their case after use Store discs vertically in a cabinet Do not p...

Page 11: ...o access the setup menu which various features of the player can be adjusted in LCD Mode USB Briefly press this button to display the LCD menu Brightness Contrast Color Mode 16 9 Reset 0 0 0 Press up down direction button to highlight 1 item and then make adjustment by left right direction button Press up down direction button to select Mode 2 and then press the Enter button to toggle the screen di...

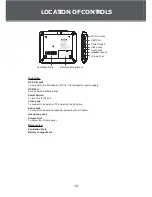
Page 12: ... on off the unit Video Jack To connect to an external TV screen by the AV cable Audio Jack To connect to an external speaker system by the AV cable Headphone Jack Volume Dial To Adjust the Volume Level Bottom View Ventilation Slots Battery compartment Battery Compartment Ventilation Slots USB Port DC 9V in Jack Power Switch Video Jack Audio Jack Headphone Jack Volume Dial ...

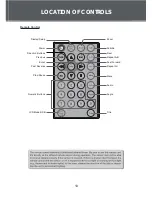
Page 13: ...CONTROLS Remote Control Display Setup Power Previous Fast Reverse Play Pause Numeric Buttons LCD Mode USB Zoom Subtitle Repeat A B Repeat All Menu Audio Angle Title Next Fast Forward Direction Buttons Enter Menu Title ...

Page 14: ...t takes a short while for the unit s reading data After the device is detected the screen will display the 2 working menu press the direction buttons to select the desired file from the menu and press Play Pause to start playback Be sure that your unit is at low volume level before con necting the headphones Increase the volume gradually for your comfortable listening CAUTION Hearing experts advis...

Page 15: ...lly charge the battery Make sure that the power switch is set to the Off position before charging To charge the built in battery just connect the AC adapter to the player and a specified wall outlet See above The Battery Charge indicator will light red while it is charging it will go off when the battery is fully charged The built in rechargeable battery can be used for approximately 300 charge cyc...

Page 16: ...e at the remote sensor of the photo frame at a distance of no more than 15 and at an angle no greater than 60 degrees Batteries will last for about one year under typical usage Replace the batteries if the remote is no longer working Do not spill water on the remote control Do not use the remote control for other equipment at the same time Remove the batteries if the remote control will not be in ...

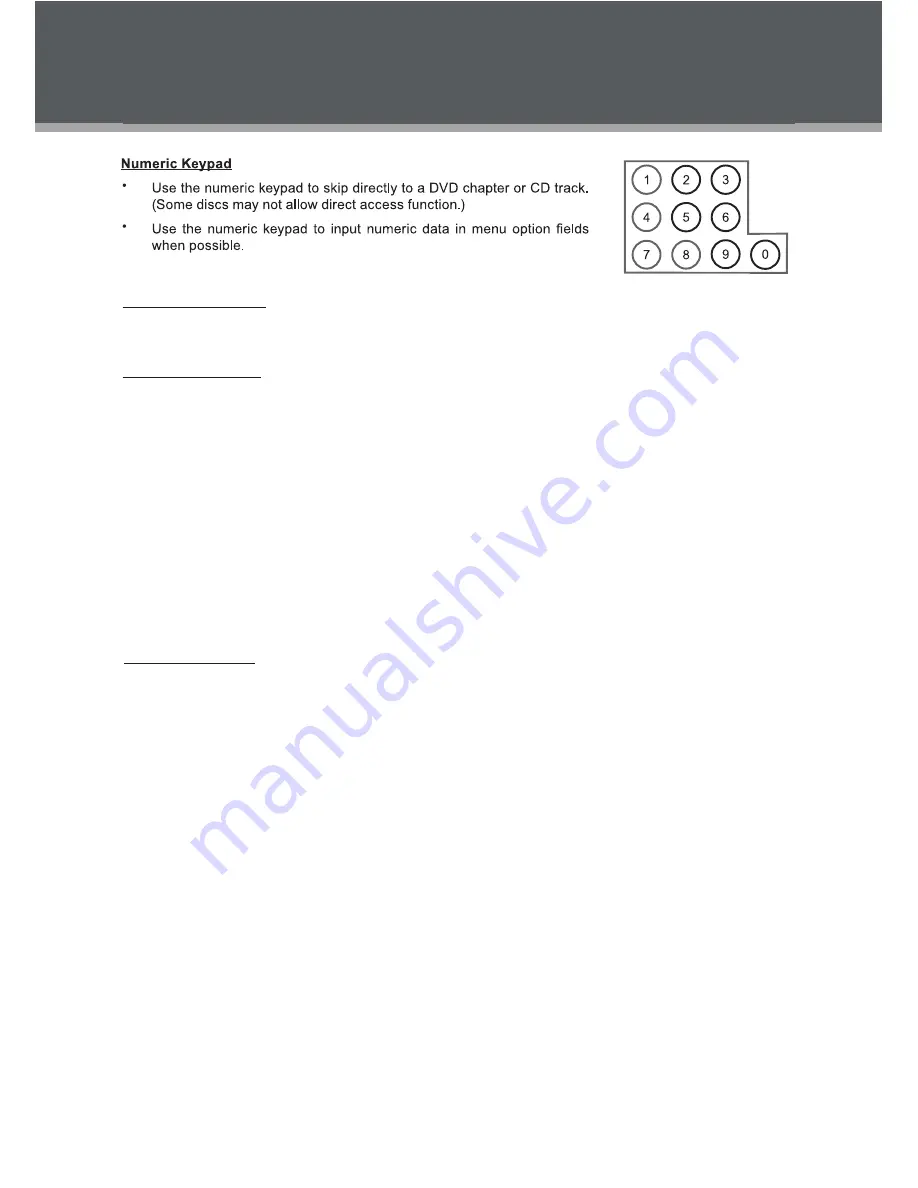
Page 17: ... resume playback Press during playback to stop the disc Pre Stop Press to resume playback Press when the disc is Pre Stopped to stop playback completely When is pressed the disc will start playing from the beginning Next Previous Skip Press to skip forward one track DVD CD MP3 etc Press to skip back one track DVD CD MP3 etc Forward Reverse Search Press to fast forward reverse through the disc Each...

Page 18: ...layer The player will not play the disc BAD DISC T he player is equipped with automatic disc quality detection software If the player detects a disc that is damaged or has a format problem it may play the disc at a lower quality or stop play com pletely depending on how damaged the disc is Note DVD disc production quality may vary some discs may deviate from the industry standard Some incorrectly ...

Page 19: ...D may have up to 32 selectable subtitles During playback of a DVD that has been mastered with alternate language audio tracks press AUDIO to hear the alternate tracks A DVD may have up to 8 selectable audio tracks During playback of a DVD that has been mastered with multiple angles press ANGLE to view the available alternate camera angles A DVD may have up to 9 selectable angles Menu Title Press t...

Page 20: ...n to select Mode and then press the Enter button to toggle the 2 screen dimension between 16 9 and 4 3 Select RESET and press ENTER to return the settings of 3 brightness contrast and color to their factory default settings To access the USB mode insert a USB flash drive into the USB port With no disc loaded or in stop mode press and hold this button for a short while to display the source mode yo...

Page 21: ...ted in the SETUP menu 1 Press twice to enter the player s setup menu 2 Press the direction buttons to select the desired item 3 Press ENTER to confirm English English English English SETUP Video Language View Mode Sets the view mode of DVDs Auto Fit ...

Page 22: ...word is 8888 Levels 1 to 8 8 ADULT is de fault Set Password Change the Parental Ctrl password Enter the old password and then the new password DO NOT FORGET THE PASSWORD this password cannot be reset Misc Use Default Settings Resets all settings to their factory default state This will not reset the Parental Control password Read The screen saver prevents burn in damage to the player s screen Scre...

Page 23: ...23 SPECIFICATIONS Specifications and manual are subject to change without prior notice 1 PAL 192x165x41mm 680g 6W ...

Page 24: ...owered on and is set to the correct AV mode Ensure that the connections between the player and the TV are secure and correct Check if the connection cables are damaged The picture is noisy or distorted The disc may be damaged or dirty Clean the disc or try another one Reset your TV s color system Ensure that the player is connected directly to the TV and not through a VCR cable box satellite re ce...

Page 25: ...Point the remote at the remote sensor on the main unit Ensure that the batteries in the remote retain a charge and have been installed correctly Try replacing the remote s batteries Cannot turn the player on using battery power To activate the battery power Turn off the player and then charge the battery by the AC adapter for about 10 seconds See Using the Built in battery section on Page 15 ...

Page 26: ......

Reviews: