background image

18 


No. 

Part No. 

Name 

Specification 

GB70 

Socket Head Screw 

M6x12 

GB97.1 

Tailor-Made Washer 

D330B-14205 

Splash Guard 


GB818 

Screw 

M5x8 

GB91 

Pin 

3x16 

14 

D330A-21105 

Pulley 


15 

GB97.1 

Washer 

16 

GB70 

Socket Head Screw 

M8x16 

16a 

GB1096 

Key 

8x20 

19 

D330B-14203 

Oil Tray 


20 

D330B-14204 

Oil Tray 


23 

D330B-14401 

Water Tank 


24 

GB70 

Socket Head Screw 

M10x30 

25 

GB6170 

Hexagon Nut 

M10 

27 

D330B-14201 

Left Stand 


28 

D330DV-14102 

Cover 


29 

GB818 

Screw 

M5x12 

30 

D330B-14209 

Cover 


31 

D330A-11237 

Drawspring 


32 

D330A-11236 

Pin 


33 

D330A-11242 

Shaft 


34 

GB70 

Socket Head Screw 

M6x40 

35 

GB879 

Spring Pin 

5x40 

36 

D330A-11235 

Rocker 


37 

D330A-11238 

Long Shaft 


38 

D330B-14206 

Angle Iron 


39 

GB6170 

Hexagon Nut 

M6 

40 

GB97.1 

Tailor-Made Washer 

41 

GB70 

Socket Head Screw 

M6x12 

42 

GB879 

Spring Pin 

5x28 

43 

D330B-14207 

Baffle Board 


44 

D330B-14212 

Brake Pedal 


45 

D330A-11241 

Short Shaft 


46 

D330B-14202 

Right Stand 


47 

D330B-14208 

Cover 


48 

D330B-14213 

Funnel 


50 

D330DV-11211 

Washer 


51 

D330DV-11210 

Cam 


52 

GB78 

Screw 

M6x15 

53 


Switch 

LXW5-11N1 

54 

GB818 

Screw 

M4x45 

55 


Cover 


Summary of Contents for Crusader VS

Page 1: ...Crusader VS Lathe Operation Manual Chester UK Ltd Clwyd Close Hawarden Industrial Park Hawarden Chester CH5 3PZ Tel 01244 531631 sales chestermachinetools com www chestermachinetools com ...

Page 2: ...n 7 2 Feed and Thread Tables 7 3 Threading Dial Indicator 8 Chuck and Faceplate Removal Installation 8 1 Chuck and Faceplate Removal 8 2 Chuck and Faceplate Installation 8 3 Camlock Stud Installation 9 Maintenance and Servicing 9 1 Lathe Alignment 9 2 Saddle Strip 9 3 Cross Slide 9 4 Compound Rest 9 5 Cross Slide Nut 9 6 Tailstock Bed Clamp 10 Parts List Bed Assembly Headstock Assembly Feed and Ch...

Page 3: ...tion 10 Always keep the cutters sharp 11 Never use the machine in an explosive atmosphere or where a spark could ignite a fire 12 Always use identical replacement parts when servicing the machine Warning Do allow familiarity gained from frequent use of your lathe to become commonplace A careless fraction of a second can lead to severe injury 2 Machine Specification Bench lathes are especially suit...

Page 4: ...ame work 29 Bed way 9 Leadscrew and safety guide 30 Tailstock set over screw 10 Feed rod 31 Tailstock 11 Control bar 32 Quill travel handwheel 12 Oil Tray 33 Tailstock lock leer 13 Left stand 34 Quill lock lever 14 Indication light 35 Coolant system 15 Inching Button 36 Compound rest handwheel 16 Spindle speeds adjustable knob 37 Compound rest 17 Coolant knob 38 Tool post 18 Emergency stop button ...

Page 5: ...tion then tighten the foundation bolts evenly and finally recheck the machines level 5 Lubrication Before putting the lathe into operation make the following lubrication check 5 1 Headstock The bearing of the headstock turns in an oil bath Ensure that the oil level reaches three quarters of the oil gauge glass When changing the oil remove the end cover and the change gears with swing frame Drain o...

Page 6: ...se circumstances both the longitudinal travel handwheel 21 and the cross travel handle 25 can be operated by hand B Main spindle rotation The main spindle rotation is selected by the forward reverse switch C Main spindle speed The speed of the main spindle is selected by the high low speed selector 1 For both the high and low speeds there are two different positions For the correct speed refer to ...

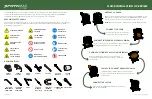
Page 7: ...7 6 2 Operation Symbols ...

Page 8: ...diate gear with the feed direction selector 6 then set the feed thread selector 6 to the left hand position and position one lever at any of the 1 5 hole the other at the A E holes The feed rod will rotate If the selector is pushed upwards a longitudinal feed can be obtained If the selector is pushed down across feed will be obtained D Thread Cutting Operation The direction of thread cutting is co...

Page 9: ...eed selector to any position and be sure the feed selector handle is engaged Operate the thread cutting engagement lever downwards to engage with the leadscrew to obtain the longitudinal travel of the carriage i e the thread cutting feed Make sure that the feed axis selector is disengaged at the neutral position before operating the thread cutting engagement lever as there is an interlock mechanis...

Page 10: ...ended that the thread dial indicator be used as this allows the half nut of the leadscrew to be engaged at the end of the end of each thread cutting pass provided that they are re engaged in accordance with the indicator table mounted in front and down of the change gear box In column 1 millimeter pitches to be cut 27T 28T 30T The number of teeth in pitch off gear arranged to mesh with the leadscr...

Page 11: ...ix cams in turn When fully tightened the cam lock line on each cam should be between the two V marks of the spindle nose If any of the cams do not fully tighten with in these limit marks remove the chuck or faceplate and re adjust the stud as indicated in the illustration Fit and tighten the locking screw B at each stud before remounting the chuck for work A reference mark should be made on each c...

Page 12: ...bed and adjust the headstock Repeat this procedure until all the measurements are the same 9 2 Saddle Strip Wear on the rear saddle gib strip may be accommodated by the adjustment of the socket head set screws First remove the rear splash guard and release the hexagon nuts turn the socket head set screws slightly in clockwise and then re clamp the hexagon nuts Care should be taken not to over adju...

Page 13: ...backlash in the cross slide nut the procedure for adjustment being as follows take off the dust plate which is mounted on the rear face of the saddle groove turn the cross feed nut until it reaches the edge of the feed rod Turn the socket head cap screw in a clockwise direction as required Care should be taken to avoid over adjustment a 45 turn at the socket head cap screw represents approximately...

Page 14: ...14 10 Parts List and Diagrams Bed Assembly 1 2 ...

Page 15: ...17 GB881 Assembling Pin 8x70 18 D330 11103G Bridge 19 D330B 11101G Bed 20 GB70 Socket Head Screw M8x50 21 GB70 Socket Head Screw M8x30 22 GB118 Taper Pin 6x30 23 GB879 Spring Pin 4x42 24 GB879 Spring Pin 4x32 25 D330B 11203G Control Rod 26 D330B 11202G Feed Rod 27 D330B 11201G Leadscrew Tr22x4 7h D330B 11201G 1 Tr22x3 175 7h 28 GB879 Spring Pin 5x20 29 GB70 Socket Head Screw M6x16 30 D330B 11205G ...

Page 16: ...Screw M8x12 50 D330C 3012C Plectrum 51 GB70 Socket Head Screw M8x16 52 GB818 Screw M4x42 53a Switch 53 D330C 11301C Box 54 D330C 11302C Cover 55 GB818 Screw M4x10 56 D330B 11210G 1 Cover 19 57 D330B 11210G 2 Cover 22 58 GB5781 Hexagonal Head Tap Bolt M12x45 59 GB97 1 Washer 12 60 GB70 Socket Head Screw M10x35 61 GB6170 Nut M10 ...

Page 17: ...17 Bed Assembly 2 2 ...

Page 18: ...2 Cover 29 GB818 Screw M5x12 30 D330B 14209 Cover 31 D330A 11237 Drawspring 32 D330A 11236 Pin 33 D330A 11242 Shaft 34 GB70 Socket Head Screw M6x40 35 GB879 Spring Pin 5x40 36 D330A 11235 Rocker 37 D330A 11238 Long Shaft 38 D330B 14206 Angle Iron 39 GB6170 Hexagon Nut M6 40 GB97 1 Tailor Made Washer 6 41 GB70 Socket Head Screw M6x12 42 GB879 Spring Pin 5x28 43 D330B 14207 Baffle Board 44 D330B 142...

Page 19: ...19 Headstock Assembly 1 3 ...

Reviews: