– 6 –
1. Press the
MENU
key once to enter the sub menu items
2. Press the
+
and
–
keys to toggle through the features.
3. To enable or edit the status of any feature, press the
ENTER
key.
4. The edit icon will start blinking to indicate that the TI-007DLX is currently
in
EDIT
mode.
5. Press the
+
and
–
keys to toggle through the setting options.
6. Press the
ENTER
key to accept changes and return to the top level of features, or
the
MENU
key at any time to abort changes and return the measurement screen.
2.9 The Display
The TI-007DLX uses a custom glass
LCD backlit low temperature display for
use in a variety of climate conditions. It
contains graphic icons, as well as both 7
and 14 segment display areas. Let’s take
a closer look and what all these things are
telling us:
A. Edit: This icon will be displayed, and
blinking, to let a user know when they
are in an edit mode to change a value
or setting.
B. Large 7 segment: The thickness measurement, velocity or alpha message will be
displayed in this area.
Menu Feature Items
Gain
Multi
Scan Alarm
Diff
Unit
Lite
Beep Probe
VX
VLOW
Aluminum On
On
On
English
On
On
Delay
On
LOW
Steel
Off
Off
Off
Metric
Off
Off
Plaastic Off
MED
Stainless
Options Options Options Options
Contact
HIGH
Iron
Set Lo
Set
Nominal
LOW
Lo
Options
**
VHI*
Plexiglass
Set Hi
HIGH
Med
.125
PVC
High
.250
Plastic
.375
Poly Urea
.500
User 1
User 2
* Displayed only when the contact transducer option has been selected.
** Diameter options are only available for contact transducers.
Summary of Contents for TI-007DLX
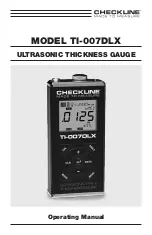
Page 1: ...MODEL TI 007DLX ULTRASONIC THICKNESS GAUGE Operating Manual ...
Page 44: ... 43 NOTES ...
Page 45: ... 44 NOTES ...
Page 46: ......


