background image


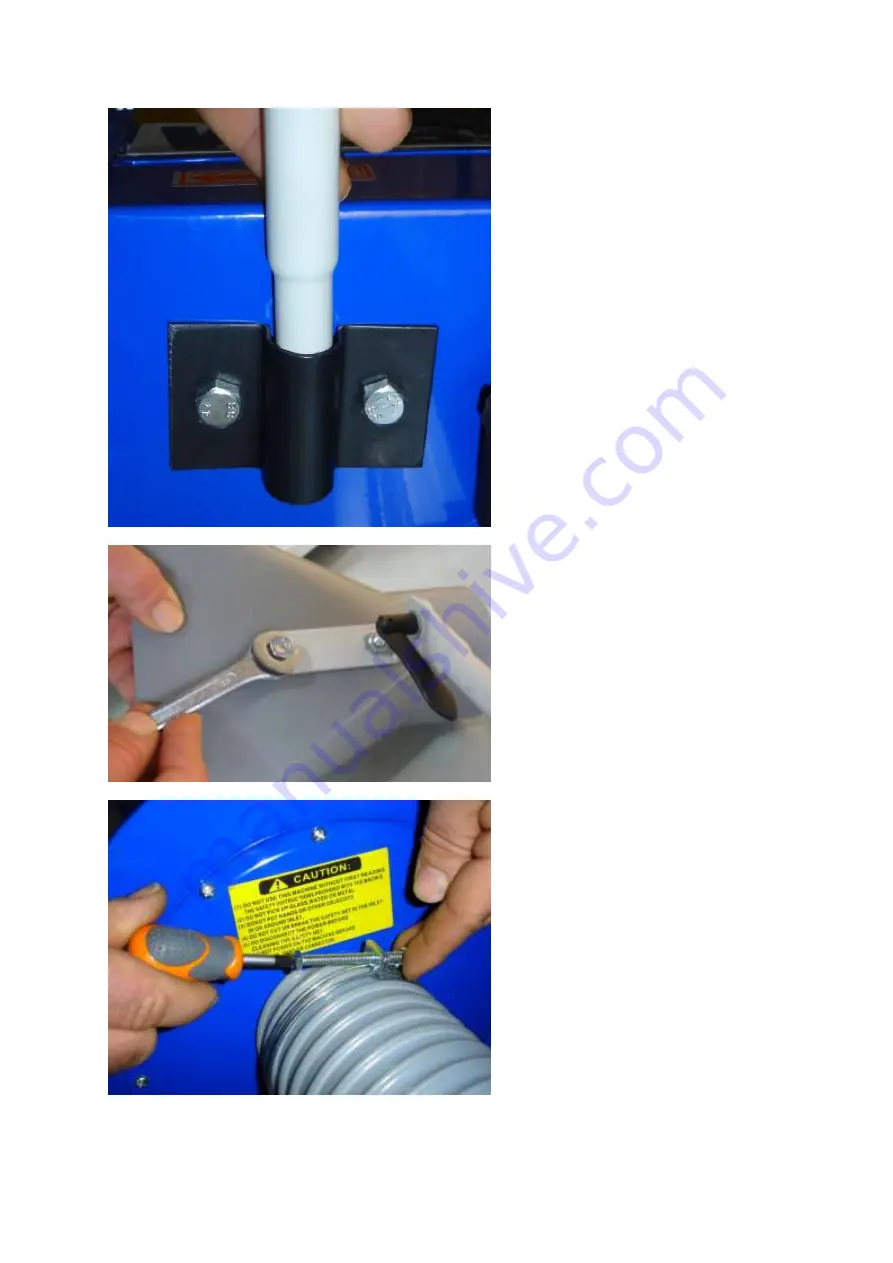
Insert the reduced end of the 
support arm into the mounting 
bracket. 


Attach the adjustable bracket 
assembly to the dust hood using 
the bolts, nuts and washers fitted 
to the hood. Ensure that the heads 
of the bolts are inside the hood 
and the nuts/washers outside. 
 
Insert the end of the adjustable 
bracket into the support arm and 
tighten the jubilee clip to fix in the 
desired position. 


Connect the flexible hose to the 
dust hood and the extractor using 
the hose clips supplied. 
 
Adjust & lock the bracket and arm 
assembly to position the hood as 
required. 


Summary of Contents for W685

Page 1: ... DUST EXTRACTOR MODEL W685 W685KIT Charnwood Cedar Court Walker Road Hilltop Industrial Estate Bardon Leicestershire LE67 1TU Tel 01530 516 926 Fax 01530 516 929 email sales charnwood net website www charnwood net ...

Page 2: ...s and adjusting spanners are removed from the machine before switched it on 5 Keep your work area clean Cluttered areas and workbenches increase the chance of an accident 6 Do not use in dangerous environments Do not use power tools in damp or wet locations or expose them to rain Keep work areas well illuminated 7 Keep children away All visitors should be kept a safe distance 8 from the work area ...

Page 3: ...tion 19 Always wear a face or dust mask if operation creates a lot of dust and or chips Always operate the tool in a well ventilated area and provide for proper dust removal Use a suitable dust extractor ADDITIONAL RULES FOR DUST EXTRACTORS 1 Dust extractors are frequently moved around the workshop Make sure that mains cables and extractor hoses are positioned in such a way that they do not presen...

Page 4: ... woodworking enthusiasts Refers to generally lighter weight machines with lower power ratings and smaller tooling capacities Typically only ever used by one person for short periods of time or longer periods infrequently Machinery should be well maintained in a clean dry environment such as a home workshop garage or timber shed Expected maximum use of 100 hours annually Please Note Using a product...

Page 5: ...iately Assembly Leave all bolts finger tight until each castor is fitted Place the machine on its back and bolt one of the castors to the baseplate using four dome head M5 bolts with washers and nuts on the underside Note that the longer edge of the fixing plate should be horizontal Continue with the remaining three castors ...

Page 6: ...M6 bolts into the top holes of the square extractor outlet and slip the rubber gasket onto them Fit the plastic adapter over the bolts and secure with washers and nuts Add the remaining four bolts Tighten the nuts when all six bolts are in position ...

Page 7: ...ving the bag or connecting a hose The extractor is now ready for use in the horizontal mode after connecting to the hose attached to your woodworking machine 170mm 50mm Two wall brackets are supplied in case you wish to wall mount the extractor Attach these to a suitably strong wall using appropriate fixings The extractor can now be wall mounted by hooking the two cut outs in the base over the wal...

Page 8: ...t notably a woodturning lathe Two hose clamps securely attach the hose to the extractor and the hood The hose can also be used without the hood to connect to any woodworking machine with a 100mm diameter dust outlet When fitted to the support arm the centre of the hood is at a height of 920mm Dust Hood opening size 240mm x 120mm Assembly Attach the mounting bracket to the extractor fan housing usi...

Page 9: ...ood Ensure that the heads of the bolts are inside the hood and the nuts washers outside Insert the end of the adjustable bracket into the support arm and tighten the jubilee clip to fix in the desired position Connect the flexible hose to the dust hood and the extractor using the hose clips supplied Adjust lock the bracket and arm assembly to position the hood as required ...

Page 10: ...ted on this type of extractor Charnwood stock a large range of hoses connectors and reducers details of which can be found on their website Always switch on the extractor before starting the woodworking machine Allow it to continue running for a few moments after the other machine is switched off in order to clear the hose Troubleshooting Problem Possible Cause Remedy Motor fails to start Blown fu...

Page 11: ...ntial requirements of the directive Signed Dated 30 09 2016 Location Leicestershire Richard Cook Director Please dispose of packaging for the product in a responsible manner It is suitable for recycling Help to protect the environment take the packaging to the local amenity tip and place into the appropriate recycling bin Only for EU countries Do not dispose of electric tools together with househo...

Page 12: ...crew 06 Inlet Cover 07 Left Hand Cap Screw 08 Set Screw 09 Washer 10 Impeller 11 Impeller Housing 12 Washer 12 1 Hex Nut 13 Hex Bolt 14 Hex Bolt 15 Hex Nut 15 1 Hex Bolt 15 2 Washer 16 Switch 17 Dust Bag Clamp 18 Motor 19 Gasket 20 Motor Support Plate 21 Key 22 Gasket 23 Outlet 24 Dust Bag 5 Micron 25 Handle 26 Power Cord 27 Hook 28 Screw ...

Page 13: ...t Part No Description Part No Description 01 Dust Hood 02 Support Bracket 03 Washer 04 Dust Hood Bracket 05 Bracket Adapter 06 Locking Lever 07 Hose 100mm x 3m 08 Hose Clip 100mm 09 Coach Bolt M8 x 20mm 10 Washer M8 11 Nut M8 12 Small Jubilee Clip 13 Hex Bolt M8 x 16mm 14 Support Arm ...

Page 14: ...pdated October 2016 Charnwood Cedar Court Walker Road Hilltop Industrial Estate Bardon Hill Leicestershire LE67 1TU Tel 01530 516 926 Fax 01530 516 929 email sales charnwood net website www charnwood net ...

Reviews: