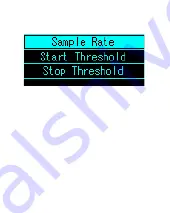
Chargerlab KT001 User Manual Download Page 43

• 

Curve Settings

     The device can store at most 

4

 curves, 

each curve can store data of 

3750 points. For 

example, if the sample rate is 2 seconds/

point, each curve can store the data in 3750 

* 2 = 7500 seconds, which is about 2 hours.

     You can set a 

lower

 sample rate to get a 

longer

 duration, but this will lead the curve to 

lose some details.

     You can evaluate the recording duration, set 

the sample rate to the maximum possible.

Summary of Contents for KT001

Page 1: ... use the device please save the manual properly for looking up USB Power Meter Hint The model name can vary from one provider to another So far KT001 Kotomi Premium CT 2 UT100 are provided they have the same features and share the same manual PC software and firmware it is not necessary to concern about that Rev V1 02 ...

Page 2: ...hen the power meter is monitoring the voltage current on the two ports DO NOT plug any device into the other ports this will cause damage Especially when the device being monitored required a high voltage to the devices 3 After using PD listener trigger or E Mark Info Reader feature please switch the PD tester switch back to OFF position for safer operation The author would not be responsible for ...

Page 3: ... after use 3 Section Main Menu Screen Settings added manual for HomePage Update Rate and Enable Disable Fahrenheit 4 Section Auto Enumerate added description for internal dummy load on hardware version V1 02 or above 5 Added manual for trigger of Huawei SCP VOOC DASH 6 Added manual for trigger of PD PPS 7 Added manual for E Mark Info Reader 8 Added manual for cable resistance test mode Bypass Load...

Page 4: ...10 Section Misc added manual for logo customization added improved method of theme customization ...

Page 5: ...Structure ...

Page 6: ... divided pages The 1st page shows the voltage current that the being monitored devices are working at the time The accumulated energy and capacity are shown below Time environment temperature data set number are also shown in this page ...

Page 7: ...ol that may working according to them If a PD device is detected on the line the PD indicator turns on so as QC The arrows on the bottom of the screen indicates the flowing direction of the current or energy Voltage current and power are also shown in this page ...

Page 8: ...The 3nd page shows the time platform voltage energy capacity and date Note that the platform voltage equals to energy divided by capacity ...

Page 9: ...The 4th page shows the voltage current power and environment temperature in big font The 5th page turns the screen off usually to reduce the power consumed by the meter itself to get higher precision ...

Page 10: ...Menu A long press to the middle key will make the system enter the main menu ...

Page 11: ...he idle clock page Record Threshold Idle Clock Settings This option sets the record threshold of the device the capacity energy and time keep accumulating when the current is above the threshold The current below the threshold will be ignored Clear This Group This will reset the data in the current group This option contains settings on idle clock ...

Page 12: ... and enter home screen Screen Settings This option contains settings of the screen Disable Enable Screen Idle After a given time without operation screen reduces brightness to save power this feature can disabled enabled this option Screen Idle Time This option sets the time that the screen turns idle Brightness Settings This option sets the brightness when the device is in operation Idle Brightne...

Page 13: ...that color Enable Disable Custom Theme This enable or disable the custom theme The guide of theme customizing is written at the end of the manual Language Set the language Clear All Groups Clear all data sets in one time HomePage Update Rate Set update rate level of home page Enable Disable Fahrenheit Enable or disable temperature display in fahrenheit ...

Page 14: ... Restore Settings Restore settings to default Calibration The user shall not enter this option ...

Page 15: ... System Info See the software version author and vendor Developer Tools The user shall not enter this option ...

Page 16: ...ne of the protocols above The device also provides a routine which can detect if an apple cable is MFI authorized Reference only Warning The faulty operation of this feature may cause damage to the devices The author isn t responsible for those consequences A left click on the home screen will make the system enter fast charge trigger mode ...

Page 17: ... QC2 0 ...

Page 18: ...red by scrolling the left and right keys A click on the middle key is recognized as confirmation A double click on the middle key will lead the system to exit this mode back to the home screen The voltage keeps the level that the user required after exiting this mode ...

Page 19: ... QC3 0 In the QC3 0 mode the user adjust the voltage by scrolling the left and right keys Every click will have an effect of 200mV according to the protocol ...

Page 20: ...A double click on the middle key will lead the system to exit this mode back to the home screen The voltage keeps the level that the user required after exiting this mode Auto Enumerate ...

Page 21: ...te charging on apple devices Apple MFI Test This is an apple MFI test routine which can detect if an apple cable is MFI authorized Note that the result is for reference only During the procedure the device will require high volltage from the QC3 0 adapter this may cause damage to the unauthorized cable The user shall plug the meter into an adapter which is QC3 0 supported and plug in the cable int...

Page 22: ...Result Passed indicates the cable is MFI authorized Result Fake indicates the cable is not MFI authorized Result Unknown indicates the test cannot be done correctly it is most probable that the adapter is not QC3 0 supported ...

Page 23: ...ing the switch on the right bottom side of the device to ON position and disable it by toggling it to OFF After enabling this feature plug the meter to the adapter by a Type C 2 Type C cable The meter will startup then the user enter power delivery mode the meter will reset the adapter and itself after reset the meter will report the capability of the adapter You can also enter this mode rapidly b...

Page 24: ...The example report is shown above This charger has support for PD revision 3 0 with 5 sepeate fixed PDO and 1 PPS PDO select Fixed to trigger fixed PDOs and PPS to trigger PPS PDO ...

Page 25: ...In trigger mode of PDOs of fixed type scroll the multi key to left right to switch from one PDO to another ...

Page 26: ...de of PDOs of Augmented PPS type scroll the multi key to left right to adjust the target voltage and press the middle key to apply A double click on middle key exits PD trigger mode with triggered voltage maintains ...

Page 27: ... HuaWei FCP The same as QC2 0 HuaWei SCP The same as QC2 0 ...

Page 28: ... Samsung AFC The same as QC2 0 VOOC DASH CV ...

Page 29: ...able to connect the charger to the meter For hardware version below V1 02 please apply a load greater than 0 2A while this is not needed for hardware version V1 02 and above After entering this mode scroll the multi key to left right to adjust the target voltage and press the middle key to apply A double click on middle key exits PD trigger mode with triggered voltage maintains FastCharge Release ...

Page 30: ... to 5V as default E mark Info Reader This feature is only applicable for meters with hardware version V1 02 or above Power the meter with power sources which will not occupy ANY type C ports An independednt 5V supply is recommended switch on the PD tester switch enter this mode plug in the cable being read and the result comes out as following ...

Page 31: ...sent communication CC pin raw data from E Marker are placed on the top half of the screen while brief analysis Type vendor HW_Ver FW_Ver Voltage Current Data ratings displayed on the bottom half of the screen ...

Page 32: ...Hot Plug is supported in this mode you can simply replug a new cable for fast selecting Double click the middle key to exit this mode after that don t forget to swich off the PD tester switch ...

Page 33: ...easure the resistance of the MicroUSB cable USB A 2 Type C cable and provides a program for 4 line cable resistance test The meter can also evaluate the resistance of the Type C 2 Type C cable A load free mode brings more convinience ...

Page 34: ...e meter with an A C cable or a MicroUSB cable then plug in the same load in step1 the cable resistance will be shown on the screen 4 Line Mode The device provides the software implementation only require the usage of the accessory from its provider Bypass Mode This mode can only evaluate the resistance of the Type C 2 Type C cable because the meter can only get the resistance of the positive line ...

Page 35: ...d 500mA into the USB A female port 2 Plug both sides of the Type C 2 Type C cable into both Type C female port on the meter 3 The resistance is shown on the screen Bypass Load Free This mode is only applicable with hardware version V1 02 or above Instead of an external load this mode enables the dummy load integrated in the meter Plug the meter into a common 5V power supply enter this mode after t...

Page 36: ...Diagram Painting A double click on the home screen will make the system into diagram painting mode Then the resistance comes out this mode is hot plug supported ...

Page 37: ...diagram from D D voltage and voltage current Double click the middle key can exit this mode back to home screen You can adjust the sample rate by scrolling the key to the left right available sample rates are 1fps 2fps 4fps 10fps 20fps 30fps 50fps 100fps ...

Page 38: ...Idle Clock This device can be used as a digital clock when it s not in use Refer Menu chapter for the related settings ...

Page 39: ...Offline Recording The device consists Offline Recording feature it can record the voltage current in a period for further analysis Right click at the home page to enter offline recording menu ...

Page 40: ... After clicking Curve Create New option the screen will turn to above Current voltage current and power is shown on the top left side point No space condition sample rate is shown in green summary data is shown in white ...

Page 41: ...You can manually pause or continue the record by clicking the Pause GoOn button stop the record by clicking Stop button For automatic record starting stopping look up in Curve Settings section ...

Page 42: ...h sample rate and summary data including capacity energy and lasting time You can view the record diagram by click Diagram button but it is more recommended to view the chart on PC Curve Browse Browse the existing records Curve Delete Delete the existing records Curve Delete All Delete all of the existing records ...

Page 43: ...e if the sample rate is 2 seconds point each curve can store the data in 3750 2 7500 seconds which is about 2 hours You can set a lower sample rate to get a longer duration but this will lead the curve to lose some details You can evaluate the recording duration set the sample rate to the maximum possible ...

Page 44: ...and won t record any data Once the current is above the start threshold record starts Setting the start threshold to 0mA means the record always starts after created When the current is lower than the stop threshold the device automatically stop the record Setting the stop threshold to 0mA means the device never stop the record automatically unless the space is full ...

Page 45: ...he device can be connected to the PC for more features Connect the device to the PC with a micro USB cable For the first time you should install the driver Click the Install Driver menustrip to run the driver installer ...

Page 46: ...This will be shown if no problem occurred Offline record readout ...

Page 47: ... diagram will be shown On the right hand side of the form the information of the record sample rate length capacity energy is shown If you want to see the detailed information on a certain point move the cursor on that point detailed information at that point will be shown ...

Page 48: ...Voltage current power at that point is shown You can save open or export the record in Record menu ...

Page 49: ...rding when online record is running the diagram will be refreshed dynamically The behavior of online recording is basically the same as offline recording the extra option EndDelay delays the auto stop behavior to prevent unexpected record stop When the current is below stop threshold for just a little time Online record can also be saved to file ...

Page 50: ...You can get the screenshot of the device by clicking Screenshot button ...

Page 51: ...eep the device on the home screen click PD Listen button to enter PD listener mode Make sure the PD Tester switch is switched on connect the device and the PD charger powerbank then plug in the consumer mobile phone etc you can see the messages between them on the application ...

Page 52: ...The list on the middle shows the no message type message brief time voltage current when the message is sent ...

Page 53: ...tom side in little endian Sometimes GoodCRC messages will make the messages confusing you can mask the GoodCRC messages by unchecking GoodCRC checkbox Select the data object you concerned the bit fields and their values will be shown below Click Clear List to clear the messages Click Save as to save the current PD stream for sharing or further analysis PD streams can be opened at Records Open PD S...

Page 54: ... voltage Current when each packet is sent on the diagram form Firmware Update When the device need a firmware update click the Advanced menu then click Firmware Update A firmware update will be performed automatically ...

Page 55: ...lized Settings The device has some personalized features Enter main menu select Personalized you can change the theme color in Theme Color sub item The colors on the main screen can also be customized as following ...

Page 56: ...ed Customize Theme Set colors you expected the previews update automatically click Apply to apply the theme to the meter Click Export to export theme to file Click Import to import theme from file Click Import Default to restore to default ...

Page 57: ... Logo Customization Logo which is shown during startup can be customized Connect the device to PC click Advanced Customize Logo ...

Page 58: ...Follow the instructions on the window ...

Page 59: ...e Disable Warnings Enable Disable warnings when you entered fast charge trigger menu Shortcuts PD Trigger You can enter PD trigger quickly by press and hold the middle key during startup Auto Trigger This dangerous feature triggers QC2 0 9V 12V 20V during startup it can be set at Main Menu Developer Tools Auto Trigger do not use this feature since it can cause damage to your device easily ...

Page 60: ......

Reviews: