background image

GRILL MAINTENANCE

Frequency of clean up is determined by how often the grill is used. Make sure coals are completely extinguished  before 
cleaning inside of the unit. Thoroughly rinse with water and allow to air dry before using again. Wipe out the interior of the 
unit with a cloth or paper towels.

When finished cooking, and the unit has adequately cooled, clean out all remaining ashes. Ashes collect moisture, which 
can lead to premature rusting and decay.  Also, occasional touch up of the exterior paint will be required. Black, high-
temperature spray paint is recommended. NEVER PAINT THE INTERIOR OF THE UNIT.

Cooking Surface:

 If a bristle brush is used to clean any of the grill cooking surfaces, ensure no loose bristles remain on 

cooking surfaces prior to grilling. It is not recommended to clean cooking surfaces while grill is hot.

GRILLING

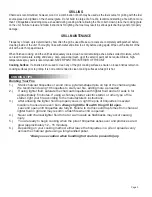
Charcoal is recommended, however, wood or a combination of both may be used as the fuel source for grilling with the fuel 
source placed and ignited on the charcoal grate. Do not build too large of a fire. We recommend starting a fire with no more 
than


10


briquettes and adding more as needed during cooking. After allowing the fire to burn down, place the cooking grate 

on the unit. Failure to read and follow instructions for lighting charcoal may result in serious personal injury and/or property 
damage. 

Page 3

COOKING TIPS

Building Your Fire

1.)

Stack charcoal briquettes or wood into a pyramid-shaped pile on top of the charcoal grate. 

We recommend using 10 briquettes to start your fire, adding more as needed.

2.)

If using lighter fluid, saturate the charcoal briquettes with lighter fluid and let it soak in for 

approximately 5 minutes. If using a chimney starter, electric starter, or other type of fire 
starter, light your fire according to the manufacturer's instructions.

3.)

After allowing the lighter fluid to properly soak in, light the pile of briquettes in several 

locations to ensure an even burn.


Always light the fire with the grill lid open.

Leave lid open until briquettes are fully lit. Failure to do this could trap fumes from charcoal 

lighter fluid in grill and may result in a flash fire when lid is opened.

4.)

Never add charcoal lighter fluid to hot or warm coals as flashbacks may occur causing 

injury.

5.)

You are ready to begin cooking when the pile of briquettes ashes over and produces a red 

glow (approximately 12 – 15 minutes). 

6.)

Depending on your cooking method, either leave the briquettes in a pile or spread evenly 

across the charcoal grate using a long-handled poker.

 *Always use caution when handling hot coals to prevent injury.

Summary of Contents for 12301782

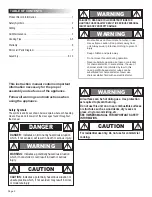
Page 1: ...lt in serious personal injury and or property damage CAUTION Some parts may contain sharp edges Wear protective gloves if necessary WARNING CARBON MONOXIDE HAZARD Burning charcoal inside can kill you It gives off carbon monoxide which has no odor NEVER burn charcoal inside homes vehicles or tents 42804829 12 16 11 Date Purchased IMPORTANT Fill out the product record information below 14 Tabletop C...

Page 2: ... hot during use Use protection as required to prevent burning Do not use this unit on or near combustible surfaces or structures such as wood decks dry leaves or grass vinyl or wood siding etc SEE OWNERS MANUAL FOR IMPORTANT SAFETY INFORMATION WARNING FAILURE TO READ AND FOLLOW INSTRUCTIONS FOR LIGHTING CHARCOAL MAY RESULT IN SERIOUS PERSONAL INJURY AND OR PROPERTY DAMAGE WARNING Most surfaces on ...

Page 3: ...the cooking grate on the unit Failure to read and follow instructions for lighting charcoal may result in serious personal injury and or property damage Page 3 COOKING TIPS Building Your Fire 1 Stack charcoal briquettes or wood into a pyramid shaped pile on top of the charcoal grate We recommend using 10 briquettes to start your fire adding more as needed 2 If using lighter fluid saturate the char...

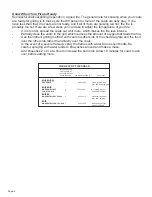
Page 4: ... gray If you have less than that the coals are not ready and if all of them are glowing red hot the fire is probably too hot Here are a few steps you can take to adjust the temperature of your fire If it is too hot spread the coals out a bit more which makes the fire less intense Partially close the vents in the grill which reduces the amount of oxygen that feeds the fire Use the indirect grilling...

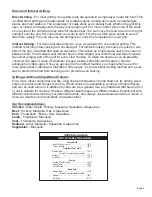
Page 5: ... extinguish any flare ups Once you get used to the indirect method you may prefer to use it for more grilling tasks Although it may take a little longer it is an excellent cooking method and a sure way to prevent the food from burning and to promote even cooking Grilling with Wood Chips Wood Chunks For a more robust smoke flavor while using charcoal briquettes or lump charcoal try adding wood chip...

Page 6: ...ue aparece en este documento de EVANS POWER EQUIPMENT o marcando 01800 00EVANS o en www evans com mx EVANS POWER EQUIPMENT S A DE C V Camino a Cóndor 399 Col El Castillo C P 45680 El Salto Jalisco Mexico Tel 0133 3668 2500 www evans com mx EVANS POWER EQUIPMENT S DE C V guarantees for a period of 90 days that this product including all its parts and workmanship is free from defects in material and...

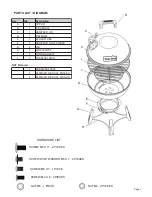
Page 7: ...PIECES HARDWARE LIST Page 7 PARTS LIST DIAGRAM B A C D E F G H I J Key Qty Description A 1 TOP LID B 1 LID HANDLE C 1 DAMPER F LID D 1 FIREBOWL E 1 ASH CATCHER F 1 DAMPER F ASH CATCHER G 4 LEG H 1 LEG SUPPORT I 1 COOKING GRATE J 1 CHARCOAL GRID NOT Pictured 1 HARDWARE PACK 1 ASSEMBLY MANUAL ENGLISH 1 ASSEMBLY MANUAL SPANISH ...

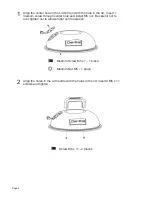
Page 8: ...ew through center hole and install M5 nut Be careful not to over tighten nut to allow proper vent operation 1 Medium Screw M5 x 7 1 piece Medium Nut M5 1 piece 2 Align the holes in the Lid handle with the holes in the lid Insert 2 M6 x 11 screws and tighten Screw M6 x 11 2 pieces Page 8 ...

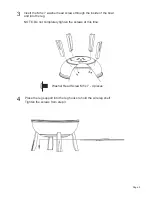
Page 9: ...rough the inside of the bowl and into the leg NOTE Do not completely tighten the screws at this time 4 Place the leg support into the leg hooks to hold the wire leg shelf Tighten the screws from step 3 Washer Head Screw M5 x 7 4 pieces Page 9 ...

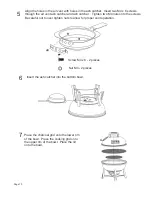
Page 10: ...sh catcher Insert two M4 x 8 screws through the air vent ash catcher and ash catcher Tighten two M4 nuts onto the screws Be careful not to over tighten nuts to allow for proper vent operation 7 Place the charcoal grid onto the lower rim of the bowl Place the cooking grid onto the upper rim of the bowl Place the lid onto the bowl Page 10 ...

Page 11: ......

Page 12: ......

Reviews: