background image

18 Series LCD TV    

PAGE 9 


2j


Program Recall 


Signal Source Switch 

Picture Mode Selection 


Menu Selection 


Volume Down 


Channel Down 


Display 

Picture Still 


PIP Location 

PIP Signal Source Selection 


PIP Still 

PIP Size 


Screen Size Mode Selection
 
Power On/Off 


Channel Number 


Invalid Button 

Sound Mode Selection 

Invalid Button 

Channel Up 

Enter 

Volume Up 


Invalid Buttons 


Sleep Timer 

Sound Mute 


Invalid Buttons 

PIP Channel Up 

PIP Swap 


PIP On/Off 

PIP Channel Down 


REMOTE CONTROL   

Summary of Contents for LT2618, LT3218, LT3718, LT4018

Page 1: ...LCD COLOR TELEVISION LT2618 LT3218 LT3718 LT4018 OPERATION MANUAL Please read this manual carefully before operation ...

Page 2: ... Audio Setting Menu 14 Using the General Setting Menu 15 Using the Timer Setting Menu 15 Using the Child Lock Setting Menu 16 Using the PC Setting Menu 17 OTHER FUNCTIONS INTRODUCTION 17 Standby Mode 17 Signal Switch 17 Channel Selection 17 Volume Control 18 Mute 18 Sound Mode Selection 18 Picture Mode Selection 18 Information Display 18 Sleep Function 18 Recall 19 Zoom Mode 19 Still 19 PIP POP PB...

Page 3: ...tion Protect the power cord from being walked on or pinched particularly at plugs convenience receptacles and the point where they exit from the apparatus 8 Overloading Do not overload wall outlets extension cords or convenience receptacles on other equipment as this can result in a risk of fire or electric shock 9 Entering of objects and liquids Never insert an object into the product through ven...

Page 4: ...g this apparatus during lightning storms or when unused for long periods of time For added protection for this television equipment during a lightning storm or when it is left unattended and unused for long periods of time unplug it from the wall outlet and disconnect the antenna This will prevent damage to the equipment due to lightning and power line surges 18 Do not use this apparatus near wate...

Page 5: ...Do not expose the remote control to shock In addition do not expose the remote control to liquids and do not place in an area with high humidity Do not install or place the remote control under direct sunlight The heat may cause deformation of the unit The remote control may not work properly if the remote sensor window of the main unit is under direct sunlight or strong lighting In such a case ch...

Page 6: ...dding well for future convenient use when you convey them 2j Radio Frequency input support CATV Capable of receiving the full append cable programs in 470MHZ AV input Capable of receiving PAL NTSC SECAM color systems Very convenient to watch VCR video cassette recorder Pickup Camera other Disc s programs AV output Capable of transmitting signal of different AV RF systems to other AV receivers thro...

Page 7: ...s screen displays soft blue background if there is no signal input Auto Off if no signal input In TV mode the LCD TV will automatically power off within 15 minutes and enter into the Power Energy Saving Mode if there is no signal input Multi Language On Screen Display menu Ordinary and graphical user interface makes the menu operation more user friendly Plug and Play No installation software is ne...

Page 8: ...d volume Adjust functions in menu operation VOL To increase the sound volume Adjust functions in menu operation CH 1 In TV mode decrease channel number 2 To select functions in menu operation CH 1 In TV mode increase channel number 2 To select functions in menu operation To power on or put the LCD TV to STANDBY The same function to on R C Note In this operation manual symbol means Button TV AV MEN...

Page 9: ...input output terminals AV input 1 headphone output see illustration 1 Signal input output terminals TV signal input AV output AV input 2 YPbPr input see illustration 2 Signal input output terminals Including PC and DVI input see illustration 3 AV Input 1 AC Input AC Power Switch AV Input 1 AC Input AC Power Switch AV Input 1 AC Input AC Power Switch ...

Page 10: ...Video 1 is the first if VIDEO S Video 1 connect at one time and the screen displays AV1 Y C HEADPHONE OUT Headphone audio signal output AV IN 2 One way AV input port one way S Video input terminal S Video 2 is the first if VIDEO S Video 2 connect at one time and the screen displays AV2 Y C AV OUT For TV AV1 and AV2 modes only COMPONENT IN Capable of transmitting YPbPr signal from DVD or other equi...

Page 11: ...lay Picture Still PIP Location PIP Signal Source Selection PIP Still PIP Size Screen Size Mode Selection Power On Off Channel Number Invalid Button Sound Mode Selection Invalid Button Channel Up Enter Volume Up Invalid Buttons Sleep Timer Sound Mute Invalid Buttons PIP Channel Up PIP Swap PIP On Off PIP Channel Down REMOTE CONTROL ...

Page 12: ...fo of current program 15 SLEEP Select time of TV to sleep mode 16 MUTE Mute sound 17 STILL Freeze or activate the image 18 PIP SOURCE SELECTION Select source of sub picture source 19 LOCATION Adjust position of sub picture frame 20 PIP CHANNEL UP Switch to the next channel of sub picture 21 PIP SWAP Interchange main picture displayed with sub picture source 22 PIP STILL Freeze or unfreeze screen s...

Page 13: ...tor light on the front panel will blink till the TV displays pictures 2 In Standby mode press on the remote control or front panel to enter to Power On mode To Turn the TV Off 1 Press on the remote control or on the front panel to switch off the TV 2 Unplug the power cord from the AC outlet to turn the TV off completely Caution The TV will be shut off automatically when the power trips The followi...

Page 14: ...mong PAL NTSC SECAM PAL M PAL N N4 43 and AUTO modes Sound System Switch among B G I D K and M systems Skip After Auto Search there may be some vacant and pseudo programs received Skipping the undesired program position can dramatically quicken program selection 1 When one program is preset to Skip you will find the program skipped during programs switch by pressing P P 2 Input the channel number ...

Page 15: ...uto Scan In TV mode select Auto Scan to activate the scan mode All pictures will be displayed in the current channel The current program will be displayed in the middle of the screen with twelve small pictures around the middle picture All pictures are scanned beginning with the current program from the upper left side screen in clockwise direction Use P P and V V to select the desired channel Use...

Page 16: ...r NTSC signal only Color Temp Four modes can be chosen Warm Normal Cool and User User mode is valid for PC DVI only Fleshtone To adjust the human skin tones Using the Audio Setting Menu 1 Press MENU and then use V V to select the Audio Setting menu 2 Press P P to select the desired field Sound Mode To select the desired sound mode among Standard News Music and User Bass To adjust the accompanying ...

Page 17: ...n To adjust the OSD position vertically OSD Timeout To adjust the length of time the OSD to be displayed on the screen without any commands Blue Screen To set the Blue Screen on off when there is no signal input in TV AV AV1 AV2 YPbPr modes Close Caption Only valid for U S A users Scaler Mode To select viewable screen modes of Fill Screen 4 3 Wide Cinema and Sub Title Factory Reset All users setti...

Page 18: ...d then use V V to select the Child Lock Setting menu 2 Press P P to select the desired field In this mode press OK P to enter the password mode Press the number button to enter the password The default password is 1601 After entering 1601 for the first time the screen displays the menu on the right Press the number button on the remote control to set the new password When done press OK and the TV ...

Page 19: ...horizontally in PC mode V Position To adjust picture s position vertically in PC mode Note In the menu gray items means invalid to operate in the current mode Standby Mode Press the on the TV panel Remote Control the LCD TV will store the current setup and enter into the standby mode with a red indicator light To Power on the LCD TV press the button again Signal Switch Press TV AV on the remote co...

Page 20: ... the screen the Mute function is switched on Press MUTE or increase the value of volume or adjust the items of the sound menu to exit The symbol is hidden when the menu operation is entered but the feature is still valid It appears again when the menu operation is exited When there is no valid signal input the TV will be mute but no mute symbol with a blue background Sound Mode Selection Press S M...

Page 21: ... small size wherever you want to locate Mode 2 To place two pictures in the same size side by side Both main picture and sub picture PBP cover half area of the display screen Mode 3 A main picture covers 12 16 area of the display screen while a sub picture POP covers 1 16 3 Press to switch between main picture and sub picture 4 Press to freeze or continue the current sub picture 5 Press to adjust ...

Page 22: ... Sound system to the country broadcasting standard Picture is spotted or with snow Signal source is low grade or the signal cord is in a lower quality Use the qualified signal cord Blue background in AV mode No Video signal or the signal cord is improperly not connected Connect the signal cord properly Picture is unclear or moves or have black stripes on horizontal position in PC mode PC Picture i...

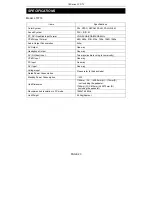
Page 23: ...on 2x5w AV Output One way Headphone Output One way AV S Video Input Two ways audio is using in community YPbPr Input One way PC Input One way DVI Input One way Voltage Input Rated Power Consumption Please refer to the back label Standby Power Consumption 2W Unit Dimension 874mm W 512mm H 225mm D including the pedestal 874mm W X488mm H X110mm D Not Including the pedestal Recommended resolution in P...

Page 24: ...x5w AV Output One way Headphone Output One way AV S Video Input Two ways audio is using in community YPbPr Input One way PC Input One way DVI Input One way Voltage Input Rated Power Consumption Please refer to the back label Standby Power Consumption 2W Unit Dimension 1012 6mm W 586mm H 225mm D including the pedestal 1012 6mm W X552 5mm H X112mm D not including the pedestal Recommended resolution ...

Page 25: ... 2x5w AV Output One way Headphone Output One way AV S Video Input Two ways audio is using in community YPbPr Input One way PC Input One way DVI Input One way Voltage Input Rated Power Consumption Please refer to the back label Standby Power Consumption 2W Unit Dimension 1152mm W 628 5mm H 113mm D not including the pedestal 1152mm W X675mm H X272mm D including the pedestal Recommended resolution in...

Page 26: ...on 2x5w AV Output One way Headphone Output One way AV S Video Input Two ways audio is using in community YPbPr Input One way PC Input One way DVI Input One way Voltage Input Rated Power Consumption Please refer to the back label Standby Power Consumption 2W Unit Dimension 1236mm W 717mm H 274mm D including the pedestal 1236mm W X673mm H X106mm D not including the pedestal Recommended resolution in...

Page 27: ...18 Series LCD TV PAGE 25 All the features and specifications are subject to change without notice for improvement LT2618 LT3218 LT3718 LT4018 JUJ6 491 1168 ...

Reviews: