

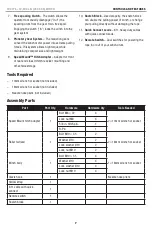


100776 - 10,000 LB. (4536 KG) WINCH
OPERATION
12
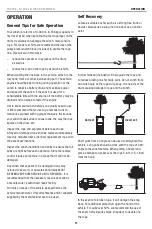
Double line
Single line
This reduces the load on the winch and the strain on the
rope by approximately 50%.
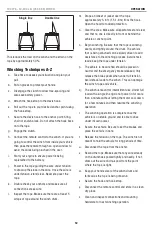
Winching Techniques A-Z
a. Take time to assess your situation and plan your
pull.
b. Put on gloves to protect your hands.
c. Disengage the clutch to allow free-spooling and
also save battery power.
d. Attach the hook strap to the clevis hook.
e. Pull out the rope to your desired anchor point using
the hook strap.
f. Secure the clevis hook to the anchor point: Sling,
chain or snatch block. Do not attach the hook back
onto the rope.
g. Engage the clutch.
h. Connect the remote control to the winch. If you are
going to control the winch from inside your vehicle
then pass the remote through an open window to
avoid the wires being pinched in the door.
i. Start your engine to ensure power is being
replenished to the battery.
j. Power in the rope guiding the wire under tension
to draw up the slack in the wire. Once the wire is
under tension, stand clear. Never step over the
rope.
k. Double check your anchors and make sure all
connections are secure.
l. Inspect the rope. Make sure there are at least 5
wraps of rope around the winch drum.
m. Drape a blanket or jacket over the rope
approximately 5-6 ft. (1.5-1.8 m) from the hook.
Open the hood for added protection.
n. Clear the area. Make sure all spectators stand clear
and that no one is directly in front or behind the
vehicle or anchor point.
o. Begin winching. Be sure that the rope is winding
evenly and tightly around the drum. The vehicle
that is being winched can be slowly driven to add
assistance to the winching process. Avoid shock
loads; keep the rope under tension.
p. The vehicle to be winched should be placed in
neutral and the emergency brake released. Only
release the brake pedal when under full tension.
Avoid shock loads to the winch. This can damage
the winch, rope and vehicle.
q. The winch is meant for intermittent use. Under full
load with a single line rig do not power in for more
than a minute without letting the motor cool down
for a few minutes and then resume the winching
operation.
r. The winching operation is complete once the
vehicle is on stable ground and is able to drive
under its own power.
s. Secure the vehicle. Be sure to set the brakes and
place the vehicle in park.
t. Release the tension on the rope. The winch is not
meant to hold the vehicle for long periods of time.
u. Disconnect the rope from the anchor.
v. Rewind the rope. Make sure that any wire already
on the drum has spooled tightly and neatly. If not,
draw out the wire and re-spool from the point
where the rope is tight.
w. Keep your hands clear of the winch drum and
fairlead as the rope is being drawn in.
x. Secure the hook and hook strap.
y. Disconnect the remote control and store in a clean,
dry place.
z. Clean and inspect connections and mounting
hardware for next winching operation.