MAINTENANCE
71
Took Kit
Tool kit
1
is located under the seat. The tools supplied with the
vehicle are helpful for partial maintenance, disassembling and assembling.
Page 1: ......
Page 2: ...troduction 13 VIN and Engine Serial Number 14 Specifications 15 Operator Safety 18 General Safety Precautions 18 Owner Responsibilities 22 Safe Riding Gear 23 Potential Hazard Warnings 26 Safety Decal...
Page 3: ...ever 39 Rear Brake Lever 40 Side Stand 40 Passenger handhold and footrest 41 Instrument 42 Instrument Indicators 42 Instrument Display 45 Instrument Navigation Settings Adjustments 47 Operating Your V...
Page 4: ...9 Key Points of Lubrication Schedule 60 Break in Maintenance Schedule 61 Periodic Maintenance Schedule 64 Clutch Lever Freeplay 70 Took Kit 71 Fuel System 72 Fuel Tank 72 Fuel Requirement 73 Engine As...
Page 5: ...d 83 Tire Friction 84 Drive Chain Inspection 85 Chain Tension Adjustment 86 Brake System 88 Front Brake Lever Inspection 88 Rear Brake Pedal Inspection 88 Brake Fluid Level Inspection 89 Adding Brake...
Page 6: ...torcycle cleaning and storage 104 General Precautions 104 Washing Vehicle 105 Protect the Surface 106 Windshield and Other Plastic 106 Chrome and Aluminum 106 Preparation for Storage 108 Preparation A...
Page 7: ...CFMOTO LIMITED WARRANTY 114 Telematics BOX T BOX and CFMOTO Ride App 121...
Page 8: ...ns globally For safe and enjoyable operation of your vehicle be sure to follow the instructions and recommendations in this owner s manual Your manual contains instructions for minor maintenance Infor...
Page 9: ...e the engine except as necessary service your vehicle in a well ventilated area and wear gloves or wash your hands frequently when servicing your vehicle EVAP System Evaporative Emission Control Syste...
Page 10: ...ntive oil or engine oil into the muffler Doing so could damage the catalytic converter NOTE Some features described within this manual may not apply to models in your market All descriptions and direc...
Page 11: ...afety is involved when these words and symbols are used Become familiar with their meanings before reading the manual DANGER This safety alert and icon indicates a potential hazard that may result in...
Page 12: ...the instructions and safety precautions in this manual and on all product labels Failure to follow the safety precautions could result in serious injury or death WARNING The engine exhaust gas from th...
Page 13: ...s unable to resolve a product issue or concern you can reach a CFMOTO customer service representative depending on the market you reside in For USA Please contact CFMOTO POWERSPORTS INC TEL 763 398 26...
Page 14: ...N VIN and Engine Serial Number Be sure to record the VIN number engine serial number and name plate information in the spaces below Vehicle identification number Engine serial number 1 VIN No 2 Engine...
Page 15: ...in 995 mm Wheelbase 47 8 in 1214 mm Seat height 30 5 in 775 mm Ground clearance 5 7 in 145 mm Curb weight 251 3 lb 114 kg Engine Type Vertical single 4 stroke air coolant Displacement 126 mL Bore Stro...
Page 16: ...ssion type 6 speed manual gear shift Clutch type Wet multi disc manual Driving system Chain drive Primary reduction ratio 3 5 Final reduction ratio 2 6 Gear ratio 1st 3 0 2nd 1 857 3rd 1 368 4th 1 143...
Page 17: ...17 SPECIFICATIONS Battery 12V 9 Ah Headlight LED Tail brake light LED Turn signals LED...
Page 18: ...perating procedures before operating this vehicle Riding Restrictions This vehicle is an ADULT VEHICLE ONLY The operator must acquire a driving license as required by local laws and regulations Know Y...
Page 19: ...le that increase its speed or power Avoid Carbon Monoxide Poisoning All engine exhaust contains carbon monoxide a deadly gas Breathing carbon monoxide can cause headaches dizziness drowsiness nausea c...
Page 20: ...f the fuel cap is not properly installed Gasoline is poisonous and can cause injury or death Never siphon gasoline by mouth If you swallow gasoline get any in your eye s or inhale gasoline vapor see a...
Page 21: ...fill the tank Do not fill to the tank neck If gasoline spills on your skin or clothing immediately wash it off with soap and water and change clothing Never start the engine or let it run in an enclos...
Page 22: ...lly stroke the brake lever with the right hand fully stroke the foot brake lever with the right foot be able to firmly plant both feet on the foot pegs and be able to balance the vehicle with the feet...
Page 23: ...derwear and a face guard for cold weather The operator must never wear loose clothing that may get entangled in the vehicle or on tree branches and shrubs Helmet and Eye Protection An approved helmet...
Page 24: ...nt or turnover Snowmobile gloves o er better protection when operating in cold areas Jackets Pants and Motorcycle Suits Wear a jacket or a long sleeved shirt and long pants or a full riding suit Quali...
Page 25: ...d rubber rain boots Rubber rain boots may get trapped behind the foot brake pedal impairing proper operation Other Riding Gear Rain Gear When riding in rainy weather a rain suit or a waterproof riding...
Page 26: ...should regularly practice the skills learned in the course and any operating techniques described in the owner s manual WARNING POTENTIAL HAZARD Failure to follow the age recommendations for this vehi...
Page 27: ...ere injury HOW TO AVOID THE HAZARD Always wear an approved helmet that fits properly Always wear eye protection goggles or face shield gloves long sleeved shirt or jacket long pants and over the ankle...
Page 28: ...n an accident HOW TO AVOID THE HAZARD Always operate at a speed that s proper for the terrain visibility and operating conditions and your experience WARNING POTENTIAL HAZARD Attempting slides jumps a...
Page 29: ...n safe operating condition Always follow the inspection and maintenance procedures and schedules described in the owner s manual WARNING POTENTIAL HAZARD Operating this vehicle with improper tires or...
Page 30: ...nges in handling which could lead to an accident HOW TO AVOID THE HAZARD Never modify the vehicle through improper installation or use of accessories All parts and accessories added to the vehicle mus...
Page 31: ...ations Read and understand all of the safety and information labels on your vehicle for safe and proper operation Never remove any labels from your vehicle If a label becomes di cult to read or falls...
Page 32: ...S FEATURES 1 Instrument 2 Clutch lever 3 Handlebar switch LH 4 Ignition switch lock 5 Fuel tank lock 6 Gear shift lever 7 Seat lock 8 Passenger handhold 9 Footrests 1 2 4 5 6 7 3 Vehicle View Rear Lef...
Page 33: ...33 CONTROLS FEATURES Front Right View 10 Throttle grip 11 Handle bar switch RH 12 Front hand brake lever 13 Rear brake lever 10 11 12 13...
Page 34: ...h Lever Clutch lever 1 is on the left side of handlebar The clutch is cable operated type Front Hand Brake Lever Front hand brake lever 2 is on the right side of handlebar Front brake caliper activate...
Page 35: ...Turn to this position low beam lights on 3 Hazard flasher switch Short press to turn on the hazard flasher light 4 Turning light switch Push this switch to the right the right turning light will activ...
Page 36: ...to this position the vehicle is ready to start 3 Starter button Push this button to start the vehicle 4 Light switch Turn to this position headlight position light and taillight will be on Turn to th...
Page 37: ...left then turn the key to the lock indicator to lock the handlebar Turn o Turn the key to this position the engine cannot be started and the vehicle power circuit is disconnected Start Turn the key to...
Page 38: ...FEATURES Fuel Tank Lock Follow the items below before opening the fuel tank The vehicle is stopped Engine is o Open the fuel tank lock cover Insert the key and turn to release the lock Open the fuel...
Page 39: ...Lock 1 The seat lock is on the left side of the vehicle The seat can be removed by inserting the key and turning to release the lock Gear Shift Lever The gear shift lever 2 is on the left side of the...
Page 40: ...right side of the engine Activate the rear brake by pushing down on the rear brake lever Side Stand The side stand 2 is on the left side of the vehicle and is used for parking NOTE When the side stand...
Page 41: ...EATURES Passenger handhold and footrest A passenger handhold 1 is mounted on the motorcycle seat for passenger to hold on during riding Footrests 2 are mounted on the motorcycle for the operator and p...
Page 42: ...trument Instrument Indicators 1 SEL button 4 High beam indicator 7 Fuel indicator 2 Turn signal indicator 5 Voltage indicator 8 Fault indicator 3 Position light indicator 6 Neutral indicator 9 ADJ but...
Page 43: ...ash Position light indicator 2 When position light is on the indicator will be on High beam indicator 3 When the light switch is on this position and the dimmer switch is on this position high beam in...
Page 44: ...44 CONTROLS FEATURES Fault indicator 8 When the vehicle EFI system detects a fault this indicator will be on ADJ button 9 To adjust or set the instrument functions Use together with SEL button...
Page 45: ...45 CONTROLS FEATURES Instrument Display 1 Tachometer 3 Gear display 5 Speed display 2 Clock 4 Fuel display 6 Rider Information Center 1 5 6 2 3 4...
Page 46: ...ition Fuel Display 4 Displays the current fuel volume When the fuel gauge indicator flashes Please arrange your travel properly and fill the fuel tank as soon as possible Speed display 5 Displays the...
Page 47: ...setting Short press Enter into minute setting Minute setting Short press Adds 1 hour for every press Hour setting Minute setting Short press Enter into unit shifting Unit shifting Short press Adds 1...
Page 48: ...for 2 3 minutes at idle speed and let oil flow into all the engine lubricating parts 2 Do not run the engine at high Rpm when the transmission is in neutral 3 During the break in period CFMOTO suggest...
Page 49: ...ssure is in the standard range Rear brake Inspect the thickness of rear brake pad Inspect the thickness of rear brake disc and check for any dirt or damage Chain and Sprockets Inspect the drive chain...
Page 50: ...stand main stand Check if any looseness or damage for the return spring of side stand main stand Stop switch Check that the stop switch works correctly DANGER Inspect the vehicle every time before rid...
Page 51: ...speed Before the instrument self inspection do not start the vehicle with the start switch Pull the clutch lever and shift into a gear with side stand up the vehicle can be started When the transmiss...
Page 52: ...andle bar at all times with both hands when driving with the throttle applied WARNING Avoid any abrupt load alterations or strong brake operation which can cause an out of control vehicle Adjust the s...
Page 53: ...hicle weight with full fuel tank driver passenger and luggage cargo Luggage cargo sliding will e ect the handling performance inspect that it is fixed tightly on the vehicle and that the width does no...
Page 54: ...stem and reduce the chance of overheat WARNING Moisture and dirt impair the brake system Brake carefully several times to dry out moisture and remove dirt from the brake pads and discs If the hand bra...
Page 55: ...ter running the vehicle the temperature will be very high for some parts Do not touch any parts such as the exhaust system cooling system engine or brake system before the vehicle parts have cooled do...
Page 56: ...s safe Do not rely solely on the rearview mirrors You may misjudge a vehicle s distance and speed which can easily cause an accident When going up steep slopes shift to a lower gear so there s plenty...
Page 57: ...f your actions should be smooth under these conditions Sudden acceleration braking or turning may cause loss of control Practice your operating skills In an empty area exercise cautiously slow down an...
Page 58: ...sure and check the wheel balance Fuel Have su cient fuel onboard for high speed operation Engine oil To avoid engine failure which could result in a loss of control make sure the oil level is maintain...
Page 59: ...have a qualified dealer perform the required maintenance for you Pay special attention to the engine oil level during cold weather operation A rise in engine oil level can indicate contaminants collec...
Page 60: ...Change lubricants more often under severe use such as wet or dusty conditions Lubricate before long periods of storage after pressure washing or after submerging drive system Item Lubricant Method Eng...
Page 61: ...000 Inspect Adjust Electrical system Functions of electrical parts 600 1000 Inspect Battery 600 1000 Fuses or circuit breakers 600 1000 Brake system Brake discs 600 1000 Inspect Brake pads 600 1000 Br...
Page 62: ...l bearings 600 1000 Suspension system Rear shock absorber and front forks 600 1000 Inspect for leaking maintain front forks and rear shock absorber according to the requirement Steering system Steerin...
Page 63: ...or 600 1000 Read with PDA Moving parts 600 1000 Lubricate inspect for flexibility Bolts and nuts 600 1000 Inspect for fastness Cables and wires 600 1000 Inspect for damage bending and routing Severe U...
Page 64: ...ainer 6M 3000 5000 Clean Clutch 3000 5000 Inspect Idle 6000 10000 Throttle system 3000 5000 Inspect Air filter element 3000 5000 Inspect and clean 24M 12000 20000 Replace Spark plug 3000 5000 Inspect...
Page 65: ...6M 3000 5000 Fuses or circuit breakers 6M 3000 5000 Wires 12M 6000 10000 Inspect for damage bending and routing Wheels Tire condition 12M 4500 7500 Inspect 24M 9000 15000 Tire pressure 12M 4500 7500...
Page 66: ...500 24M 9000 15000 Brake pads 12M 4500 7500 24M 9000 15000 Brake fluid level 12M 4500 7500 9000 15000 Brake hoses 12M 4500 7500 Inspect for damage and sealing 24M 9000 15000 Brake lever 12M 4500 7500...
Page 67: ...00 7500 Inspect 9000 15000 Rear shock absorber and front forks 12M 4500 7500 Inspect for leaking maintain the parts according to the requirement 24M 9000 15000 Swing arms 4500 7500 Inspect 9000 15000...
Page 68: ...stem Frame 18000 30000 Inspect Steering system Steering bearings 4500 7500 Inspect 9000 15000 Chain Chain rear sprocket and engine sprocket 4500 7500 Inspect 9000 15000 Severe Use Item Reduce interval...
Page 69: ...for flexibility 48M 9000 15000 Bolts and nuts 12M 4500 7500 Inspect for fastness 48M 9000 15000 Cables and wires 12M 4500 7500 Inspect for damage bending and routing 24M 9000 15000 Pipes ducts hoses...
Page 70: ...ay 0 39 in 0 78 in 10 mm 20 mm WARNING If there is no free play for clutch lever the clutch will start to slip Check lever free play every time before starting the engine Set the clutch lever freeplay...
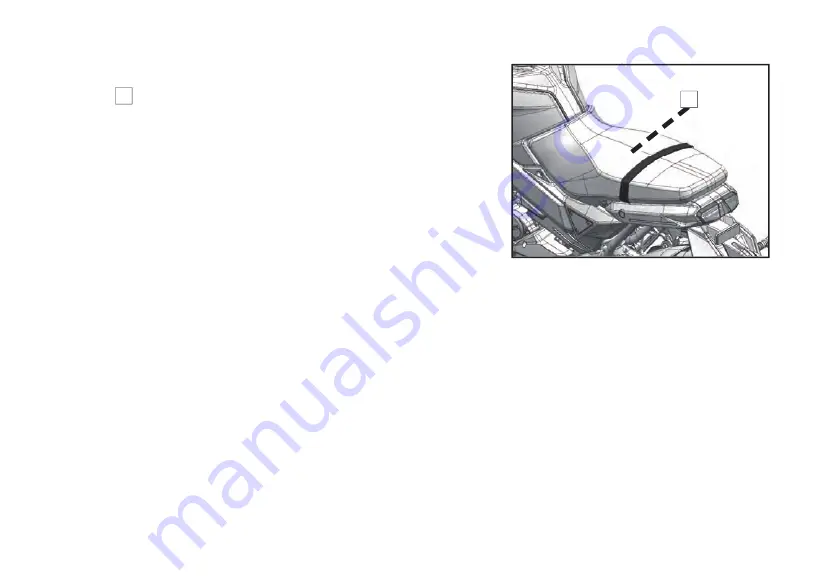
Page 71: ...MAINTENANCE 71 Took Kit Tool kit 1 is located under the seat The tools supplied with the vehicle are helpful for partial maintenance disassembling and assembling 1...
Page 72: ...d overflowing onto high temperature parts The fuel level should not exceed the tank opening As temperature rises fuel can heat and expand possibly spilling over and damaging motorcycle parts Fuel is t...
Page 73: ...er Be sure to use fresh gasoline Gasoline oxidate resulting in loss of octane and volatile compounds It also produces colloidal and lacquer deposits which could damage the fuel system Your CFMOTO engi...
Page 74: ...oil will cause accelerated wear and may result in engine or transmission seizure accident and injury Engine Oil Level Inspection Make sure the vehicle is turned o If the running was operated prior to...
Page 75: ...riod may lead to high temperature of the engine and engine oil Please wear suitable protective clothing and safety gloves when changing oil In the event of scalding wash the affected area immediately...
Page 76: ...lter CAUTION Before mounting the oil filter applying a thin layer of oil on the seal ring prevents the filter from becoming stuck on the engine case Clean the oil drain bolt and the area around the oi...
Page 77: ...evel and adjust according to the level result Engine Oil Capacity Change with oil filter 1 27 qt 1 2 L Use of any oil other than those recommended may cause serious engine damage CFMOTO recommends the...
Page 78: ...hould be replaced in accordance with the Periodic Maintenance Chart Spark plug maintenance should only be performed by an authorized dealer Spark plug type CR8E Spark plug clearance 1 0 027 in 0 035 i...
Page 79: ...r Temperature sensors By this way the ratio of air against fuel can be optimized for complete combustion Air Intake Valve An air intake valve is essentially a valve which allows fresh air to flow only...
Page 80: ...e Chart WARNING If adjustment of the valve clearance is not performed it will eventually result in no clearance or cause the valves remaining partly open which reduces performance creates valve noise...
Page 81: ...t should be serviced more frequently than the recommended interval in the periodic Maintenance Chart Due to the vehicle s design air filter service should be only performed by an authorized dealer Ind...
Page 82: ...Rear wheel 130 70 12 56L Tire pressure Front wheel 25 4 psi 175 kPa Rear wheel 29 psi 200 kPa Minimum tread depth Front wheel 0 031 in 0 039 in 0 8 mm 1 mm Rear wheel 0 031 in 0 039 in 0 8 mm 1 mm Im...
Page 83: ...d or used within 24 hours after repairing the vehicle speed should not exceed 60km h and cannot exceed 90 km h at any other time A punctured tire should be repaired as soon as possible The front and r...
Page 84: ...h a new tire if severely damaged For example if partial expansion appears on the tire it means the tire is severely damaged Remove any embedded stones or other foreign particles form the tread CAUTION...
Page 85: ...t which may cause locking of rear wheel or engine damage The service life of the drive chain largely depends on the maintenance Chain dirt inspection Inspect periodically or inspect the chain for dirt...
Page 86: ...r wheel to different positions and repeat the measurement before adjusting chain slack Chain Tension Adjustment Loosen the rear wheel shaft nut 1 Loosen the left and right locking nuts 3 Screw the lef...
Page 87: ...andard limit replace the chain with a new one Standard limit 12 6 in 320 7 mm DANGER For your safety please use the standard chain When chain is elongated never cut the chain and mount back onto the v...
Page 88: ...15 mm Inspect the front brake lever for any cracks or abnormal noise Replace with new parts if problems are discovered Rear Brake Pedal Inspection Park with the side stand on level ground Lightly appl...
Page 89: ...area A Drain out the redundant fluid until it arrives at area B If the brake fluid level is located at area C or cannot see the level Refill with same brake fluid until the level arrives at area B WA...
Page 90: ...uid spills onto your clothing change the clothing WARNING Brake fluid used for long time without replacement will reduce braking e ciency Please change the brake fluid according to the Periodical Main...
Page 91: ...oir gasket 2 Refill brake fluid to area B Reinstall the cover and reservoir gasket Install the screws Rear brake fluid reservoir Remove screws 1 Remove the cover and reservoir gasket 2 Refill brake fl...
Page 92: ...rake discs Brake discs wear limit 0 14 in 3 5 mm Brake Caliper Inspection Inspect the brake calipers before riding Inspect the brake pads for minimum thickness periodically If the brake pad is too thi...
Page 93: ...ng check the front shocks for any mud dirt or debris Clean these surfaces periodically Failure to maintain them could lead to oil seal damage and shock oil leak Press down on the seat with your weight...
Page 94: ...moothly Visually inspect the rear shock absorber for oil leak If you have any doubt about the rear shock absorber please contact the authorized CFMOTO dealer Rear Shock Absorber Adjustment The rear ab...
Page 95: ...rt time during each ride the battery can remain discharged Batteries can also self discharge from infrequent use The rate of discharge varies with battery type and ambient temperature When environment...
Page 96: ...r dealer for battery charger specifications Battery Charging Remove the battery from the vehicle before charging Connect the positive and negative wires from the charger and charge the battery at a ra...
Page 97: ...e vehicle on the level ground and park Turn o the engine and the vehicle power Insert the key into the seat lock Remove the seat 1 Remove the black negative wire Remove the red positive wire Remove th...
Page 98: ...le will not be used for a month or longer take out the battery and store it in a cool dry place Completely recharge the battery before re installation When charging the battery it should be taken out...
Page 99: ...yes when working near batteries Keep out of reach of children Keep batteries away from sparks flames cigarettes or other sources of ignition Ventilate the area when charging or using in a closed space...
Page 100: ...sed on that front and rear wheels touch down the ground and driver sits on the vehicle All the lights are LED structure which cannot be repaired if damaged or failed Have your dealer replace the entir...
Page 101: ...r removing the seat and the dust cover If a fuse is blown inspect the electrical system for damage and replace with the same new fuse WARNING Do not use any substitute for the standard fuse Replace a...
Page 102: ...the catalytic converter Do not coast the vehicle with the engine and transmission engaged and the ignition switch and or engine stop switch off Do not attempt to start the engine many times when the b...
Page 103: ...ure inside the fuel tank is balanced by the EVAP system If inner pressure of fuel tank is lower than outside it is available to replenish air pressure through the air tube of the carbon canister and a...
Page 104: ...e spray Avoid all harsh chemicals solvents detergents and household cleaning products like ammonium hydroxide Gasoline brake fluid and coolant will damage painted plastic surfaces Wash them off immedi...
Page 105: ...om the engine will help dry o the vehicle in moist areas Carefully ride the motorcycle at a low speed and apply the brake several times This will help to dry the brakes and restores their normal opera...
Page 106: ...usehold cleaning products such as gasoline brake fluid window cleaners thread fastener glue or other harsh chemicals If a plastic part comes in contact with any harsh chemical substance wash it o with...
Page 107: ...a rubber protective agent to preserve their life DANGER Special care must be taken when treating tires that rubber protective agent applied will not a ect the tire tread function If not applied corre...
Page 108: ...on the vehicle Do not smoke Make sure the area is well ventilated and free of any source of flame or sparks This includes any appliance with a pilot light Gasoline is a toxic substance Dispose of gaso...
Page 109: ...then install the battery in the motorcycle Lubricate any pivot points as necessary handle bar levers foot pedal etc Check all the points listed in Pre Ride Inspection section Test ride at slow speed...
Page 110: ...burning Clean or replace ECU failure Poor contact or burning Clean or replace Trigger coil failure poor contact or burning Clean or replace Stator failure poor contact or burning Clean or replace Wir...
Page 111: ...il fuel quality shelter etc Adjust or replace Insu cient power Spark plug Improper spark plug gap normal specification is 0 8mm 0 9mm Adjust or replace Intake pipe Air leakage of intake pipe too long...
Page 112: ...FMOTO dealer Reporting Safety Defects If you believe that your vehicle has a defect which could cause a crash injury or death you should immediately inform the National Highway Traffic Safey Administr...
Page 113: ...f Ownership Original Purchaser 2nd Owner 3rd Owner 4th Owner Owner Name Address City State Zip Code Telephone E mail Date of Purchase Odometer Reading New Owner Signature NOTE If a completed Change of...
Page 114: ...ch transfer will not extend the original term of the warranty The CFMOTO Limited Warranty is subject to the following terms and conditions WARRANTY TERMS CONDITIONS This CFMOTO Limited Warranty is sub...
Page 115: ...lure or negligence in the performance of periodic vehicle maintenance Improper or negligent use or operation Unauthorized repair or adjustment Unauthorized modifications or performance upgrades Use of...
Page 116: ...owners must be provided c The original delivery date of the vehicle must be provided d The new owner must indicate in writing that he she has received and read the vehicle s Owner s Manual and the CFM...
Page 117: ...pes Silencers Air cleaner housing case air cleaner element or intake duct 8 Emissions Control System Warranty CFMOTO also warrants to the ultimate purchaser and each subsequent purchaser of each CFMOT...
Page 118: ...use of five 5 Years or 30 000km 18 641 miles whichever occurs first for 300cc or above motorcycles and a period of use of five 5 Years or 12 000 km 7456 miles whichever comes first for 125cc motorcycl...
Page 119: ...t Connector As related to the evaporative emission control system IV Emission related components also include any other part whose primary purpose is to reduce emissions or whose failure would commonl...
Page 120: ...l be the sole and exclusive remedy available to the customer with respect to the covered CFMOTO vehicle In the event of any alleged breach of any warranty or any legal action brought by the customer b...
Page 121: ...with an intelligent terminal box or T Box This feature helps build a communication bridge between the owner and vehicle through the CFMOTO Ride App which installs on an Android or Apple phone Contact...
Page 122: ...122 FOREWORD 6FIV 380101 6601 13 US21C...