Installing the CP 3100
Installing the Rack-Mount CP 3100
41
the SCSI bus. If this is not possible, use the SCSI ID selector switch on the back panel of the
CP3101R-160 to select a unique SCSI ID for the unit.
Installing the Rack-Mount CP 3100 in a Rack
The rack-mount CP 3100 is a low-profile 1U rack-mount device that is mounted horizontally in an
appropriate rack. Shut down the computer and remove the power supply cable. Then mount the
rack-mount CP 3100 in a Certance-recommended rack-mount slide, such as Accuride or General
Devices.
Connecting to a Host
To connect the rack-mount CP 3100 to a host computer, use the following procedure.
1.
Shut down the host computer and disconnect the computer’s AC power cord.
2.
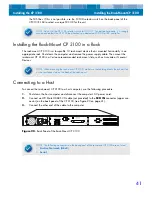
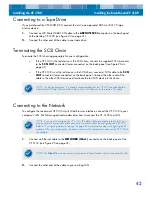
Connect an LVD Male HD68 SCSI cable (not provided) to the
SCSI IN
connector (upper con-
nector) on the back panel of the CP 3100 (see Figure 20 on page 41).
3.
Connect the other end of the cable to the computer.
Figure 20.
Back Panel of the Rack-Mount CP 3100
NOTE. Do not set the CP 3100 selector switch to SCSI ID 7. For best performance, it is strongly
recommended that the CP 3100 be attached to a dedicated SCSI Ultra 160 controller.
NOTE. When mounting the rack-mount CP 3100, make sure that nothing blocks the exhaust fan
or the ventilation slots on the back of the rack-mount.
NOTE. The following connectors on the back panel of the rack-mount CP 3100 are not used:
•
Archive Network (Gbe2)
•
Serial
(Gbe1)

