

The setup is complete when the screen change
to the Dashboard main panel in below. Please
visit the Online Manual for further information
about the Dashboard main panel functions.
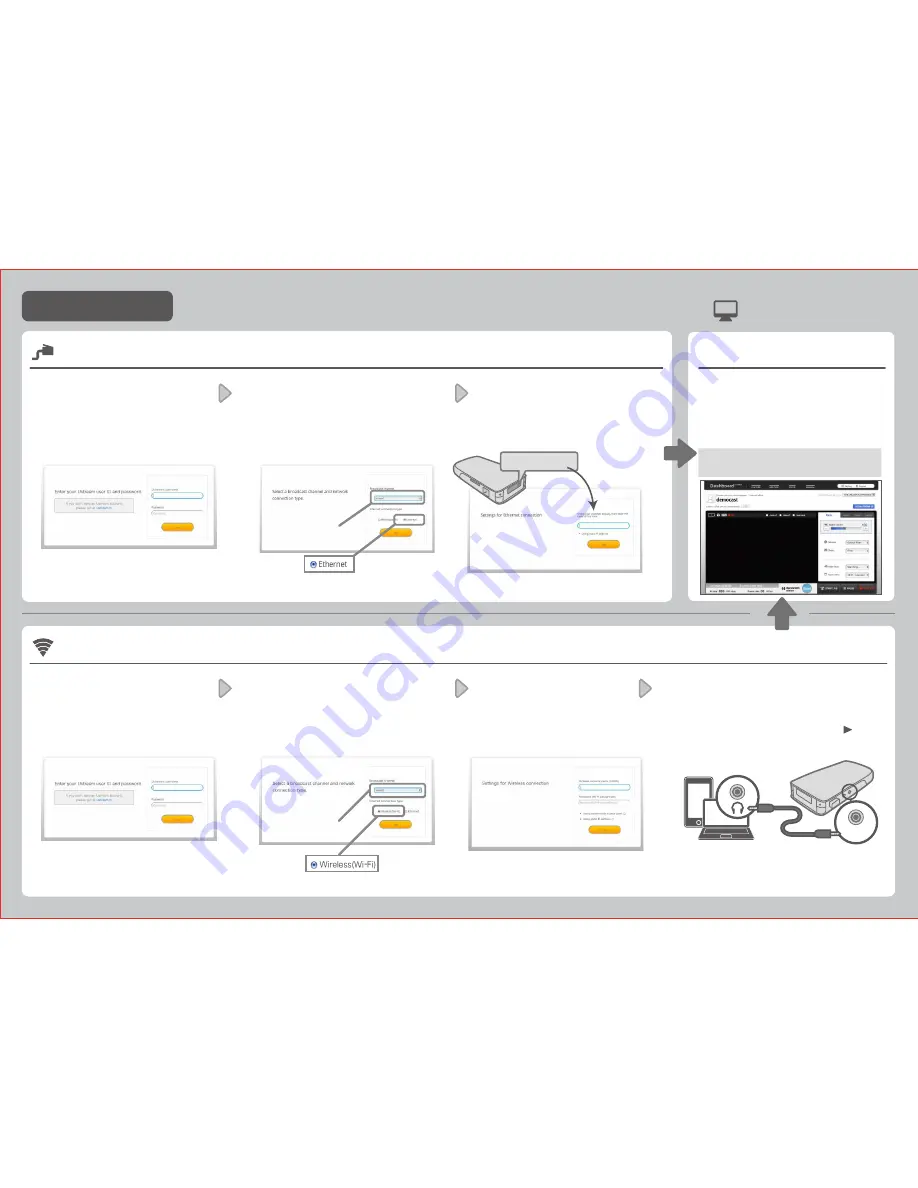
When you use Ethernet
When you use Wireless (Wi-Fi)
4
.
Transferring Network Setting
Connect the “MIC IN” port on the LiveShell to the
headphone jack on your PC/Smartphone using the
provided blue cable, and click Play button ‘ ’. If
the Play button does not show up on your browser of
PC/Smartphone, select “ Download and Play”.
If this does not work, adjust the volume on your PC/Smartphone, or check
and see if you are running another application using audio output. Installing
Google Chrome (a free web browser) sometimes helps resolve this issue.
MIC IN
1
.
Setup Ustream Account
Please enter your Ustream username
and password.
Select a broadcast channel and a type
of network.
2
.
3
.
3
.
Setup Network
Next, please enter the Wireless network
name(ESSID) and password.
* Please be sure to use the correct case (upper or lower)
and symbols (hyphens/underscores, etc).
1
.
Setup Ustream Account
Please enter your Ustream username
and password.
Enter PIN Code
Lastly, please enter the PIN code that was
displayed on the screen of the LiveShell.
Setup Complete
* When an error message is displayed on the screen
and it does not direct to the next page, please review
the online manual.
PIN Code
* * * *
Select a broadcast channel
and network connection type
Select a broadcast channel and a type
of network.
2
.
Select a broadcast channel
and network connection type
Detail instructions are available online.
LiveShell Online Manual
http://s.cerevo.com/doc
LiveShell Online Manual
http://s.cerevo.com/doc
* This Quick Setup Guide only covers network environments where IP can be automatically
acquired through DHCP, and ID input and consent agreement are not required.
Check on
Select a Channel
Select a Channel
Check on
S T E P
②
Blue cable


