


RECORDING OPTIONS
NORMAL RECORDING
22
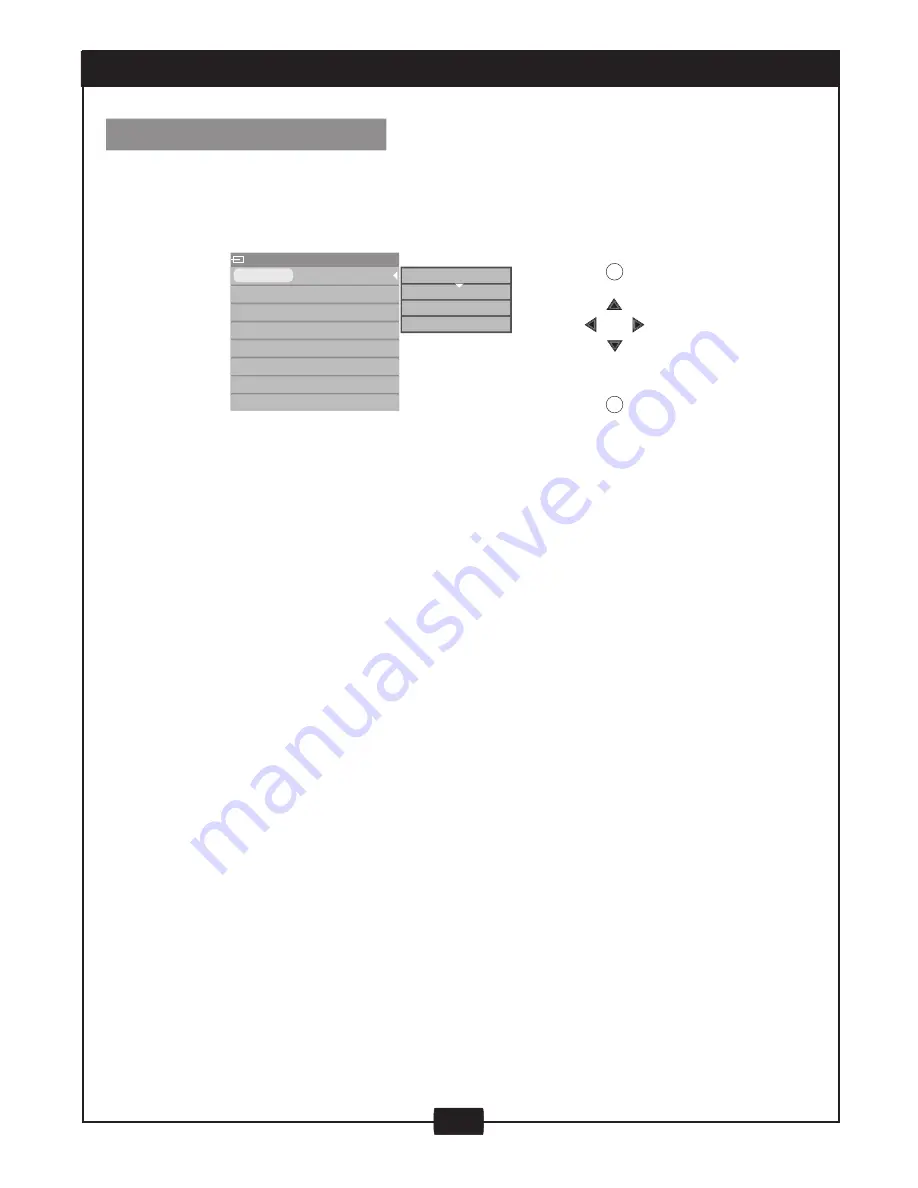
RECORD
(DVD+R)
New Title
Append title
Overwrite title
Overwrite disc
MODE
New Title
SOURCE Ch000
QUALITY SLP
REC TO
DVD-VIDEO
TRICK
Stop
HTLE
07/07
CHAPTER 01
TIME
0:04:20/5:27:31
NAVIGATION
STOP
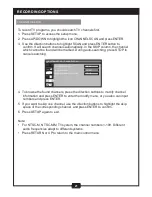
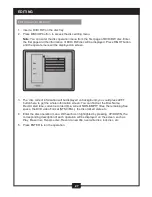
1. Make connections illustrated as page 6-8
2. Insert a DVD+RW or DVD+R disc into the recorder
3. Press NAVIGATION to access the Control Menu
4. Press UP/DOWN to highlight the MODE icon, and press ENTER and UP/DOWN to
select the record way for the new record event. You could select different mode
according different DVD+R or DVD+RW discs.
• New Title: Set up a new title in the disc.
• Append title: Append the new record on a record title.
• Overwrite title: Overwrite the last title to record.
• Overwrite disc: Overwrite the disc to record.
5. Press UP/DOWN to highlight the SOURCE icon, and press ENTER and UP/DOWN to
select the input source which you have connected as step 1.
• Front CVBS: Front Audio/Video Input (on the front panel)
• Rear CVBS: Rear Audio/Video Input (on the rear panel)
• Rear S-VIDEO: Rear S-Video (on the rear panel)
• DV: Digital Vidicon (on the front panel)
• Tuner:TV (on the rear panel)
• Each channel (you can select it by pressing /- or input the assigned
number of the channel to select your desired one directly)
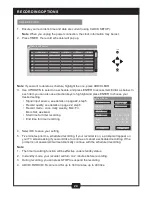
6. Press RIGHT/LEFT to highlight the QUALITY icon, and press ENTER and UP/DOWN
to select the record quality. After your selection, press ENTER to confirm it.
• HQ: High quality, approximately 60 minutes on a blank disc.
• SP: Standard Play quality, nearly 120 minutes on a blank disc.
• EP: Extend Play, nearly 240 minutes on a blank disc.
• SLP: Standard Long Play, nearly 360 minutes on a blank disc.
Note:
• The quality of its recording is based on the selection made in the RECORD MODE.
• You can select the type of quality by pressing the ADD/CLEAR button.
7. Press UP/DOWN to select TRICK icon, and press ENTER and UP/DOWN to select
RECORD. If you want to stop recording, press STOP. If the DVD+RW or DVD+R is
new, it will take about three minutes to stop.
Note:
• It will take about 30 minutes to format the DVD+R/+RW disc before recording.
• Generally, it takes more time and no more than 5 minutes to rename the disc if the
STOP button is pressed to stop the recording operation.