background image

Taking Pictures

Please   make   sure   EOS   Utility   and  

BackyardEOS   are   already   installed   on  
the  PC   which   will   be  connected   to  the  
camera   first.   You   can   operate   the  
camera   with   the   following   instruction.  
Please   follow   the   order   of   the  
instruction.

1.

Turn  off   the   camera   on/off   switch   and   the   cooler  

on/off  switch  on  the  backside  of  the  camera.

2.

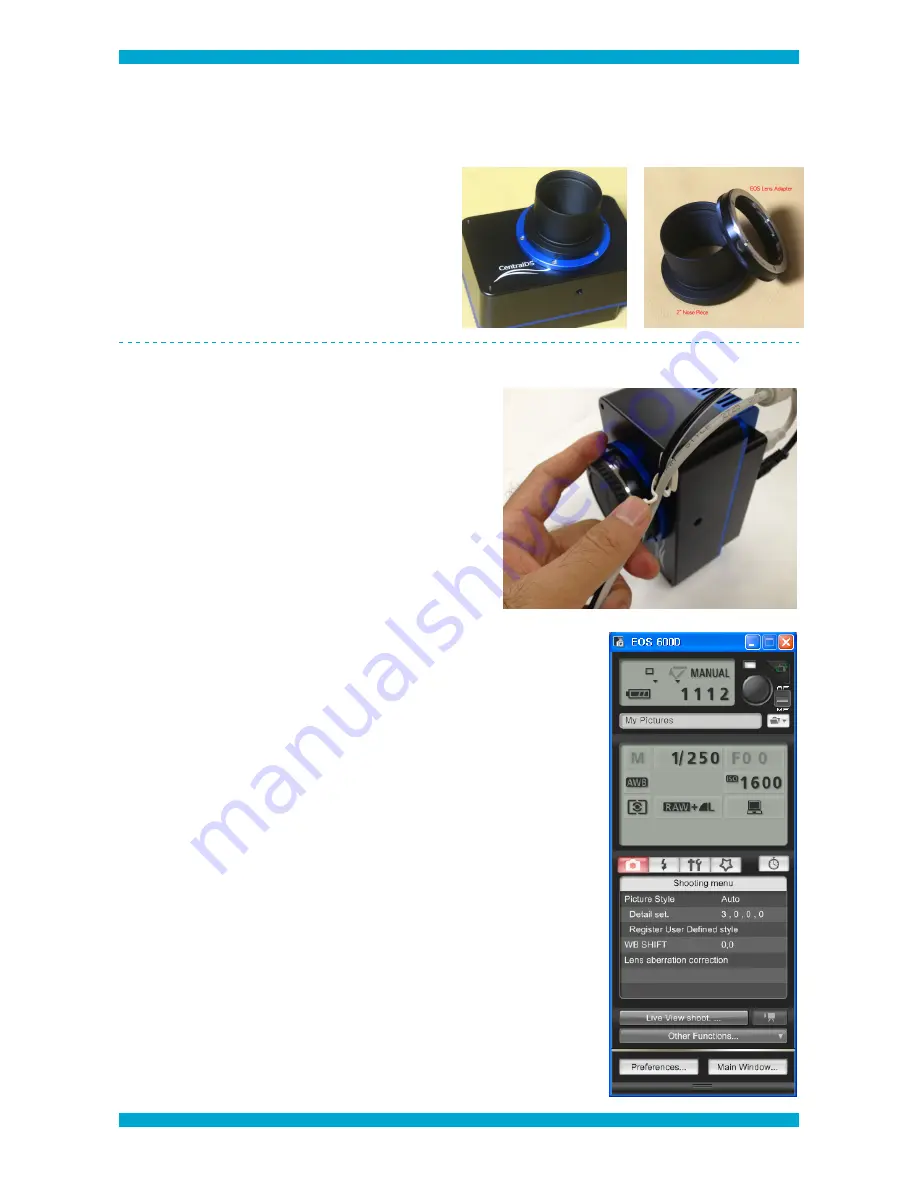
Connect   the   2”   nosepiece   (or   the   camera   lens  

adapter)  to  the  camera  body.

3.

Connect   the   camera   to   a   telescope   (or   a   camera  

lens)  securely.

4.

Connect  the  USB  cable  to  the  camera  USB  port.    

5.

Connect  the  DC  cable  to  the  camera’s  power  port.

6.

Please  make   sure   you  route   the   USB   cable  and  the  

DC  power  cable   through   the   cable   holder  to  ensure  

reliable  communication  between  the  camera  and  the  PC  and  prevent  

any  damages  on  the  USB  port  by  any  loose  connection.

7.

Connect  the  power  cable  to  the  power  adapter.

8.

Turn  on  the  PC  with  EOS  Utility  and  BackyardEOS  installed  to  control  

the  camera  remotely.

9.

Once  the  PC  is  started,  plug  in  the   USB   cable  from  the   camera  into  

the  PC  and  turn  on  the  camera.

10.

Check  the   LED  light  on  the   camera  is  on.  If  the  green  LED  is  on,  the  

camera  is  being  powered  properly.

11.

Run  EOS  Utility  from  the  PC.

12.

Take   some   test   pictures   after   clicking   Camera   Settings   /   Remote  

Shooting.

*Please   refer   to   the   EOS   Utility   instruction   manual   in   the   [EOS  

DIGITAL  Software   INSTRUCTION  MANUAL]      for  detailed   usage   of  

the  software.

13.

If   test   photos  were   not   taken  properly,   please   turn   off   the   camera  

and   check   the   USB   cable   connection.   Then   turn   on   the   camera  

again  and  take  another  test  picture.

14.

If   you   successfully   took   a   picture,   turn   on   the   cooler   (move   the  

switch   to   the   left)   to   start   TEC   cooling.   If   the   red   LED   is   on,   the  

cooling  module  is  being  powered  properly.

15.

Check  if  the  cooling  fan  for  the  heat  sink  is  operating  properly

CENTRALDS  CDS-600D/ CDS-1100D  USER  GUIDE

PAGE 8 / 13


CENTRALDS

Summary of Contents for CDS-1100D

Page 1: ...CDS 1100D CDS 600D User Guide Version 1 0 May 2012 CENTRALDS CDS 600D CDS 1100D USER GUIDE PAGE 1 13 CENTRALDS ...

Page 2: ...re 5 Before start using 6 Installing BackyardEOS 6 Installing Canon EOS Software 6 Reading software manual 7 Taking Pictures 8 Characteristics of the modified camera 11 Safety of the User and the Camera 12 Product Warranty 12 Thank you for purchasing a CentralDS product CENTRALDS CDS 600D CDS 1100D USER GUIDE PAGE 2 13 CENTRALDS ...

Page 3: ...You will get used to this camera and understand the camera better while reading this manual and taking test images Please read Handling caution and Safety of the user and the camera thoroughly to prevent any accidents or damages to the camera Package contents Please check following devices and accessories are all included in the package If anything is missing please contact CentralDS or the dealer...

Page 4: ...assembled by personnel not authorized by CentralDS the warranty will be voided Do not leave the camera attached to a telescope with the cooling system off for long time Dew can form on the surface of the camera and this can damage the camera If condensation forms on the camera do not use the camera If the camera is suddenly brought in from the cold into a warm room condensation may form on the cam...

Page 5: ... mode with the mode switch pressed in the manual mode with the mode switch released You cannot use any other MODEs such as Av Tv P modes available for unmodified EOS 1100D and 600D CENTRALDS CDS 600D CDS 1100D USER GUIDE PAGE 5 13 CENTRALDS ...

Page 6: ...re and enter the activation key to finish the installation Installing Canon EOS Software You can control basic camera settings and take pictures and movies with a PC connected to the camera using EOS utility The CD ROM provided with the camera includes EOS utility Digital Photo Professional Zoom Browser EX and Picture Style Editor Do not connect the camera to the PC before installing the software ...

Page 7: ...ease BackyardEOS x x x zip package and download the file 3 Extract the ZIP file and store the BackyardEOS User Guide pdf separately 4 Open BackyardEOS User Guide pdf with Adobe Acrobat Reader You can download Adobe Reader from the internet for free EOS Utility 1 Load EOS DIGITAL Software INSTRUCTION MANUAL CD Rom into the CD Rom drive 2 Double click the CD Rom icon 3 Copy the EOS Utility manual EU...

Page 8: ... the power adapter 8 Turn on the PC with EOS Utility and BackyardEOS installed to control the camera remotely 9 Once the PC is started plug in the USB cable from the camera into the PC and turn on the camera 10 Check the LED light on the camera is on If the green LED is on the camera is being powered properly 11 Run EOS Utility from the PC 12 Take some test pictures after clicking Camera Settings ...

Page 9: ...re at the temperature sensor installed on the PCB circuit board placed 2mm behind the sensor Only the image sensor is directly cooled with a cold finger in the CDS 1100D and the CDS 600D We found out from experiments that the actual image sensor temperature is around 8C below the temperature that BackyardEOS is displaying from Canon exif data It means that the actual cooled image sensor temperatur...

Page 10: ... 24 Put the nosepiece cap or lens cap on and put the camera in a case with desiccants i e Silica gel If the camera is exposed to the air outside with the cooling module off for extended period of time the camera can be internally damaged due to problems such as short circuits caused by condensation If you have to leave the camera outside for extended period of time cover the camera with the dew sh...

Page 11: ...do infrared photography by mounting a visible light blocking infrared transmitting filter such as a Hoya R72 filter 5 Various 2 imaging filters can be mounted in the 48mm filter holder in front of the clear filter or Baader UV IR filter when a camera lens is used The lens should be mounted after the 2 filter is mounted 6 When a telescope is used for imaging 2 filters can be mounted in the 48mm fil...

Page 12: ...e and electrical shock follow the safeguards below Always insert the power plug all the way in Do not handle a power plug with wet hands Do not excessively bend the cord Do not put a heavy object on the power adapter and cord Do not connect too many power plugs to the same power outlet Do not use a cord whose insulation has been damaged If the surrounding near the power outlet is dusty or humid th...

Page 13: ...http www centralds net Email support centralds net phone 82 42 321 5862 fax 82 42 253 5065 CENTRALDS CDS 600D CDS 1100D USER GUIDE PAGE 13 13 CENTRALDS ...

Reviews: