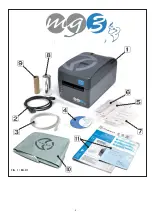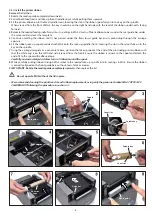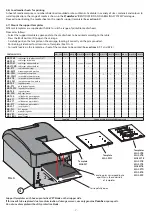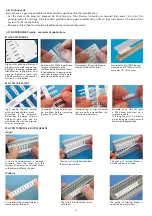
. 8 .
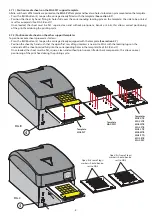
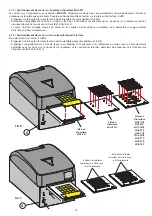
4.7.1) Position media sheets on the MG2-PLT support template
All die-cut sheets of fl at media are printed on the
MG2-PLT
template and have two holes to locate on pins mounted on the template:
– Press the BLUE button (4) to open the carriage already fi tted with the template (
See section 4.7
).
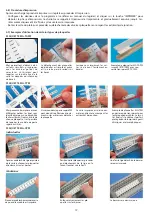
– Position the sheet by hand, fi tting its holes fully over the corresponding locating pins on the template; the side to be printed
must face upwards (See FIGS. B and C).
Once loaded, the sheet must be fl at, square, clean and without protrusions, bends or kinks; this allows correct positioning
of the print head during the printing cycle.
4.7.2) Position media sheets on the other support templates
To position media sheets proceed as follows:
– Press the BLUE button (4) to open the carriage already equipped with the template
(See section 4.7)
.
– Position the sheet by hand such that the open ‘fi rst’ row of tags/markers is nearest to MG3 with the locating lugs on the
underside of the sheet inserted fully into the corresponding holes in the template (See FIGS. B and C).
Once loaded, the sheet must be fl at, square, clean and without protrusions, lifted or bent components; this allows correct
positioning of the print head during the printing cycle.
4
Template
MG2-PLT
Template
MG2-PWC
Templates
MG2-QTB
MG2-LTB
MG2-WTB
MG2-STB
MG2-CTB
MG2-MTB
MG2-PTD
MG2-ETB
MG2-PSP
Open ‘fi rst’ row of tags/
markers should be nea-
rest to MG3
Open ‘fi rst’ row of tags/
markers should be nea-
rest to MG3
FIG. B
FIG. C
4
Summary of Contents for Markingenius MG3
Page 2: ... 2 FIG 1 BILD 1 ...
Page 55: ... 55 ...


