Cellofoam PERMAPORT XPRESS Assembly, Installation And Maintenance Instructions Download Page 21


21 

October 12 2020 

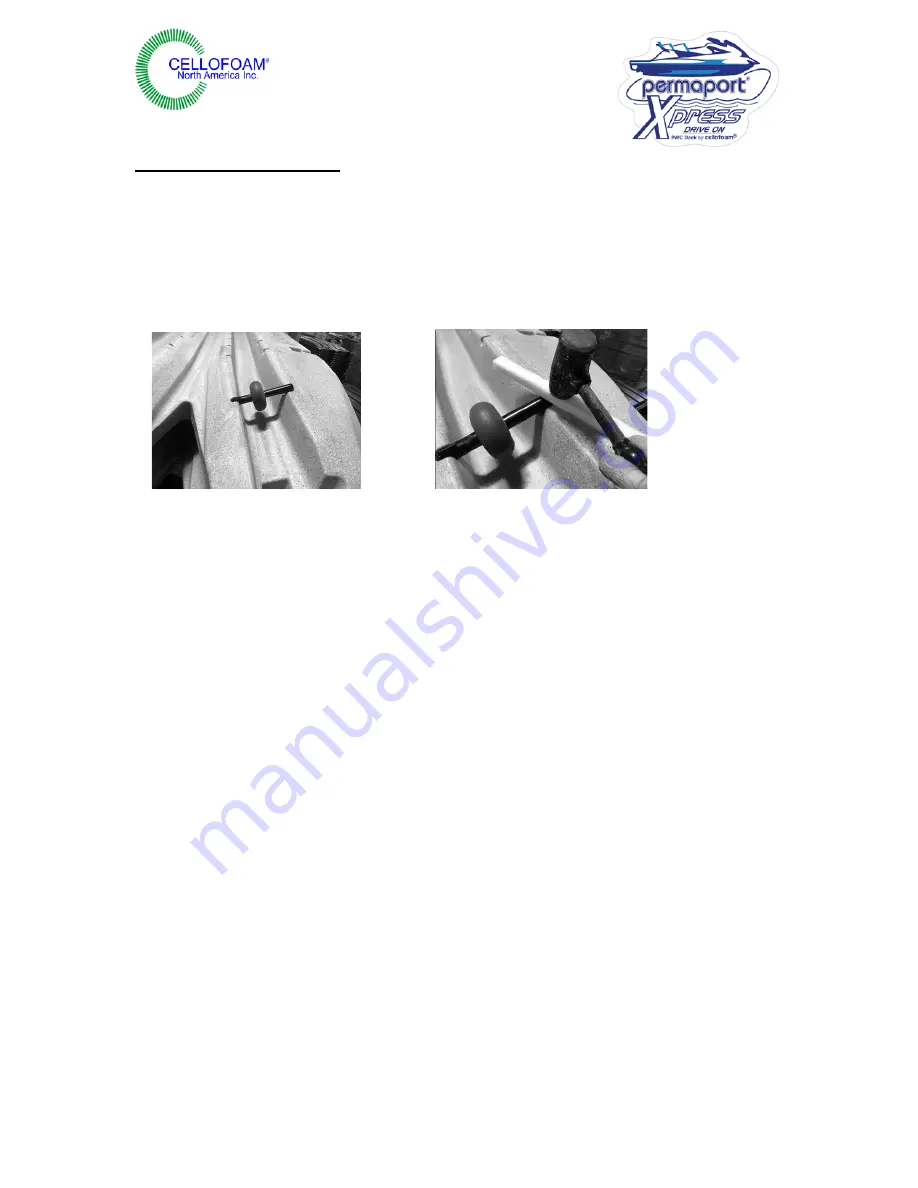
Re-Assembly of Wheels 


Slide one end of the assembly into a recess and then using a protective piece of wood or 
plastic drive the other end into the opposing recess using a mallet as shown. Do not apply 
lubrication as an aid to insertion. 


Summary of Contents for PERMAPORT XPRESS

Page 1: ...1 October 12 2020 PERMAPORT XPRESS ASSEMBLY INSTALLATION AND MAINTENANCE INSTRUCTIONS...

Page 2: ...stallation Considerations and Tools Required 4 Parts List for Permaport Xpress 5 Basic Assembly Instructions 7 Attaching Dock Hardware Front Mount 9 Special Considerations for Double Install 11 Consid...

Page 3: ...Use The Xpress has Heavy Duty Steel attachments for long life and durability These components are heavy and extend below the water line of the Xpress It is inadvisable to swim near under or from the X...

Page 4: ...rt be installed by a professional dock builder Failure to mount the port in accordance with the manufacturer s instructions will invalidate the warranty Tools required The Xpress port has been designe...

Page 5: ...e available before starting assembly Xpress Hull Including 14 Fitted Rollers and 6 Void Fillers Two Xpress Brackets Two Contoured Rollers Two Straight Rollers Four 6 x Stainless Steel Bolts Four 1 x S...

Page 6: ...Steel Washers Two Raised Washers and Plastic Caps Two Pipe caps One Lanyard One Xpress Step some models only Other Parts Required Not Included 2 Diameter Schedule 40 Galvanized Pipe Length to suit Du...

Page 7: ...mounting holes placed along the edges of the Xpress Select the holes to be used For a front mount use the two on the front edge For a side mount select two holes on the side edge the front hole and e...

Page 8: ...nsuring that there is a pair of contoured rollers on one bracket and a pair of straight rollers on the other Place a washer as shown between the bracket and the rollers as well as under the bolt head...

Page 9: ...brackets on this assembly Lag screws should not be used except in the position shown these must be 3 8 x 1 lag screws it is critical that bolts and washers are used to mount this assembly The Xpress s...

Page 10: ...nd the left hand sides these are the center lines of each of the Dock Brackets Alternatively mark one line 5 from the edge of where the Xpress is to be positioned and then a second line Dim A from the...

Page 11: ...of anyone in the water When joining them side by side additional consideration must be made for the selection of the dock Brackets There may be two different widths of dock bracket in the Hardware ki...

Page 12: ...Xpress ports side by side With Xpress Walk between If an Xpress Walk is being installed between two Xpress Ports then a space needs to be left between the Dock hardware to allow for the Xpress Walk T...

Page 13: ...rear is the preferential position but the position in the center of the Xpress is acceptable if the dock configuration makes it necessary to use that position After deciding on the second position to...

Page 14: ...e dock ensure that the bracket is firmly against the stringer and attach to the dock using screws or bolts in the top two holes Note If necessary chamfer the top front edge of the dock Repeat for the...

Page 15: ...necessary to use 2 lengths of 2 schedule 40 Galvanized Pipe that are at least 24 longer than the water depth when measured from the top of the Dock After installing the Dock Brackets position the Xpre...

Page 16: ...e front of the brackets as shown Individual dock conditions may make it difficult to bolt in all six positions however it is essential that the bolt marked in red is used Finally move the Xpress into...

Page 17: ...17 October 12 2020...

Page 18: ...to the length of the pipe Position the Xpress under the Dock Brackets as shown and slide the two lengths of pipe through the Dock Bracket and the Xpress brackets ensuring that they protrude at least 2...

Page 19: ...19 October 12 2020...

Page 20: ...e and are tighter than the rest of the rollers do not remove these rollers unless it is for service replacement in which case they will need to be replaced in the same configuration The rollers can be...

Page 21: ...bly of Wheels Slide one end of the assembly into a recess and then using a protective piece of wood or plastic drive the other end into the opposing recess using a mallet as shown Do not apply lubrica...

Page 22: ...Kit available from your dealership The joiner Kit is supplied pre assembled Joiner Kit Installation In order to join two Permaport Xpress s together you will need 1 joiner Kit Mount both Permaport Xp...

Page 23: ...counter clockwise to the point where the nut emerges from the bottom of the assembly Insert a joiner in both Permaport Xpress s as shown ensure that the joiner is fully seated use a mallet to drive h...

Page 24: ...Attachment fasteners are not provided with the step because of the various materials and dock designs that are in use The illustrations show a step being mounted to a wooden dock using lag bolts It m...

Page 25: ...e configurations Front Mounted Permaport Xpress Side Mounted Permaport Xpress The step can be mounted on either the front or the rear side positions or with the addition of a second step they may be i...

Page 26: ...lts use 3 8 diameter and size the length of the bolts to suit the deck it is being installed on Using the step with a side by side installation The step may be used with side by side installations ple...

Page 27: ...since it can be added to just the most convenient side It can be added to both sides forming a 98 wide port ideal for children or those with limited mobility It can also be added between two Xpress po...

Page 28: ...28 October 12 2020...

Reviews: