background image

10

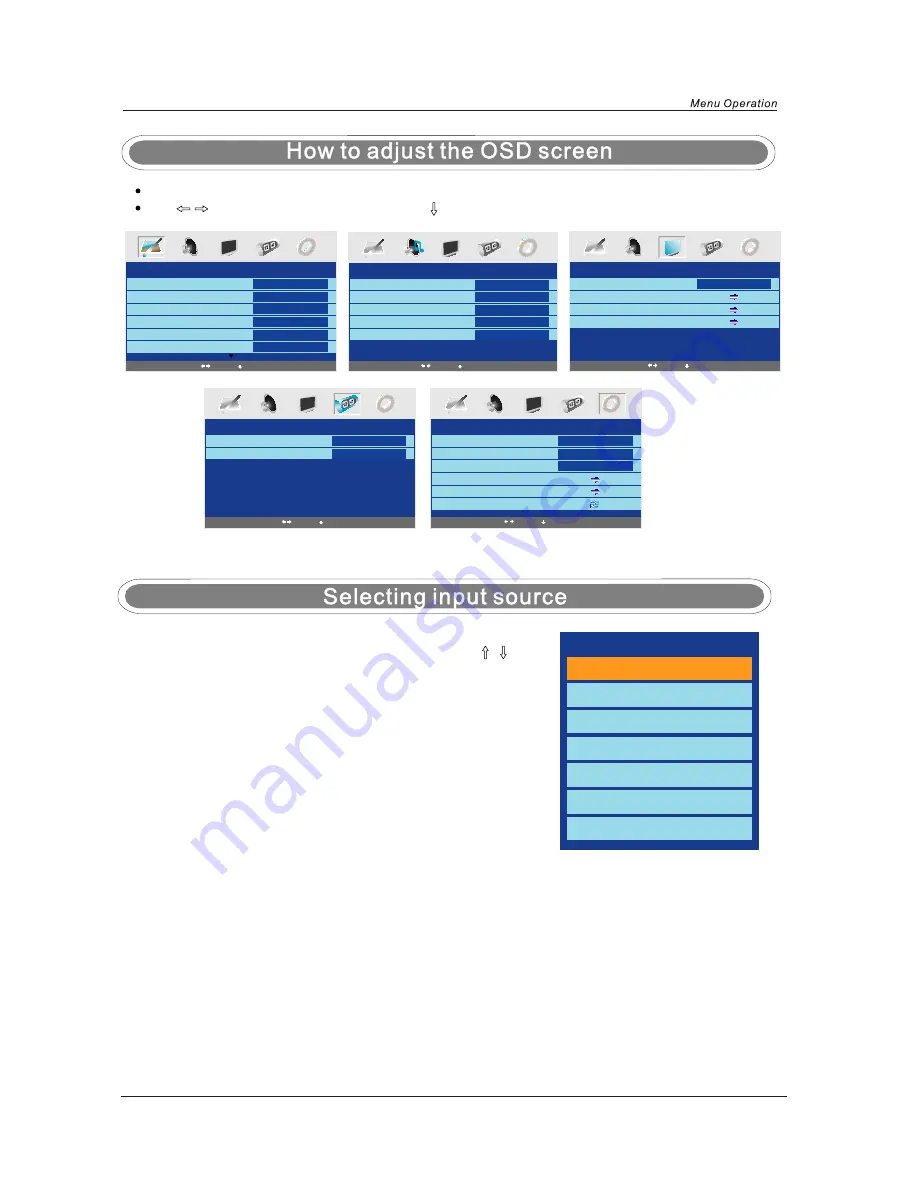
Press the 

MENU

 button to display the main menu.

Use

/

 buttons to select menu, and press 

button to enter the menu.

PICTURE

Picture Mode

Contrast

Brightness

Color

Tint

Sharpness

Personal

50

50

50

0

Normal

Select

Enter

TIMER

Sleep Timer

OSD Timer

0 Min

30Sec

SOUND

Volume

Sound Mode

Bass

Treble

Balance

20

Music

60

52

50

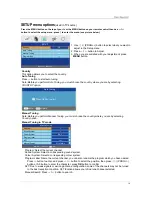
SETUP

Country

Auto tuning

Manual tuning

Program Edit

UK

FUNCTION

Language

Video Size

Blue Screen

Child Lock

First Time Installation

Reset

English

Auto

On

You can dispaly the input source menu by pressing the 

FUNCTION

button on  the remote control or on the the TV set, press 

/

button

to select, and press 

OK

 button to confirm.

Select

Enter

Select

Enter

Select

Enter

Select

Enter

TV

SCART

CVBS

S-VIDEO

VGA

HDMI

DVD

Summary of Contents for TP1906D

Page 1: ...19 Wide screen LCD TV with DVD Model No TP1906D ...

Page 2: ...CD screen is made with high precision technology and 99 99 or more of the pixels are effective black dots may appear or bright points of light red blue or green may appear constantly on the LCD screen This is not a malfunction ...

Page 3: ...on Basic TV operation PICTURE menu options SOUND menu options TIMER menu options FUNCTION menu options SETUP menu options DVD operation 3 4 4 5 6 7 8 9 9 10 11 12 12 13 14 15 16 DVD System Operation 17 19 Disc care 20 SimpleTroubleshooting Techincal Specifications 21 22 1 2 Caution Safety Information ...

Page 4: ...posal of this Product This unit is a CLASS 1 laser product This product uses a visible laser beam which could cause hazardous radiation exposure Ensure the recorder is operated as instructed Do not remove any covers or look into the DVD drawer opening whilst power is applied Do NOT modify or adjust any controls that may affect laser emissions Should the appliance become faulty consult a qualified ...

Page 5: ...throoms steamy kitchens or near swimming pools x Pull the plug out immediately and seek professional help if the mains plug or cable is damaged liquid is spilt onto the set or if it is accidentally exposed to water or moisture anything accidentally penetrates the ventilation slots the set doesn t work normally Do NOT remove the safety covers There are no user serviceable parts inside You may inval...

Page 6: ...Unit and Accessories Power cable Unit and Accessories Warranty Card Warranty Card Quick Start Guide Quick Start Guide User s Manual User s Manual ...

Page 7: ...ress to display the input source menu see page 10 Buttons for DVD operation Please insert a 12cm disc according to the silk POWER NEXT Play the next track or chapter PREV Play the previous track or chapter EJECT Eject the disc PLAY Play the disc playing PAUSE Pause the disc playing STOP Stop the disc playing LED Indicator Indicator on Red Standby mode Indicator on Green Power on mode ...

Page 8: ...5 Getting Started COAX out TV Signal Output to Audio amplifier DVD TOGGLE SWITCH Turn on the AC power ...

Page 9: ...mputer output Connect to the composite terminal of your DVD VCR COAX out S Video IN Video IN AUDIO L R IN PC Audio IN Headphone RF Connect to power supply SCART Connect to the HDMI of your DVD or other equipment Audio signal input for AV S Video signal input Video signal input PC audio input Connect it to your headphone or other audio equipment Connect to antenna or cable source Output to Audio am...

Page 10: ...To tune in your TV FAV Means favorite to display the favorite channel list defined by you EXIT Exit the OSD menu MUTE Mutes the Audio DISPLAY Display brief information concerning the current channel you are viewing Cursor left right up down Cursor buttons used in menus OK CONFIRM BUTTON for menu VOL Adjust the volume PROG Scan through channels FUNCTION Press to display the input source menu see pa...

Page 11: ...y pause DVD program stop DVD program 0 9 Choose channel directly Number buttons for DVD PICTURE Select the picture mode SOUND Select the sound mode Timer Standby timer ASPECT Press to change the display mode of the screen POWER OFF FUNCTION STANDBY PROG VOL TEXT HOLD MENU EXIT QUICK START MUTE SUBPAGE REVEAL PICTURE SOUND TIMER ASPECT DISPLAY FAV OK 1 2 3 4 5 6 7 8 9 0 SETUP ZOOM SUBTITLES ...

Page 12: ...ch UK English OK Cancel Select Adjust 1 Using the CH on the front panel or PROG on the remote control Press CH PROG to increase channel number Press CH PROG to decrease channel number 2 Using 0 9 digital buttons and button Press button then the screen will display press again it will become When it displays you should then press a unmber of 0 9 to play the channel you desired When it displays you ...

Page 13: ...olume Sound Mode Bass Treble Balance 20 Music 60 52 50 SETUP Country Auto tuning Manual tuning Program Edit UK FUNCTION Language Video Size Blue Screen Child Lock First Time Installation Reset English Auto On You can dispaly the input source menu by pressing the FUNCTION button on the remote control or on the the TV set press button to select and press OK button to confirm Select Enter Select Ente...

Page 14: ...e in NTSC mode Sharpness Select sharpness mode of the picture Colour Temperature in VGA mode Select an optimum color temperature mode to suit your eyes for viewing among Normal Warm and Cold DNR If the broadcast signal received is weak you can select the DNR option to reduce the video noise level between Off Low Mid and High In this manual the settings shown on the OSD On Screen Display may be dif...

Page 15: ...ly into standby mode after a specified period of time The period of time for automatic switch off can be selected in steps 15 30 45 60 75 90 105 120 and 0 Min Off You can also select the automatic sleep time by pressing the TIMER button on the remote control repeatedly OSD Timer You can select the time period for OSD display to remain on the screen such as 5Sec 10Sec 15Sec 20Sec 25Sec and 30Sec SO...

Page 16: ...IN Code Set pin code Old PIN Code The default is no password press OK to confirm If the Pin code has been changed you must enter the present code New PIN Code Enter the new password Enter Again Enter the new password and press OK to complete the change FUNCTION menu options Select Adjust Child Lock Child Lock Key Lock Change PIN Code Off Off Select Adjust Change PIN Code Old PIN Code New PIN Code ...

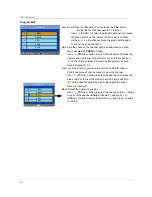
Page 17: ...ning Program Edit UK Select Adjust Auto tuning Press OK key to start Enter Return OK MENU Program Select the current channel Sound System Select a corresponding sound system Colour System Select a corresponding colour system Program Label Name the current channel you can also rename the program which you have named Press ɺ button to enter and press ɺ ɻ button to select the position then press ɼ ɽ ...

Page 18: ... press the blue button again to cancel Such as channel 5 Move Adjust the channel s position Use PROG button to select the channel press button to pull out the channel label as channel 3 and press PROG button to select the position you like press button to confirm Program Edit Channel list Flags X X X Skip Lock Move 1 BBC1 2 BBC2 3 ITV1 4 CH4 5 CH5 Favorite Favorite Set favorite channels You could ...

Page 19: ... page Disc Type Track the playing track total tracks Mute PBC Repeat Mode Elapsed Time of the Playing Track Press the button again to show the second page Language the serial number of playing language the amount of optional languages or Off Language Type Audio Type Subtitle the serial number of playing subtitle the amount of optional subtitles or Off Press the button for the third time the displa...

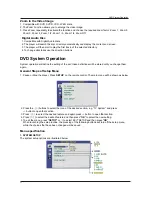
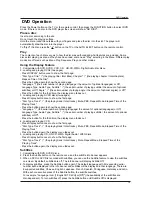
Page 20: ...en press OK When launching the setup routine the pressing of the following buttons will turn off the setup menu while the choices that have been changed will be saved Menu specification 1 SYSTEM SETUP The system setup options are illustrated below DVD System Operation 3 The player will then start to play the first track of the selected directory 4 To change directories use the direction buttons Zo...

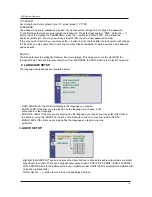
Page 21: ...DIF PCM is selected for amplifiers with no built in digital decoder TONE Use the ɼ ɽbutton to move the scroll and adjust the tone RATING The Rating feature is a rating limit feature like movie ratings This helps you to control what DVD the family watches There are 8 levels of selection from KIDS SAFE to ADULT Adult is the play all selection TV SYSTEM According to the Color system of your TV select...

Page 22: ...TAL SETUP The video setup options are illustrated below DYNAMIC RANGE Use the ɼ ɽbutton to move the scroll and adjust the dynamic range DUAL MONO Choose the mode of the audio output There are four modes STEREO MONO L MONO R MIX MONO ...

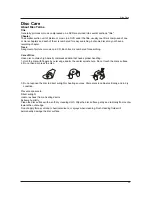
Page 23: ...h density compressed data that needs proper handling 1 Hold the disc with fingers by outer edge and or the center spindle hole Do not touch the discs surface 2 Do not bend or press the disc 3 Do not expose the disc to direct sunlight or heating sources Stere discs in cabinet vertically and in dry condition Prevent exposure to Direct sunlight Heat or exhaust from a heating device Extreme humidity C...

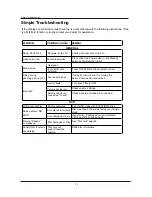
Page 24: ...xternal leads not connected if used Check all external leads are connected DVD Will not accept disc DVD not selected Select DVD mode with FUNCTION button Disc placed incorrectly Disc must have mirror side facing you if single sided Screen shows NO DISC Disc damaged or dirty Inspect disc If damaged you must discard If dirty see Disc care page 20 20 Picture Freezes or breaks up Disc damaged or dirty...

Page 25: ... TV TVSystem PAL SECAM BG DK I Screen size 19 diagonal Resolution 1440x900pixels RGB Aerial input 75 unbalanced Audio output power 2x3 W Remote control Type Control distance Control angle Batteries Dimensions Weight infrared 5m 30 horizontal 2 x 1 5 V size AA 48 x 168 x24 mm 70 g without battery ...

Page 26: ......
Reviews: