background image

13

6. CONFIGURATION OF THE LCD

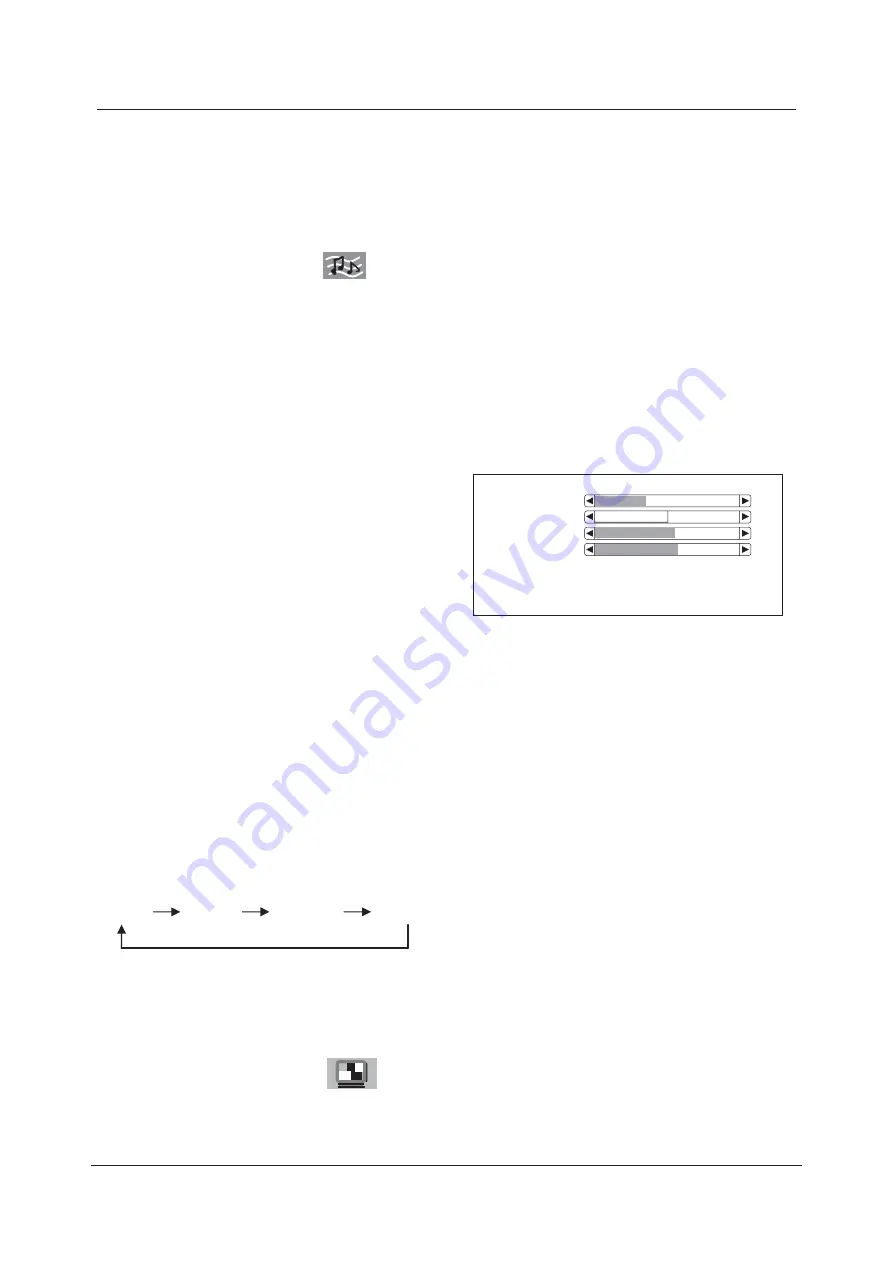
6.1 Enter sound menu

1. Press TV MENU key to open the main menu
2. Press

.

◄/► to select:

3. Press ▼ enter setting sound menu, the outline border turns red.
4. Press ▲/▼ to select option in the sound menu.
5. After setting, press TV MENU to quit. Or wait for few seconds it will quit

automatically.

Options:

1. Volume
Press

to decrease volume

Press

to increase volume

2. Balance
Press

to emphasize left speaker

Press

to emphasize right speaker.

3. Bass
Press

to decrease lower-pitched sounds

Press

to increase lower-pitched sounds

4. Treble
Press

to decrease higher-pitched sounds

Press

to increase higher-pitched sounds

5. AVL
Press

to

on/off Auto Volume Level

6. Preset
Press

to select sound mode

Remark:
Voice

Music

Theatre

Personal

.

.

.

.

.

.

.

◄/►

turn

.

◄/►

.

6.2 Enter picture menu

1. Press MENU key to open the main menu

2. Press

to select:

3. Press

enter setting picture menu, the outline border turns green.

.

◄/►

Volume
Balance
Bass
Treble
AVL

On

Preset

Personal

Summary of Contents for L2232AF

Page 1: ...Please keep this operation manual for further reference 22 Digital LCD TV USER S MANUAL Model L2232AF WITH DVD DVB T COMBO ...

Page 2: ...ection YPbPr Connection HDMI Connection 6 7 8 19 19 5 TV DVB DVD COMBO REMOTE CONTROL 10 11 Remote control instructions in TV mode Remote control instructions in Remote control instructions in DVB mode Remote control instructions in DVD mode TELETEXT mode 6 CONFIGURATION OF THE LCD 13 15 15 Enter sound menu Enter picture menu Enter Channel swap sort menu Enter setting menu Enter channel menu Batte...

Page 3: ...w Next EPG Timers Settings TROUBLE SHOOTING AND ADVICE SPECIFICATIONS 11 12 20 20 21 22 24 25 26 27 26 27 31 33 34 Basic operation MP3 JPEG Playback DVD Function General setup System Setup Language Setup Audio Setup Dolby Digital Setup 2 DVD OPERATION 9 32 30 ...

Page 4: ...sion is damaged do not install it and contact your dealer Check that you have all the accessories according to the model 2 SAFETY PRECAUTIONS Preparation Put the Television on a stable surface If you have a wall mount check that it is secure Do not place any material on the Television Do not block or cover the ventilation openings on the Television Minimum distances 10cm 20cm 10cm 5cm ...

Page 5: ...at sources Cleaning and maintenance Unplug the Television before cleaning it Do not use solvents or petrol based fluids to clean the Television with a soft dry cloth Departure in holidays During a thunderstorm or while leaving the Television unused for long periods disconnect the ariel if outdoor and mains plug ...

Page 6: ...SOURCE MENU P P V V POWER 5 3 Front Back Connections of LCD ...

Page 7: ...GS 4 1 Power Cord Connection AC POWER SWITCH Connect the power cord correctly as shown Press the POWER switch of your Television to switch on the Television The power indicator on the front panel lights up in red 4 2 S Video Connection ...

Page 8: ...7 4 3 SCART Connection 4 4 PC INPUT Connection ...

Page 9: ...8 4 5 YPbPr Connection 4 6 HDMI Connection ...

Page 10: ... Press to cycle through the different sound settings SLEEP Lets you select amount of time before your Television turn itself off automatically TV DVB SCART S VIDEO DVD YPbPr PC SOURCE Press to cycle through the input source in following HDMI AUDIO I II Press to search the NICAM modes TV MENU Brings up the main TV menu to the screen THUMBSTICK OK Allows you to navigate the on screen menus and adjus...

Page 11: ...ng from any menu SUBPAGE TELETEXT Subpage MIX TV and TXT pictures are mixed together in transparent background CANCEL TELETEXT CANCEL HOLD Freeze the current page SIZE Toggles the display between half top page half bottom page and normal page SUBTITLE To display subtitle REVEAL Reveal or hide the hidden words COLOR BUTTONS Select 4 Preferred TELETEXT page NUMBER BUTTONS Press 0 9 to select a telet...

Page 12: ...llows you to switch between default and favourite lists INFO Shows information about the current channel LANGUAGE Shows the list of audio languages available for the current channel COLOR BUTTONS Color buttons respectively red green yellow and blue used in a few sub menus TEXT Switch On or Off the DVB TELETEXT mode NUMBER BUTTONS Press 0 9 to select a channel TV RADIO When watching a channel allow...

Page 13: ...s various camera angles for certain scenes or passages on the DVD during playback A B This button enables you to repeat a selected section from the disc ZOOM In play state press ZOOM the player will zoom in the picture one time SUBTITLE Select a different subtitle language the DVD disc must have the subtitle you selected D DIS Press to display the DVD information of DVD mode Jump to previous and n...

Page 14: ...olume 2 Balance Press to emphasize left speaker Press to emphasize right speaker 3 Bass Press to decrease lower pitched sounds Press to increase lower pitched sounds 4 Treble Press to decrease higher pitched sounds Press to increase higher pitched sounds 5 AVL Press to on off Auto Volume Level 6 Preset Press to select sound mode Remark Voice Music Theatre Personal turn 6 2 Enter picture menu 1 Pre...

Page 15: ...ghtness Contrast Colour Sharpness Tint Noise Reduction On Tint Noise Reduction On Dyn skin tone On White tone Normal Preset Personal Zoom 16 9 10 Zoom Press to change zoom mode as follows 16 9 Expand Auto 4 3 ...

Page 16: ...tion 6 4 Enter Setting menu No Portugués Italiano Germany Italy turn off 1 CH01 2 3 4 5 CH02 CH03 CH04 Ch05 6 7 8 9 10 CH06 CH07 CH08 Ch09 11 13 14 15 Move Delete Show indicator On Language English Country Gr Britain Child lock Timers Teletext lang Pan European Lock Off Lock code 0000 A B C 6 3 Enter Channel swap sort menu 1 Press TV MENU key to open the main menu 2 Press to select 3 Press enter c...

Page 17: ...s as follows The timer will be activated and a symbol will show on the screen automatically after the predetermined period of time Off timer Press No key to set the off time The timer will be activated and the Television will turn off automatically after the predetermined period of time Switch timer Press No key to set the time when you want to switch program Then select Switch program press No ke...

Page 18: ...g menu the outline border turns blue 4 Then press to select option in the channel setting menu 5 After setting press TV MENU to quit Or wait for few seconds it will quit automatically 1 Program nr Press to select channel number 2 Program name Press no key to name program 3 Colour system Press to select colour system Remark Auto PAL 443 SECAM 4 Sound system Press to select sound system Remark Auto ...

Page 19: ...anual search begin a searched program will be saved automatically 7 AFC Press to turn on off automatic frequency control 8 Skip Press to turn off on skip function 9 Lock Press to turn off on menu lock Sound system Autostore Frequency 049 75 Mhz AFC On Skip Off Lock Off Auto ...

Page 20: ...sure correct polaritiesas per and marks on the battery and within the battery compartment 3 Replace the battery cover To prevent battery leakage which may result in bodily harm or damage to the remote 1 Install all batteries correctly and as marked on the remote control 2 Do not mix batteries OLD and NEW or CARBON and ALKALINE etc 3 Remove batteries when the remote is not used for a long time ...

Page 21: ... SPORTS 35 Five US INFO 20 Support for television sets with aspect ratio of 4 3 and 16 9 is provided The user may set aspect ratio using an option on the Menu In DVB mode press D Menu Settings Configuration TV Type to change aspect ratio When the system is first switched on the DVB T Turn Key Solution attempts to configure itself for the first time This is called First Time Installation The user i...

Page 22: ... background of the favourites dialog The favourites mode can be enabled from the Configuration dialog in the D Menu The user cannot select a favourites list that contains no services When a user selects a favourites list all EPG s will show only those services in that favourite list When the favourites mode is enabled the program up and down buttons on the remote control will only select those ser...

Page 23: ...can be set for the next program on each service a user highlights the next program that they wish be reminded of and presses select A clock icon is displayed next to those next programs that have reminders set The Now Next Electronic Program Guide cannot be accessed if there are no channel available Extended Schedule EPG 8 Day Electronic Program Guide with Timeline Extended Schedule EPG informatio...

Page 24: ...lighted program on the schedule is displayed in the information panel The user may change the start time of the schedule information displayed for a channel by either 30 minutes or an entire day In addition the user may also change the total time shown by a schedule in 30 minute steps between 30 minutes and 3 hours the default total time is 90 minutes The feature to change the total time shown on ...

Page 25: ...ice for which the tuner was set is selected At the end of a timer event the application will return to standby mode If the user attempts to change the service enter the Main Menu or view an Electronic Program Guide whilst a timer is running a dialog will be displayed asking the user if they wish to cancel the timer Up to five program timers may be set at any one time The user may set a timer to se...

Page 26: ...control is 0000 Language A languages dialog is provided as an option in which the user may set System Audio and Subtitle Language here the user can set the preferred and the current language of both the audio and subtitles By setting the current language the user can choose from the languages available for a particular selected service Here only the languages available for the current service will...

Page 27: ...rt from top Start from bottom Start from left Start from right Start from upper left corner Start from upper right corner Merge from left right Horizontal blades Vertical blades Merge form 4 corners Random Playback Slide effect OFF When play or pause with picture playback you may use navigation butoons to flip rotate the picture button to flip horizontally button to flip vertically button to rotat...

Page 28: ...s button to exit DVD SETUP EXIT SETUP ENTER DVD System Setup NTSC This format is used by some other countries e g USA PAL This is the format used in the UK and the default setting AUTO This format can be used if your is capable of both PAL and NTSC formats DVD NTSC PAL AUTO TV SYSTEM SCREEN SAVER TV TYPE PASSWORD RATING DEFAULT EXIT SETUP TV SYSTEM SCREEN SAVER TV TYPE PASSWORD RATING DEFAULT EXIT...

Page 29: ...ange password could be done To edit the Rating setting please enter default password 0000 by numeric buttons then press button to confirm ENTER To change password input any 4 digit number when the lock is unlocked Once the 4 digit number is entered that will be your new password ON OFF 4 3PS 4 3LB 16 9 TV SYSTEM SCREEN SAVER TV TYPE PASSWORD RATING DEFAULT EXIT SETUP TV SYSTEM SCREEN SAVER TV TYPE...

Page 30: ...D SAFE to ADULT NOTE Only editable when password is unlocked And only can function when password is locked It does not however reset either the Password or the Rating setting 1 KID SAFE 2 G 3 PG 4 PG13 5 PG R 6 R 7 NC 17 8 ADULT RESTORE TV SYSTEM SCREEN SAVER TV TYPE PASSWORD RATING DEFAULT EXIT SETUP TV SYSTEM SCREEN SAVER TV TYPE PASSWORD RATING DEFAULT EXIT SETUP TV SYSTEM SCREEN SAVER TV TYPE ...

Page 31: ...ween different languages ENGLISH GERMAN SPANISH FRENCH PORTUGUESE ITALIAN Press button to confirm ENTER SUBTITLE LANGUAGE Use navigation buttons to select the setup icon press button to confirm There are 7 languages for you selection press buttons to toggle between different languages Press button to confirm SUBTITLE LANG ENTER ENTER ENGLISH GERMAN SPANISH FRENCH PORTUGUESE ITALIAN ENGLISH SPAN FR...

Page 32: ...different languages ENGLISH GERMAN SPANISH FRENCH PORTUGUESE ITALIAN Press button ENTER to confirm Audio Setup ENGLISH SPAN FR POR GERMAN ISH ENCH TUGUESE ITALIAN 4 2 0 2 4 OSD LANGUAGE AUDIO LANG SUBTITLE LANG MENU LANG EXIT SETUP KEY EXIT SETUP AUDIO setup The audio setup options are illustrated below KEY Use the Up and Down arrow button to move the scroll and adjust the KEY ...

Page 33: ...is biggest You can select four different audio output STEREO MONO L MONO R MIX MONO The audio out description of these Selections is shown in the table below MODE LEFT SPEAKER RIGHT SPEAKER STEREO STEREO L STEREO R L MONO L MONO L MONO R MONO R MONO R MONO MIX MONO L MONO R MONO L MONO R MONO DUAL MONO FULL OFF 6 8 4 8 2 8 DYNAMIC RANGE MONO L MONO R MiX MONO STEREO DUAL MONO EXIT SETUP DYNAMIC RA...

Page 34: ...33 11 TROUBLESHOOTING AND ADVICE P if you can solve the troubleshooting by yourself lease check the Trouble Shooting Guide ...

Page 35: ...050 300cd 16 10 640X480 X 1024X 60HZ 800 600 60HZ 768 60HZ Power Source Disc Physical Format DVD Video Output Format DVD CD VCD MP3 JPEG CDR CDRW DIVX PAL NTSC MPEG 2 ISO IEC 13818 MPEG 1 JPEG 525 L X190 W X430 H mm 5 0kg Video Decompression Audio Video S Video PC ...

Reviews: