


Wireless Network Setup
Use the Network Setup when connecting
y
our TV to a wireless network.
1.
Plug the connected devices into the mains socket before switching on the TV.
2.
Press the
STANDBY
button on the right side
of the TV or the
button on the remote control to turn on
y
our TV.
3.
Press the
I-Player
button on the remote control to enter
i-Player
.
When
y
ou
enter
i-Player
there is a dela
y
whilst the network card
boots. Please be patient.
5.
If
y
ou have
t
y
connecting or there is a "No Internet Connection"
message on the screen. Press the
IP
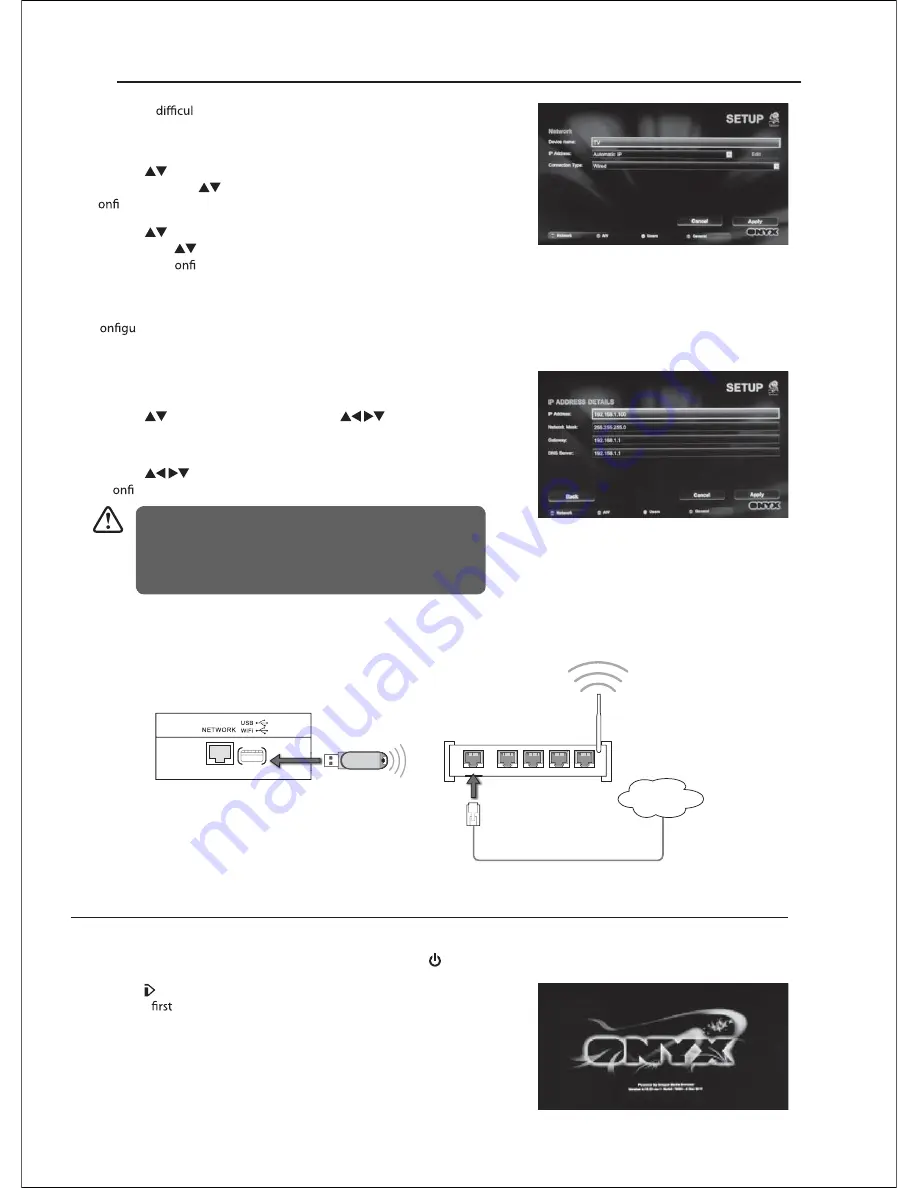
button on the remote control. The
Network SETUP
menu will be displa
y
ed.
6.
Press the
buttons to select
Connection Type
. Press the
OK
button
and then press the
buttons to select
Wired
. Press the
OK
button to
c
rm.
7.
Press the
buttons to select
IP Address
. Press the
OK
button and
then press the
buttons to select
Automatic IP
or
Fixed IP
. Press the
OK
button to c
rm.
Automatic IP
Select this if the network supports is a DHCP (D
y
namic Host
C
ration Protocol). The IP address will automaticall
y
be determined.
Fixed IP
Select this if there is no DHCP server on the network or
y
ou want to set
the IP address manuall
y
.
Press
the buttons to select
Edit
. Use the
buttons to navigate
IP Address / Network Mask / Gateway / DNS Server
and then press the
0-9
buttons to enter
y
our IP address details.
8.
Press the
buttons to select
Apply
and then press the
OK
button
to c
rm.
Connecting to a Wireless Network
Use the Wireless LAN adapter to connect the TV’s USB / WIFI socket.
In wired mode the TV is connected to the router automaticall
y
as soon as the connection is made. You will see a message
"Not connected" change to "Connected" at the top of the
screen. This means
y
ou are connected to
y
our local network.
LAN1
WAN
LAN2
LAN3
LAN4
Rear Left Side View of TV
Wireless Router
Wireless LAN Adapter
(not included)
Internet
Summary of Contents for C32227DVBIPTVT2-LED
Page 1: ...C32227DVBIPTVT2 LED ...
Page 2: ......
Page 3: ... ...
Page 7: ...3 ...
Page 12: ......
Page 13: ...1366 768 ...
Page 14: ... ...
Page 15: ......
Page 16: ......
Page 17: ......
Page 18: ... Just scan ...
Page 19: ......
Page 20: ... ...
Page 21: ... ...
Page 22: ... ...
Page 23: ... ...
Page 24: ...3DXVH 79 3DXVH79 ...
Page 25: ...3DXVH 79 3DXVH 79 3DXVH 79 ...
Page 26: ...3DXVH 79 USB WiFi NETWORK ...
Page 27: ... ...
Page 28: ... ...
Page 29: ... ...
Page 30: ... ...
Page 39: ... ...
Page 40: ... ...
Page 41: ... ...
Page 42: ... ...
Page 43: ... ...
Page 44: ... ...
Page 45: ... 3 ...
Page 46: ... 4 ...
Page 47: ... 5 ...
Page 48: ...46 RJ ...
Page 49: ...4 ...
Page 50: ...48 ...
Page 51: ...4 ...
Page 52: ......


