background image

10

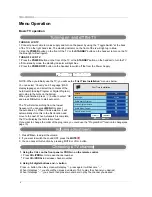
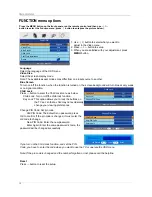
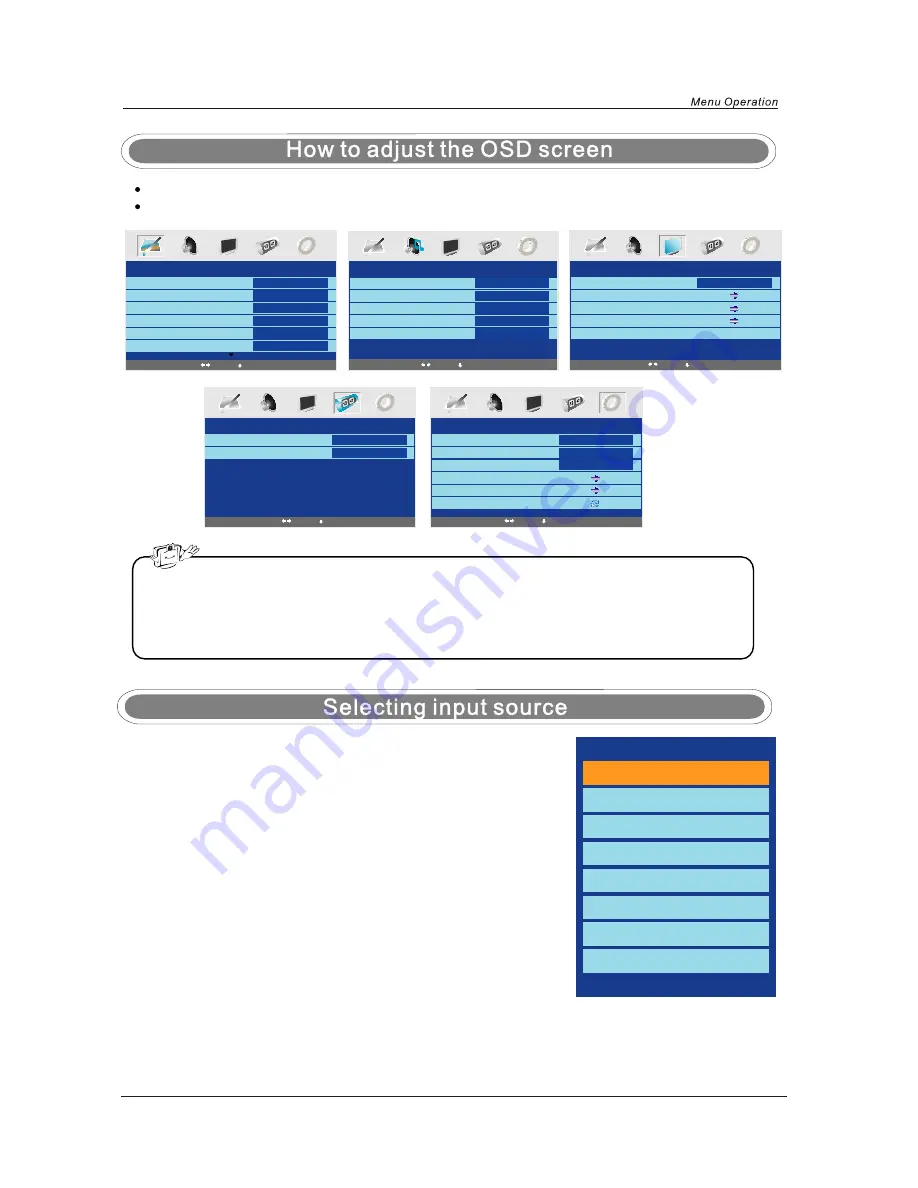
Press the 

MENU

 button to display the main menu.

Use

ɻ

/

ɺ

 buttons to select menu, and press 

ɽ

button to enter the menu.

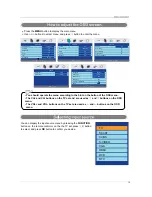
- You should operate the menu according to the hint on the button of the OSD menu.
- The CH+ and CH- buttons on the TV set and  are used as 

ɼ

 and 

ɽ

buttons on the OSD 

menu.

- The VOL+ and VOL- buttons on the TV set are used as 

ɺ

 and 

ɻ

buttons on the OSD 

  menu.

PICTURE

Picture Mode

Contrast

Brightness

Color

Tint

Sharpness

Personal

50

50

50

0

Normal

Select

Enter

TIMER

Sleep Timer

OSD Timer

0 Min

30Sec

SOUND

Volume

Sound Mode

Bass

Treble

Balance

20

Personal

50

50

50

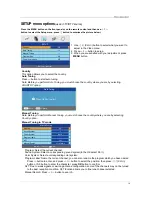
SETUP

Country

Auto tuning

Manual tuning

Program Edit

Common interface

UK

FUNCTION

Language

Video Size

Blue Screen

Child Lock

First Time Installation

Reset

English

Auto

On

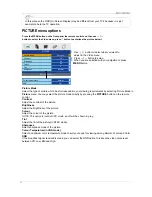
You can dispaly the input source menu by pressing the 

FUNCTION

button on  the remote control or on the the TV set, press 

ɼ

/

ɽ

button

to select, and press 

OK

 button to confirm you deside.

TV

SCART

CVBS

S-VIDEO

VGA

HDMI

DVD

DTV

Select

Enter

Select

Enter

Select

Enter

Select

Enter

Summary of Contents for C 2273F

Page 1: ...22 Wide screen LCD TV with DVD DVB Model No C 2273F ...

Page 2: ...CD screen is made with high precision technology and 99 99 or more of the pixels are effective black dots may appear or bright points of light red blue or green may appear constantly on the LCD screen This is not a malfunction ...

Page 3: ...Basic TV operation PICTURE menu options SOUND menu options TIMER menu options FUNCTION menu options SETUP menu options DVD operation 3 4 4 5 6 7 8 9 9 10 11 12 12 13 14 15 16 17 DVD System Operation 17 19 Disc care 20 SimpleTroubleshooting Techincal Specifications 21 22 1 2 Caution Safety Information ...

Page 4: ... recycled and reused This symbol means that electrical and electronic equipment at their end of life should be disposed of separately from your household waste Please dispose of this equipment at your local community waste collection recycling centre In the European Union there are separate collection systems for used electrical and electronic products Please help us to conserve the environment we...

Page 5: ...throoms steamy kitchens or near swimming pools x Pull the plug out immediately and seek professional help if the mains plug or cable is damaged liquid is spilt onto the set or if it is accidentally exposed to water or moisture anything accidentally penetrates the ventilation slots the set doesn t work normally Do NOT remove the safety covers There are no user serviceable parts inside You may inval...

Page 6: ...Unit and Accessory Power cable User s Manual Warranty Card Quick Start Guide Quick Start Guide Warranty Card ...

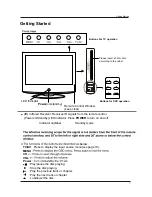
Page 7: ...ndicator on Blue Standby mode Press to display the input source menu see page 10 Play pause the disc playing Stop the disc playing Play the previous track or chapter Play the next track or chapter Load eject the disc Remote Control Window keep clear Power on standby LED Indicator Please insert a 12cm disc according to the Label Buttons For TV operation Buttons for DVD operation below ...

Page 8: ...5 Getting Started COAX out Common Interface TV Signal Output to Audio amplifier DVD Power switch ...

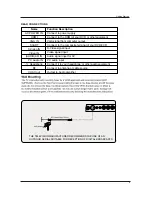
Page 9: ...dio IN Headphone RF Connect to power supply SCART Connect to the HDMI of your DVD or other equipment Audio signal input for AV S Video signal input Video signal input PC audio input Connect it to your headphone or other audio equipment Connect to antenna or cable source Output to Audio amplifier THE TELEVISION MANUFACTURER RECOMMENDS THE USE OF AN OUTDOOR AERIAL SUITABLE FOR RECEPTION OF DIGITAL B...

Page 10: ...e EPG To show the Electronic Program Guide during no menu state only SUBTITLES To switch the dialogue at the bottom of the screen Cursor left right up down Cursor buttons used in menus OK CONFIRM BUTTON for menu MENU System setup menu QUICK START To tune in your TV press the correct button FAV Means favorite to display the favorite channel list defined by you EXIT Exit the OSD menu MUTE Mutes the ...

Page 11: ...nu ZOOM adjust picture size in DVD mode SUBTITLES select DVD disc subtitle DVD fast forward DVD fast reverse DVD next chapter DVD previous chapter load eject DVD disc play pause DVD program stop DVD program 0 9 Choose channel directly Number buttons for DVD PICTURE Select the picture mode SOUND Select the sound mode Timer Standby timer ASPECT Press to change the display mode of the screen ...

Page 12: ...is function by pressing MUTE or VOL button Basic TV operation First time installation First Time Installation Country Language Delete Analog Program Analog Program Search Delete Digital Program Digital Program Search UK English OK Cancel Select Adjust 1 Using the CH on the front panel or PROG on the remote control Press CH PROG to increase channel number Press CH PROG to decrease channel number 2 ...

Page 13: ...olor Tint Sharpness Personal 50 50 50 0 Normal Select Enter TIMER Sleep Timer OSD Timer 0 Min 30Sec SOUND Volume Sound Mode Bass Treble Balance 20 Personal 50 50 50 SETUP Country Auto tuning Manual tuning Program Edit Common interface UK FUNCTION Language Video Size Blue Screen Child Lock First Time Installation Reset English Auto On You can dispaly the input source menu by pressing the FUNCTION b...

Page 14: ...htness Adjust the brightness of the picture Colour Adjust the colour of the picture NOTE This option is invalid in PC mode and it will be shown in gray Tint Adjust the tint of the picture in NTSC mode Sharpness Select sharpness mode of the picture Colour Temperature in VGA mode Select an optimum color temperature mode to suit your eyes for viewing among Normal Warm and Cold DNR If the broadcast si...

Page 15: ...the remote control Bass Adjust the level of the lower pitched sounds Treble Adjust the level of the higher pitched sounds Balance Adjust the audio output between left and right speakers Sleep Timer Select the sleep time to put automatically the TV in standby mode Timer can be selected as 15 30 45 60 75 90 105 120 and 0 Min Off You may select the sleep time by pressing SLEEP repeatedly OSD Timer Yo...

Page 16: ...entally change your viewing preferences Change PIN Code Set pin code Old PIN Code The default is no password press OK to confirm If the pin code is changed it must enter the old code to change New PIN Code Enter the new password Enter Again Enter the same password 2 twice the password will be changed successfully Press the MENU button on the front panel or on the remote control and then use ɺ ɻ bu...

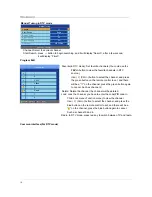
Page 17: ...ng Program Sound System Colour System Program Lable AFT Manual Search 99 I Auto Off 471 43MHz Select Adjust Input SETUP Country Auto Tuning Manual Tuning Program Edit Common Interface UK Select Adjust Auto tuing Press OK key to start Enter Return OK MENU Program Select the current channel Sound System Select a corresponding sound system In the UK select Pal I Color System Select a corresponding co...

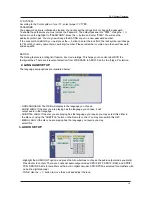
Page 18: ...ect the channel and press the green button on the remote control to set and there will be a on the channel press the green button again to cancel Such as channel 2 Delete Delete the channel the channel will be deleted Lock Lock the channel you have to enter the code PIN code in Child Lock menu Function menu to view the channel Useɼ ɽ CH button to select the channel and press the blue button on the...

Page 19: ...Type Track the playing track total tracks Mute PBC Repeat Mode Elapsed Time of the Playing Track Press the button again to show the second page Language the serial number of playing language the amount of optional languages or Off Language Type Audio Type Subtitle the serial number of playing subtitle the amount of optional subtitles or Off Press the button for the third time the display menu fade...

Page 20: ...en press OK When launching the setup routine the pressing of the following buttons will turn off the setup menu while the choices that have been changed will be saved Menu specification 1 SYSTEM SETUP The system setup options are illustrated below DVD System Operation 3 The player will then start to play the first track of the selected directory 4 To change directories use the direction buttons Zo...

Page 21: ...DIF PCM is selected for amplifiers with no built in digital decoder TONE Use the ɼ ɽbutton to move the scroll and adjust the tone RATING The Rating feature is a rating limit feature like movie ratings This helps you to control what DVD the family watches There are 8 levels of selection from KIDS SAFE to ADULT Adult is the play all selection TV SYSTEM According to the Color system of your TV select...

Page 22: ...TAL SETUP The video setup options are illustrated below DYNAMIC RANGE Use the ɼ ɽbutton to move the scroll and adjust the dynamic range DUAL MONO Choose the mode of the audio output There are four modes STEREO MONO L MONO R MIX MONO ...

Page 23: ...h density compressed data that needs proper handling 1 Hold the disc with fingers by outer edge and or the center spindle hole Do not touch the discs surface 2 Do not bend or press the disc 3 Do not expose the disc to direct sunlight or heating sources Stere discs in cabinet vertically and in dry condition Prevent exposure to Direct sunlight Heat or exhaust from a heating device Extreme humidity C...

Page 24: ...l try moving the aerial Check aerial connections Volume set too low Check volume settings No sound External leads not connected if used Check all external leads are connected DVD Will not accept disc DVD not selected Select DVD with FUNCTION button Disc placed incorrectly Disc must have mirror side facing you if single sided Screen shows NO DISC Disc damaged or dirty Inspect disc If damaged you mu...

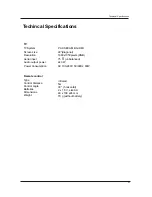
Page 25: ...TV TVSystem PAL SECAM BG DK I Screen size 22 diagonal Resolution 1680x1050pixels RGB Aerial input 75 unbalanced Audio output power 2x3 W Remote control Type Control distance Control angle Batteries Dimensions Weight infrared 5m 30 horizontal 2 x 1 5 V size AA 48 x 168 x24 mm 70 g without battery ...

Page 26: ......
Page 27: ...g Quantity Quantity Quantity Quantity Total Price Total Price Total Price Total Price WLB 901 39 99 29 99 5 00 L 1 22 99 12 99 1 50 TOTAL Postage Packing to the UK Mainland excluding Highlands Islands for costs to these non UK Mainland destinations please contact our orderline Please debit my card ___________________ I enclose a cheque made payable to Solutions 4 Today Ltd for ___________________ ...

Page 28: ...ased This bracket will fit the television you have just purchased This bracket will fit the television you have just purchased This bracket will fit the television you have just purchased all televisions from 14 all televisions from 14 all televisions from 14 all televisions from 14 24 24 24 24 TV Size 10 24 Weight Limit 15kgs Tilt Fixed Tilt Swivel VESA 75x75 100x100 Colour Silver Min Distance to...

Reviews: