background image

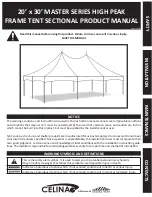
20’ x 30’ Master Series High Peak Frame Tent

www.GetTent.com / www.CelinaTent.com

PG.7

© 2013 Celina Tent Inc. 

SAFETY

MAINTENANCE

INS
TALLA
TION

CONT
AC

TS

PARTS / MINIMUM STAKING LAYOUT

20’ x 30’ Master Series High Peak Frame

Double Head Stake

Double Head Stake

Master Series Base Plates

30’

20’

5’

Peak 

Extension

Pole

Crown Adapter

F45MHPCA

Summary of Contents for MASTER SERIES

Page 1: ...uctural code unless specified Since weather is unpredictable the installer end user must incorporate their own good judgment common sense and knowledge of local conditions with the installation instru...

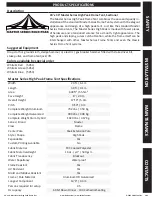
Page 2: ...mmer fitted with stake driver bit stake puller and frame tent jack lift Colors available by special order White Red 5051 White Green 5052 White Blue 5053 PRODUCT SPECIFICATIONS SAFETY MAINTENANCE INST...

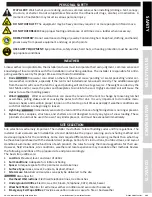
Page 3: ...R LIFT The equipment may be heavy and may require 2 or more people to lift and move DO NOT OVERREACH Keep proper footing and balance at all times Use a ladder when necessary DRESS PROPERLY Do not wear...

Page 4: ...cure the tent canopy structure or shelter to the site surface Celi na s responsibility is limited to the manufacture of the tent parts and materials It is the installer s responsibility not Celina s t...

Page 5: ...8 Black 10 Corner 4 Top View Side View Side Tee w Ring 6 Top View Side View 6 Way Crown 2 Crown Adapter 2 Master Series Base Plates 10 Top View Side View R Pin OR Pin Bail 72 OR A Ratchet Buckle with...

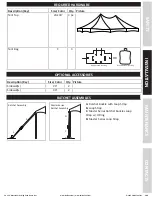
Page 6: ...tion Key Size Color Qty Picture Sidewall s 20 2 Sidewall s 30 2 OPTIONAL ACCESSORIES A Ratchet Buckle with Loop Strap B Loop Strap C Master Series Ratchet Buckles Loop Strap w O Ring D Master Series L...

Page 7: ...CelinaTent com PG 7 2013 Celina Tent Inc SAFETY MAINTENANCE INSTALLATION CONTACTS PARTS MINIMUM STAKING LAYOUT 20 x 30 Master Series High Peak Frame Double Head Stake Double Head Stake Master Series...

Page 8: ...e a pin in the alignment hole this keeps the rafter from moving too far onto the crown Slide the tubing onto the protrusion until it meets the pin c Align the placement hole in the crown with the hole...

Page 9: ...hile lacing the tent be sure to connect the rain flap to the rope covering the lace line This eliminates the need to crawl on the tent after it has been laced d Continue in this fashion until the thir...

Page 10: ...leg tubing over the longer protru sions on the master series base plates securing with a pin 16 Connect the O ring of the master series ratchet buckle C to the base plate hook mounted on the small tub...

Page 11: ...nside out and pull the strap through the loop to create a noose and pull tight over the stake Take the loop strap B attached to the tent and pull it through the reel bars slot of the ratchet ratchet b...

Page 12: ...flap until the lace line tie off is accessed b Untie knot and unlace the tent top section while disconnecting the rain flap 13 Fold and roll the tent top as tight as possible Remember not to stand or...

Page 13: ...es or holes Repair kits and tools are avail able online at www GetTent com or by contacting Celina Celina Tent Inc warrants that this product will be free from defects in material and workmanship for...

Page 14: ...400 STATE CENTER PHONE New York Dig Safely New York 800 926 7962 New York City Long Island One Call 800 272 4480 North Carolina North Carolina One Call 800 634 4949 North Dakota North Dakota One Call...

Reviews: