background image

4

Navigating the SkyScout

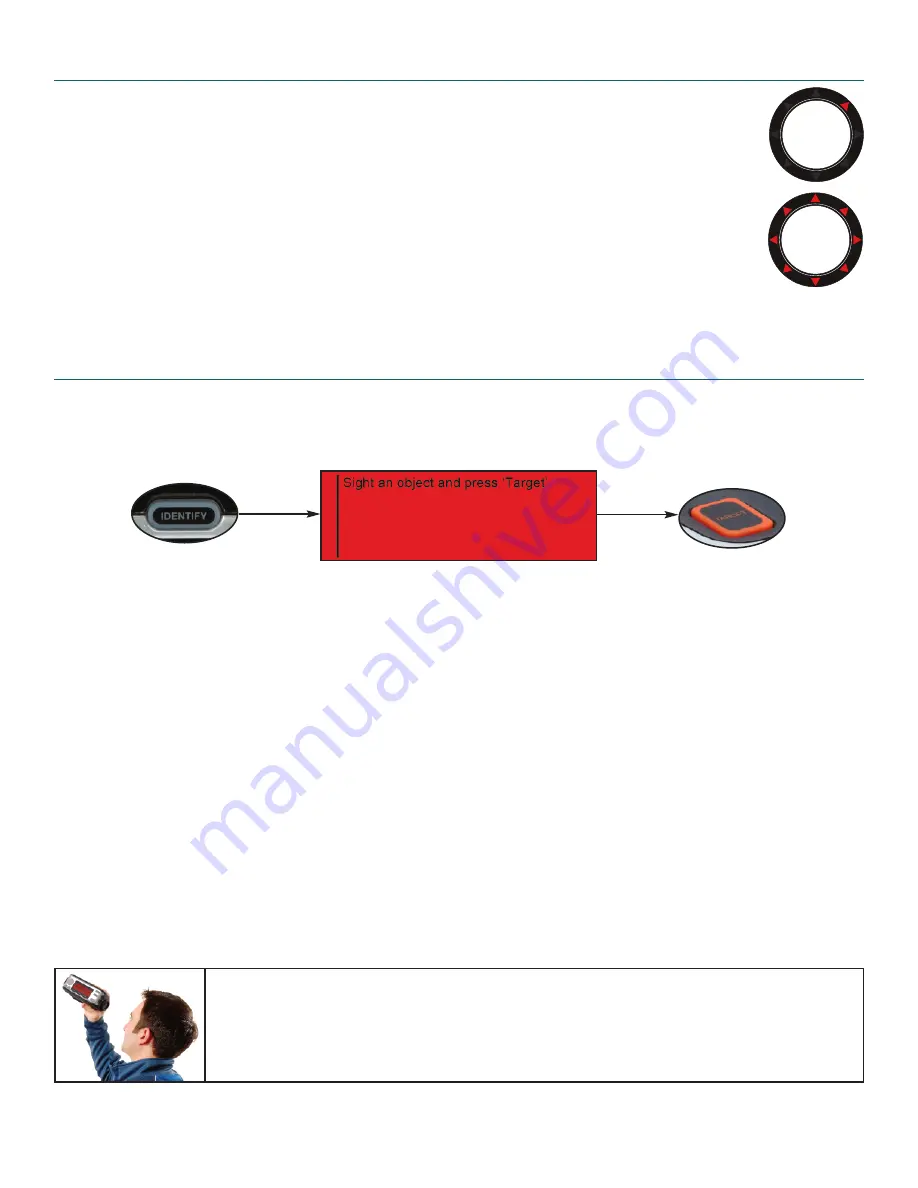
SkyScout uses two illuminated targeting rings and a series of eight direction arrows to help
you identify and locate objects. The targeting rings are located on each end of the
viewfinder to assist in alignment with celestial objects. 

To use SkyScout, hold it up so that the larger viewfinder window is pointed towards the
sky while you are looking through the smaller viewfinder window. The orange “Target”
button should be on top of the unit. To locate objects, SkyScout will illuminate the 
direction arrows inside the viewfinder to guide you to objects in the sky. As you get closer
to the desired object, the arrows will blink rapidly until the object is in the viewfinder. 
Once the object is positioned in the viewfinder targeting rings, all the direction arrows 
will light up at once. 

Identify Mode

To Identify Objects In The Sky

1. Press the Identify button on the control panel of SkyScout. 

The following message will appear.

2. Hold the SkyScout with the smaller viewfinder window closest to your eye and the larger window

facing out towards the sky.

3. While looking through the viewfinder, aim the SkyScout at the object in the sky you wish to identify.

4. Align the two illuminated targeting rings so that one fits evenly inside the other.

5. Center the desired object inside the illuminated rings and press the Target button on the top of the

SkyScout. When the target button is pressed, all eight of the direction arrows will briefly light up.

6. The screen will then display the name of the object you have targeted. If more than one object is

identified, the SkyScout will display all identified objects in order of their brightness.

7. Use the Menu Navigation Pad to select one of the following possible options for that object:

Audio description

- Listen to an audio narration about the displayed object (not available for 

all objects). 

Text description

- Read a text description about the displayed object (not available for all objects).

Scientific data

- View scientific data about the displayed object

Observing Tip

Since the SkyScout uses a zero-magnification viewfinder, it is not necessary to hold it close 
to your eye in order to see objects in the sky. It is often easiest to find objects if it is held at 
a comfortable distance from your eye. This allows you to see both the object in the viewfinder
as well as the surrounding star patterns in the vicinity.

Summary of Contents for Sky Scout

Page 1: ...USER MANUAL...

Page 2: ...n pg 6 Exploring Constellations and Asterisms pg 7 Field Guide pg 7 GPS Mode pg 8 a Viewing GPS Information Settings Menu pg 8 9 a About menu b Enter Time Location Information Manually c Updating Time...

Page 3: ...UTTONS Quickly access various on screen menus USB PORT Download database updates from your PC USB cable included 3 5mm HEADPHONE JACK for audio presentation headphones included VIEWFINDER with LED dir...

Page 4: ...options select options or return back to the previous screen You can use the Menu Navigation Pad not only to access the same menus as the quick access keys but also to explore the other features of t...

Page 5: ...ng through the viewfinder aim the SkyScout at the object in the sky you wish to identify 4 Align the two illuminated targeting rings so that one fits evenly inside the other 5 Center the desired objec...

Page 6: ...alphabetical list of all Constellations as well as a guided tour of each star in the constellation See Exploring Constellation and Asterisms section below Deep Sky Based on the popular Messier object...

Page 7: ...o blink faster Once the lights start blinking rapidly you are very close to the object so make very small movements as the SkyScout is now honing in on a very small part of the sky 9 When you are dire...

Page 8: ...Trace Figure option that will display and guide you to the brightest stars that make up the pattern Field Guide SkyScout comes with a complete field guide to help you better understand and enjoy using...

Page 9: ...e entering local time you must enter your time zone UTC offset Refer to Appendix A to locate the correct time zone Universal Time Coordinate for your location GPS Mode Viewing GPS Information Once lin...

Page 10: ...tes that you are very close to the desired object Once it gets close the SkyScout is scanning a very small area of sky to pinpoint the exact object Move the SkyScout very slowly once the arrows begin...

Page 11: ...damage to your eyes you should never look directly at the sun with the SkyScout or the naked eye What is the SD card slot for SD card slot is used for an optional Sky Tour audio presentation that pro...

Page 12: ...Program 1 Insert the SkyScout CD into your computer s CD ROM drive An interactive menu should appear on your computer screen a If CD ROM does not auto launch then double click on My Computer b Double...

Page 13: ...display with red LED backlight 3 W x 1 H 78mm x 26mm 240 x 80 with a 0 325mm dot pitch Audio Maximum output power 50mW Frequency response 20 to 20 000 Hz Earbud style headphones included Inputs and O...

Page 14: ...at the bottom of t he map The number between the boundary lines is your Universal Time Coordinate For example the UTC for Los Angeles would be 8 All numbers are listed in standard time and do not acc...

Page 15: ...air Further product malfunction or deterioration due to normal wear is not covered by this warranty CELESTRON DISCLAIMS ANY WARRANTIES EXPRESS OR IMPLIED WHETHER OF MERCHANTABILITY OF FITNESS FOR A PA...

Reviews: