16
FREEZING IN (Fig. 6)
The amount of fresh food which can be frozen in a 24 hours period at an ambient temperature of +25° C is
stated on the rating plate.
To freeze the maximum quantity of foods allowed, switch on the fast freeze facility (4) (yellow light on) 24 h
prior to loading the foods, which should be positioned directly on the grid without using the baskets.
At completion of the freezing-in operation, switch off the fast freeze facility (yellow light off).
The freezing-in time diminishes for loads less than the maximum.
Very small loads can be frozen without switching on the fast freeze facility.
Do not store warm foods in the freezer. Never re-freeze partially or completely defrosted foods.
Prepare and wrap foods to be frozen in aluminium or plastic foils or place them in appropriate containers. Label
the packets indicating the freezing-in date and the contents. The freezer compartment maintains the storage
temperature for 15 hours approx. even in case of power failure.
We suggest however you leave the door closed during this time.
Fizzy drinks should not be frozen and some products, such as flavoured water ices, should not be consumed
too cold.
Note: Due to the efficiency of the door seal, it is not always possible to open the freezer door immediately
after closing it. Wait some minutes before trying to open it.
PRODUCTION OF ICE CUBES
3/4 fill the ice cube trays with water and place them in the low temperature compartment. If the trays stick to
the bottom of the compartment, do not detach them with sharp or cutting instruments, which could damage
the appliance. Use, if necessary, the handle of a spoon. To allow removal of ice cubes from plastic trays, bend
them slightly.
Attention: Do not eat ice cubes or ice lollies immediately after removal from the low temperature
compartment as they may give rise to cold burns.
STORAGE OF FROZEN FOOD
When buying frozen food, it is suggested to use thermal bags or cold boxes. They should be the last purchases
made and should be well wrapped in newspaper. When home, store them in the compartment, with the least
possible delay. In any case these foods have to be used within the date printed on the packet.
THAWING
Here are some basic suggestions:
Raw vegetables: Do not thaw - put straight into boiling water and cook as usually.
Meat (large cuts): Thaw in the refrigerator without unwrapping them. Before cooking, leave at room
temperature for some hours.
(Small cuts): Thaw at room temperature or cook directly.
Fish: Thaw in the refrigerator without unwrapping or cook directly before being completely thawed.
Previously cooked food: Re-heat in the oven without removing from its aluminium container.
Fruit: Thaw in the refrigerator.
DEFROSTING
Generally you need to defrost two or three times a year when the layer of frost reaches a 3 mm thickness. We
suggest you periodically remove the frost from the freezing plate by means of a plastic scraper. Avoid using
sharp or cutting instruments. Defrosting should be carried out when the quantity of food stored is minimum. If
the appliance is not emply, to avoid the food thawing out during defrosting, switch on the fast freeze facility
some hours prior to defrosting so that the food stored reaches the coldest temperature. Wrap the frozen food
into several layers of newspaper (or in a cover) and place them in the refrigerator or in a cool place. Adjust the
thermostat control knob to position
●
, disconnect the appliance from the mains and leave the door open.
Remove the baskets by pulling forward and up. Do not use commercial defrosting products as they could
contain dangerous components. At completion of defrosting, clean and dry the appliance carefully. Reconnect
the freezer to the mains supply and switch on the fast freeze facility. Reload the freezer with the frozen food.
Two hours after the red control lamp switches off, switch off the fast freeze switch.
Summary of Contents for FW380 for
Page 10: ...UNDER COUNTERS Super SETMO SYSTEM D GB F NL E P I GR S N DK FIN PL CZ SK H RUS BG RO ...
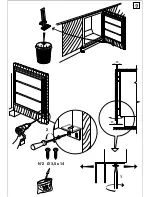
Page 11: ...N 1 P 2 min 40 mm N 2 N 5 N 12 Ø 3 5 x 14 3 mm P 2 ...
Page 12: ...Max 70 mm ...
Page 13: ......
Page 14: ...2 2 G G 1 8 x 3 5 x 14 12 3 2 1 ...
Page 15: ...1 2 3 4 L M R R R R ...
Page 16: ...S S T U T ...
Page 17: ...N 2 Ø 3 5 x 14 1 2 ...
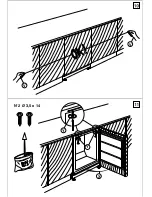
Page 18: ...V V Y Y X N 2 Ø 3 5 x 14 ...
Page 19: ......
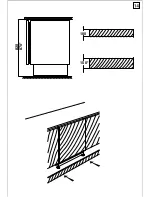
Page 20: ...276 57 X 116 X 276 X 3 mm ...
Page 21: ...820 870 100 150 ...
Page 22: ...820 870 100 135 100 b 150 b 150 185 b ...
Page 23: ...820 870 136 186 600 135 185 35 ...
Page 24: ...Max 30 mm 25 30 78 ...
Page 25: ...1 1 3 4 5 5 6 1 2 N 5 ...
Page 26: ...1 2 3 4 5 6 ...
Page 27: ...2 1 3 4 6 5 7 ...
Page 28: ......
Page 29: ...Notes ...


