16
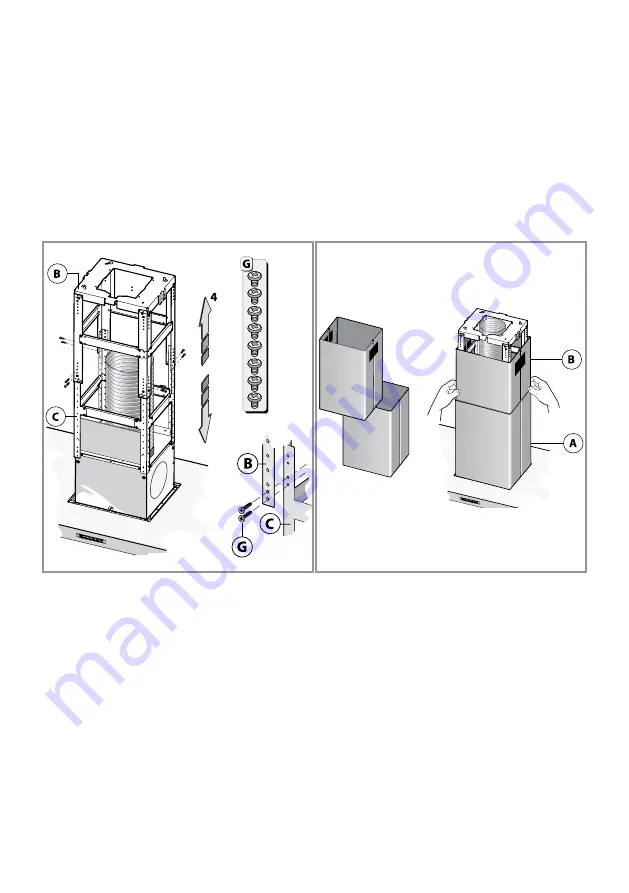
4. Assemble the upper and lower cage section at the desired height
as calculated in step 3. Use the screws highlighted with ‘G’ in Fig.
12.
5. When the cage sections have been securely fastened together,
fit the upper (B in Fig. 13) and lower (A in Fig. 13) chimney sections
over the cage sections as shown in Fig. 13.
Fig. 12
Fig. 13
Installation - mounting
1. Using the supplied template, drill four holes into the ceiling and fit
suitable wall plugs into the holes, if required. Note that plugs may
not be required if the extractor is to be mounted directly to the
ceiling joists. Ensure that the wall plugs used are suitable for the
intended purpose and weight of the extractor.
2. Fit three screws into the holes leaving at least 3mm proud, as per
Fig. 15. Note that a fourth screw (X in Fig. 15) should not be fitted
yet.


