


Setting Current Time and Day
The clock should never require adjustment since it automatically updates for
daylight savings time and stores all date/time information. Should the time and
date need to be reset after a power failure, this is an indication that the battery
needs to be replaced. To manually set the current time display:
• Press CLOCK, then press or to adjust the time. (Press and hold
or to advance the time more quickly.)
• Press DONE to save and exit (or press CANCEL to exit without changing
the time).
Programming or Changing Heating and Cooling Settings
There are five system modes. Press the SYSTem button to select one of the
following, then press dONe. Pressing the SYSTem button successively will
toggle the thermostat from one mode to another.
• Heat: Thermostat controls only the heating system.
• Cool: Thermostat controls only the cooling system.
• Off: Heating and cooling systems are off.
• Auto: Thermostat automatically selects heating or cooling depending on the
indoor temperature.
• Em Heat (only for heat pumps with auxiliary heat): Thermostat controls
Emergency and Auxiliary Heat.
It’s easy to program your system for maximum energy savings. You can program
four time periods each day with different settings for weekdays and weekends.
Times can be programmed in 15 minute increments.
1. Press SCHED, then EDIT.
2. Press day buttons to select the day(s).
3. Press or to set Wake time for selected day(s).
4. Press or to set the Heat and Cool temperature for this
time period.
5. Press other time periods (LEAVE, RETURN, SLEEP) to set time and
temperatures for each.
6. Press DONE to save and exit (or press CANCEL to exit without saving
changes).
Note: Press FAN to customize fan settings for any time period. These become your AUTO
fan settings.
Note: You can press CANCeL or PerIOd to eliminate any unwanted time period.
Changing Your Fan Control
Press FAN to select fan operation, then press dONe.
• On: Fan is always on.
• Auto: Fan runs only when the heating or cooling system is on.
• Circ: Fan runs randomly, about 35% of the time, not counting any run time
with the heating or cooling system.
You can press FAN to override the fan settings you’ve programmed for different
time periods. If you select On or Circ, the setting you select remains active until
you press FAN again to select Auto.
Note: If a fan schedule is programmed, “Auto” runs the fan schedule.
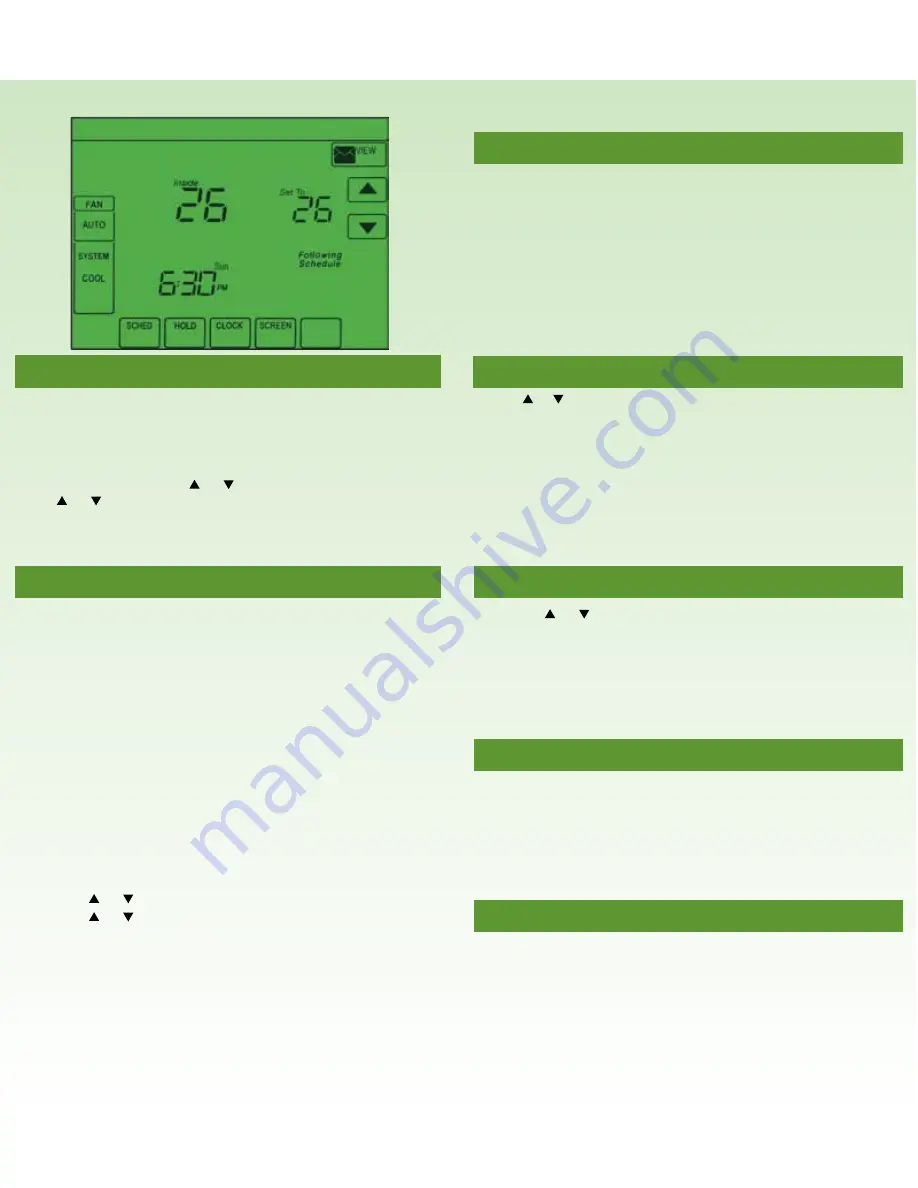
Temporary Setting Changes
Press or to immediately adjust the temperature. This temporarily
overrides the temperature setting for the current time period.
The new temperature is maintained only until the next programmed time period
begins. For example, if you want to turn up the heat early in the morning, it will
automatically be lowered later, when you leave for the day. To cancel the
temporary setting at any time, press CANCEL (or SCHED). The program
schedule resumes.
Permanent Setting Changes
• Press or to immediately adjust the temperature. This temporarily
overrides the temperature setting for the current time period and when
followed by pressing HOLD, permanently adjusts the temperature.
• Pressing HOLD turns off the program schedule but the program settings
are retained and can be resumed by pressing CANCEL (or SCHED) to
cancel “Hold” and reactivate the program schedule.
View Messages
• Press VIEW on your screen. The message envelope icon blinks whenever
you get a new message and if there are no messages, the message icon
does not appear.
• Use the arrow buttons to view the messages. There can be a maximum of
five messages.
• Press DELETE to delete the displayed message.
Clean the Screen
• Press SCREEN to go to the cleaning screen.
• Press OK to lock the screen for cleaning. (The screen remains locked for
30 seconds so you can clean the screen without changing any settings.)
• After 30 seconds, press CANCEL to resume normal operation, or press
OK if you require more time for cleaning.
Note: do not spray any liquid directly on the thermostat. Spray liquids onto a cloth, then
use the damp cloth to clean the screen. Use water or household glass cleaner. Avoid
abrasive cleansers.


