688170-172 G20NE
8
EN
G
LIS
H
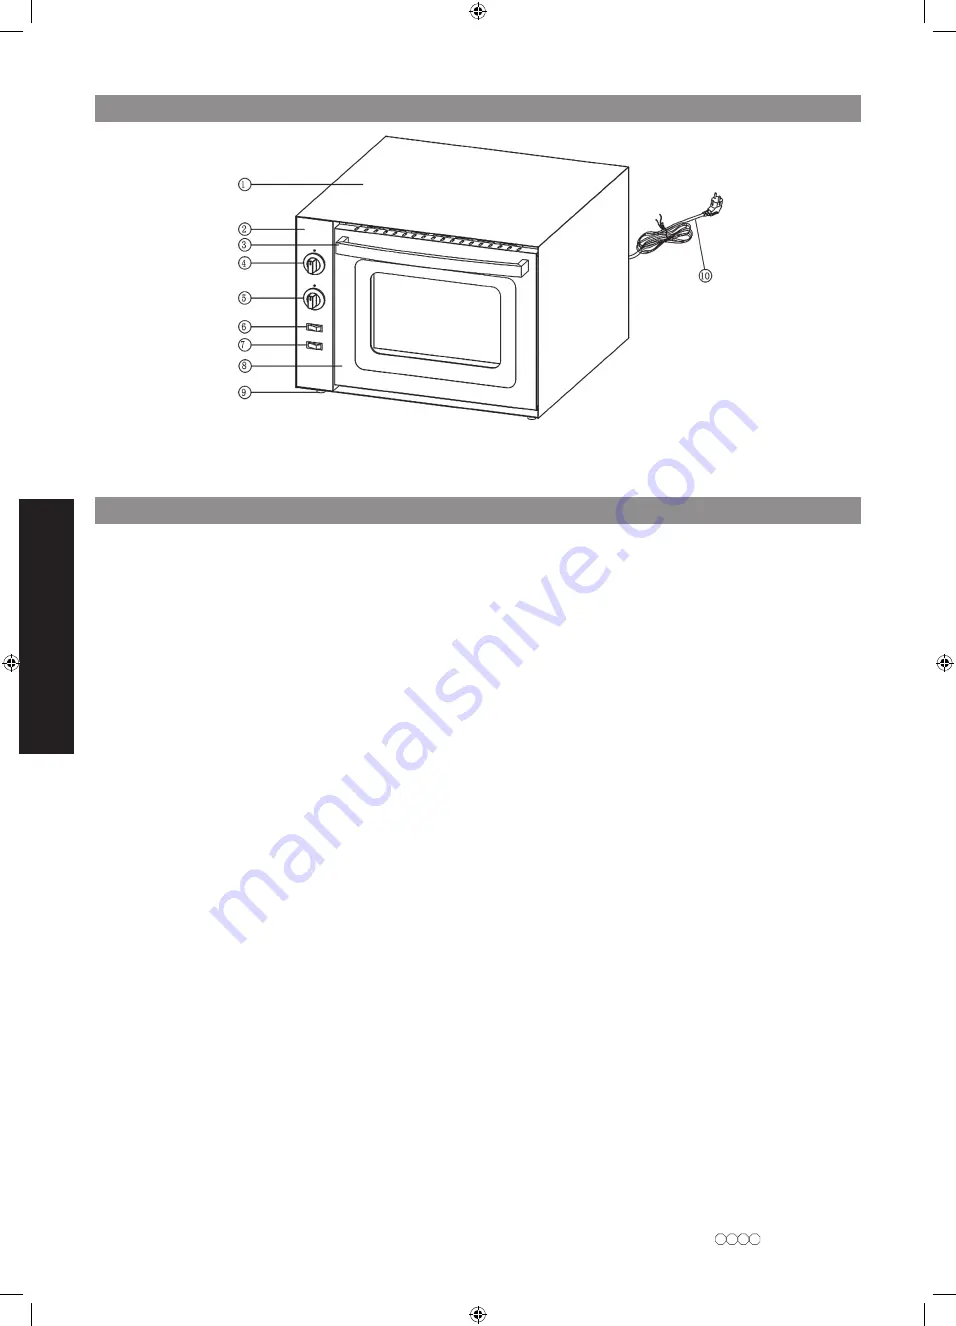
PARTS OVERVIEW
1. Body
2. Control panel
3. Handle
4. Thermostat
5. Timer
6. Light knob
7. Switch
8. Door
9. Feet
10. Power cord
USERS INSTRUCTIONS
Note:
Only place food on the shelves belonging to this device and do not place non-food products inside
the device. This can be dangerous and is therefore prohibited.
Note:
The device can become very hot, you should not touch it during use and during the cooling period
without an professional oven glove.
Pay attention!
1. The maximum temperature is 350°C. The temperature rises very quickly.
2. Preheat the pizza oven from 200 to 300°C before placing food in it.
3. The timer can be set up to 2 hours.
4. The double version has 3 heating elements (one at the bottom, one in the middle and one at the
top) and the single version has 2 (one at the bottom and one at the top). Each heating level can be
controlled separately.
5. If you have the double version (model 688172) and if you do not use the upper baking chamber, you
can save energy by activating only the lower and middle thermostats.
Preheating the oven:
1. Press the switch, the appliance will turn on.
2. Press the light switch, it will turn on.
3. Preheating can be done by activating only the lower (and middle) thermostat. Turn it to the desired
temperature of at least 200°C. The oven will reach the desired temperature very quickly. The orange
indicator light will illuminate until the heating element has reached the desired temperature. It is
recommended to activate the upper thermostat after preheating.
Single use
If you plan to use the pizza oven only once or if you want to save energy, use it as follows:
1. Insert the plug into the wall socket;
2. Turn the light switch to ON;
3. Turn the lower thermostat to the desired temperature and preheat the oven;
4. After preheating, you can activate the other thermostats;
5. Then set the timer to the desired cooking time;
6. Then turn the ON/OFF switch to OFF;
7. After the cooking time has elapsed, the oven will stop heating automatically.
8. As soon as the oven has cooled down completely and the plug has been removed from the socket,
you can start to clean or maintain the oven.
688170-172_G20NE.indd 8
688170-172_G20NE.indd 8
29-6-2020 16:03:43
29-6-2020 16:03:43


