background image

1

E

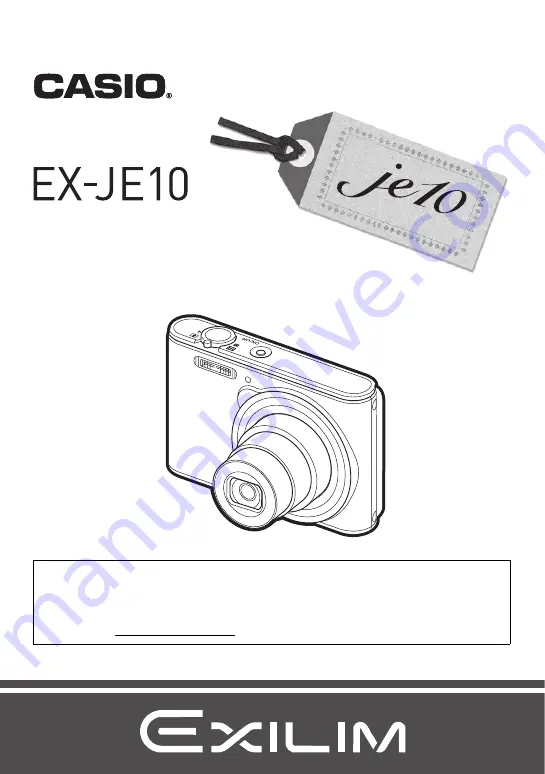
Thank you for purchasing this CASIO product.

• Before using it, be sure to read the precautions contained in this User’s Guide.
• Keep the User’s Guide in a safe place for future reference.
• For the most up-to-date information about this product, visit the official EXILIM 

Website at http://www.exilim.com/

Digital Camera

User’s Guide

Summary of Contents for EXILIM EX-JE10

Page 1: ...be sure to read the precautions contained in this User s Guide Keep the User s Guide in a safe place for future reference For the most up to date information about this product visit the official EXI...

Page 2: ...nal retailer 1 The shape of the power cord plug varies according to country or geographic area 2 For information about attaching the jacket see the separate Basic Reference instructions Rechargeable b...

Page 3: ...damages lost profits or claims by third parties arising out of the use of Photo Transport or YouTube Uploader for CASIO CASIO COMPUTER CO LTD shall not be held liable for any damages or lost profits c...

Page 4: ...nd Off 21 Holding the Camera Correctly 21 Shooting a Snapshot 23 To select an auto recording mode 23 To shoot a snapshot 24 Viewing Snapshots 27 Deleting Snapshots and Movies 28 Snapshot Shooting Prec...

Page 5: ...t Image Quality T Quality Snapshot 60 Specifying Movie Image Quality Quality Movie 60 Correcting Image Brightness EV Shift 61 Controlling White Balance White Balance 62 Specifying ISO Sensitivity ISO...

Page 6: ...u Screen Color Menu Color 91 Shooting without Disturbing Others Silent 91 Configuring Camera Sound Settings Sounds 92 Configuring a Startup Image Startup 92 Specifying the File Name Serial Number Gene...

Page 7: ...g and Loading the Battery 109 Battery Precautions 111 Using the Camera in Another Country 111 Using a Memory Card 112 Reset Initial Default Settings 113 When things don t go right 115 Troubleshooting...

Page 8: ...icrophone pages 39 74 8Back lamp pages 14 15 32 9 0 Movie button page 38 bkStrap hole page 22 bl p PLAY button pages 21 27 bm SET button 8 2 4 6 pages 11 28 31 32 47 bn MENU button page 47 boMonitor s...

Page 9: ...ning movie memory capacity page 38 3Recording mode page 23 4White balance page 62 5Continuous shutter page 54 6Image deterioration indicator page 36 7Metering mode page 123 8Snapshot image size page 5...

Page 10: ...e AE is not correct for some reason 1Recording mode page 38 2White balance page 62 3Remaining movie memory capacity page 38 4Movie recording time page 38 5Exposure compensation page 61 6Battery level...

Page 11: ...el indicator page 16 Information display on Displays information about image settings etc Information display remaining movie memory capacity date time on In addition to information about snapshot set...

Page 12: ...y and other conditions Premium Auto delivers higher image quality than standard Auto Make up Function The Make up Function smoothes the skin texture of the subject and softens facial shadows caused by...

Page 13: ...n the sequence shown below 1 2 3 4 Charging time Approximately 120 minutes IMPORTANT Make sure that you insert the cable connector into the USB AV port until you feel it click securely into place Fail...

Page 14: ...ct the USB cable Depending on the setup of your computer you may not be able to charge the camera s battery over a USB connection If this happens use of the USB AC adaptor that comes with the camera i...

Page 15: ...of a commercially available computer certain USB port specifications may make it impossible to charge via the USB cable A battery that is still warm due to normal use may not charge fully Give the bat...

Page 16: ...ed while the battery is dead will cause its date and time settings to be cleared A message telling you to configure time and date settings will appear the next time you turn on the camera after restor...

Page 17: ...old in certain geographic areas may not support display language selection 1 Press ON OFF Power to turn on the camera 2 Press SET towards 8 2 4 or 6 to select the language you want and then press SET...

Page 18: ...D Memory Card microSDHC Memory Card microSDXC Memory Card The above are supported memory card types as of July 2012 This camera supports use of microSD memory cards of the following types and capaciti...

Page 19: ...e it into the card slot all the way in until you hear it click securely into place 3 Close the memory card slot connector cover IMPORTANT Never insert anything besides a supported memory card page 18...

Page 20: ...other files on it will delete its contents Normally you do not need to format a memory card again However if storing to a card has slowed down or if you notice any other abnormality re format the car...

Page 21: ...ct into the camera The Sleep function or Auto Power Off pages 96 97 will turn off power automatically if you do not perform any operation for a preset amount of time To turn off the camera Press ON OF...

Page 22: ...ur fingers or wrist while operating the camera Take care to make sure your fingers and the strap do not cover any of the areas indicated in the illustration Never swing the camera around by the strap...

Page 23: ...ecording mode Shooting a Snapshot To select an auto recording mode Setting REC Screen Icon Display Description Auto This is the standard Auto recording mode Premium Auto With Premium Auto recording th...

Page 24: ...the subject If you are using Premium Auto text will appear in the lower right corner of the monitor screen describing the type of shot the camera has detected You can zoom the image if you want To sho...

Page 25: ...shutter button the camera automatically adjusts exposure and focuses on the subject it is currently pointed at Mastering how much pressure is required for a half press and a full press of the shutter...

Page 26: ...ooting with Premium Auto In addition to shutter speed aperture and ISO sensitivity the camera automatically executes the following operation as required when shooting with Premium Auto Auto Focus is n...

Page 27: ...r the information to view only the snapshot page 11 You can zoom in on the image by rotating the zoom controller towards z page 66 If you are recording a snapshot that is very important to you it is r...

Page 28: ...both the snapshot and the audio file To delete a single file 1 In the PLAY mode press SET 2 Press SET towards 8 or 2 to select Delete on the PLAY panel and then press SET 3 Press SET towards 4 or 6 to...

Page 29: ...of the currently selected file 5 Repeat step 4 to select other files if you want After you are finished selecting files press MENU 6 Press SET towards 8 or 2 to select Yes and then press SET This dele...

Page 30: ...age composition The actual image will be recorded at the quality set for the image quality setting page 60 Shooting Indoors under Fluorescent Lighting Minute flickering of fluorescent lighting can aff...

Page 31: ...ay you want press SET This will apply the settings and return to the REC mode If you selected BS the BEST SHOT scene menu will appear You can close the Control Panel by pressing MENU NOTE No icon is d...

Page 32: ...ash None Flash fires automatically in accordance with exposure amount of light and brightness conditions Flash Off Flash does not fire Flash On Flash always fires This setting can be used to brighten...

Page 33: ...with a tripod etc With red eye reduction the flash is fired automatically in accordance with exposure It does not fire in areas where lighting is bright The presence of outdoor sunlight fluorescent l...

Page 34: ...elf timer cannot be used together with the following features Movie Make up Using the Self timer Self timer Setting REC Screen Icon Display Description 10sec Self timer 10 second Self timer 2sec Self...

Page 35: ...turns on Face Detection page 53 Make up cannot be used with the following functions Movie recording some BEST SHOT scenes CS Triple Self timer Your camera provides you with 5X optical zoom that chang...

Page 36: ...cording You can adjust the optical zoom setting before you press the shutter button to start movie recording Optical Zoom and Digital Zoom Switch Point If you hold the zoom controller towards z Teleph...

Page 37: ...image sizes of 10M and smaller The range in which you can use digital zoom without image deterioration is indicated on the display The deterioration point depends on the image size 5X to 36X Undeteri...

Page 38: ...screen After this focus is fixed while movie recording is in progress 3 Press 0 Movie again to stop recording Each movie can be up to 29 minutes long Movie recording stops automatically after 29 minut...

Page 39: ...in memory or certain types of memory cards can slow down processing speed Whenever possible use an Ultra High Speed Type memory card Note however that not all operations can be guaranteed even if an...

Page 40: ...uring playback you will be able to jump to the markers in the recording 5 Press the shutter button again to stop audio recording To create another audio recording file repeat steps 4 and 5 To turn off...

Page 41: ...yback Voice Recording Playback Controls NOTE See page 28 for information about deleting a voice recording file Fast forward fast reverse Press SET towards 4 or 6 Play pause Press SET Jump to marker Wh...

Page 42: ...1 In the REC mode press SET 2 Press SET towards 8 or 2 to select the bottom Control Panel option BS and then press SET page 31 This will display a menu of BEST SHOT scenes The initial default selectio...

Page 43: ...hot or 0 Movie if you are shooting a movie To return to the auto recording mode press SET select the top Control Panel option Auto recording mode and then select R Auto or Premium Auto Using Scene Inf...

Page 44: ...ading page 89 Your camera includes a sample scene that optimizes settings for auction site images Depending on your camera model the sample scene is named either For eBay or Auction Images you record...

Page 45: ...the camera s monitor screen while composing the image The Face Detection and Make up functions are disabled while you are shooting with ART SHOT Shooting with Artistic Effects ART SHOT Scene Descripti...

Page 46: ...mit a shutter sound and the front lamp will flash twice when the shutter is released To cancel Auto Shutter standby press p PLAY IMPORTANT If the camera remains in Auto Shutter standby without releasi...

Page 47: ...Press SET towards 8 or 2 to select the menu item you want and then press SET towards 6 4 Press SET towards 8 or 2 to change the setting of the selected menu item 5 After the setting is the way you wa...

Page 48: ...Depending on the recording mode some of the items on the menu that appears may not be usable REC Menu Operations in This Manual REC menu operations are represented in this manual as shown below The f...

Page 49: ...REC Mode Settings REC Selecting a Focus Mode Focus Settings REC Screen Icon Display Type of Shot Focus Mode Approximate Focus Range 1 Snap shot Movies Snapshot Movies Q Auto Focus None General record...

Page 50: ...le the Miniature or Fisheye BEST SHOT scene is selected Use of the flash together with Macro Focus can cause the light of the flash to become blocked which may result in unwanted lens shadows in your...

Page 51: ...the shutter button the rest of the way down NOTE Focus lock also locks exposure AE Procedure Enter the REC Mode MENU REC Tab Focus Frame You can use this procedure to select from among five different...

Page 52: ...l be used automatically whenever a face cannot be detected for some reason Specifying the Auto Focus Area AF Area Spot This mode takes readings of a small area in the center of the image This setting...

Page 53: ...ra performs center focus if it cannot detect a face The only focus mode available while face detection is enabled is Auto Focus AF Face detection may take a bit longer when you hold the camera sideway...

Page 54: ...tinuous shutter cannot be used in combination with any of the following Premium Auto Make up Some BEST SHOT scenes Movie Recording Self timer When using a continuous shutter mode keep the camera still...

Page 55: ...ed immediately after you shoot a snapshot If the flash fires the Anti Shake icon S will remain on the display even though Anti Shake does not function during flash photography The ISO sensitivity sett...

Page 56: ...rned on NOTE The L R Key setting cannot be used together with the following features Some BEST SHOT scenes Procedure Enter the REC Mode MENU REC Tab Grid The on screen grid can be displayed on the REC...

Page 57: ...etting whenever you turn off the camera Optical zoom setting only If you turn the camera power off and then back on while the BEST SHOT memory item is enabled all of the other memory items except for...

Page 58: ...You should regard the print paper sizes suggested here as guidelines only 200 dpi print resolution Image Quality Settings Quality To select the snapshot image size Size Image Size Pixels REC Screen Ic...

Page 59: ...computer etc The size of an image indicates how many pixels it contains and is expressed as horizontal pixelsxvertical pixels Example Note that larger images have more pixels so they take up more memo...

Page 60: ...f a movie during playback Shooting with the high quality HD setting will result in better image quality but it also shortens the amount of time you can shoot The 16 9 aspect ratio is available when HD...

Page 61: ...exposure compensation value The exposure compensation value you set remains in effect until you change it or turn off the camera which causes it to revert to 0 0 NOTE When shooting under very dark or...

Page 62: ...day Overcast For shooting outdoors on an overcast rainy day in the shade etc Shade For shooting on a clear day in the shade of trees or buildings DayWhite Fluorescent For shooting under white or day...

Page 63: ...rocedure Enter the REC Mode MENU Quality Tab ISO ISO sensitivity is a measure of sensitivity to light Auto ISO sensitivity always is applied for movies regardless of the current ISO sensitivity settin...

Page 64: ...ark areas when shooting images NOTE Lighting is disabled during movie recording Optimizing Image Brightness Lighting Setting REC Screen Icon Display Description On Performs brightness correction When...

Page 65: ...of the fast forward or fast reverse operation To return to normal playback speed press SET Play pause Press SET 1 frame forward back Press SET towards 4 or 6 Holding SET towards 4 or 6 will scroll fr...

Page 66: ...wer right corner of the screen shows what part of the zoomed image is currently displayed To exit the zoom screen press MENU Though the maximum image zoom factor is 8X certain image sizes may not allo...

Page 67: ...hing appearing on the camera s monitor screen You also can change the aspect ratio of the screen and the video output system page 97 4 Now you can display images and play back movies as you normally d...

Page 68: ...to the VIDEO IN and AUDIO IN terminals Camera USB AV port You can play a slideshow of snapshots and movies on the camera and record it on a DVD or video tape When recording images to an external devi...

Page 69: ...f the PLAY Panel items Using the PLAY Panel Exit Exits the PLAY Panel Playback Start The operation that is performed when this item is selected depends on the type of file that is currently displayed...

Page 70: ...ing a Slideshow on the Camera Slideshow Start Starts the slideshow Time Time from the start to the end of the slideshow 1 to 5 minutes 10 minutes 15 minutes 30 minutes 60 minutes Interval Amount of ti...

Page 71: ...ress of SET will rotate the displayed image 90 degrees left 5 When the displayed image is at the orientation you want press MENU NOTE Note that this procedure does not actually change the image data I...

Page 72: ...Against Deletion Protect On Protects specific files 1Press SET towards 4 or 6 to scroll through the files until the one you want to protect is displayed 2Press SET towards 8 or 2 to select On and then...

Page 73: ...inal snapshot Procedure p PLAY Snapshot Screen MENU PLAY Tab Trimming You can crop a snapshot to trim parts you do not need and save the result in a separate file The original snapshot is also retaine...

Page 74: ...lete audio perform the following operation Dubbing Delete SET MENU IMPORTANT Note that you cannot restore the original audio of an Audio Snapshot after you delete or re record it To play snapshot audi...

Page 75: ...4 or 6 Play pause Press SET Volume adjustment Press SET towards 2 and then press SET towards 8 or 2 Display content switching Press SET towards 8 Stop playback Press 0 Movie Copying Files Copy Built...

Page 76: ...will be able to use DPOF settings for printing depends on the printer you are using Some professional print services may not support DPOF Printing Snapshots Professional Print Service You can take a m...

Page 77: ...ing All images 1 Press SET towards 8 or 2 to specify the number of copies You can specify a value up to 99 Specify 00 if you do not want to print the image If you want to include the date in the image...

Page 78: ...te stamping on and off each time you print You can configure settings so some images include the date stamp and some don t Configure the Camera s Time Stamp setting page 94 The camera s Time Stamp set...

Page 79: ...ly USB connection pages 81 85 Play back and edit movies You can play back movies pages 83 86 To edit movies use commercially available software as required Transfer images stored on your computer to c...

Page 80: ...3 Installation not required Windows Media Player which is already installed on most computers can be used for playback 83 Transfer images to the camera Windows 7 Windows Vista Windows XP SP3 Photo Tra...

Page 81: ...comes with the camera to connect it to your computer For details about connecting to the camera and precautions when connecting see page 14 2 Turn on the camera The first time you connect the camera t...

Page 82: ...ing DCIM folder you need to change its name or move it to a different location before performing the next step 8 Windows 7 users On the Documents Organize menu select Paste Windows Vista users On the...

Page 83: ...lay back a movie first copy the movie to your computer and then double click the movie file Minimum Computer System Requirements for Movie Playback The minimum system requirements described below are...

Page 84: ...if proper playback is not possible on the computer you can use an optionally available AV cable EMC 7A to connect to the video input terminal of a TV or computer and play back movies that way Install...

Page 85: ...light green or amber at this time In this mode your Macintosh recognizes the memory card loaded in the camera or the camera s built in memory if it does not have a memory card loaded as a drive The a...

Page 86: ...89 An image that was rotated on the camera will be displayed on your Macintosh screen in its original unrotated orientation You can use QuickTime which comes bundled with your operating system to pla...

Page 87: ...QuickTime Shut down other applications that are running Even if proper playback is not possible on your Macintosh you can use an optionally available AV cable EMC 7A to connect to the video input term...

Page 88: ...owed Example File Each folder can contain up to 9999 files named CIMG0001 through CIMG9999 The extension on the file name depends on the file type 26th file name Folders Folders are named from 100CASI...

Page 89: ...her camera s DCF compliant images to this camera and view them Memory Folder Structure DCIM Folder Recording Folder Image File Movie File Audio File Audio Snapshot Image File Audio Snapshot Audio File...

Page 90: ...ents A good way to keep track of multiple DCIM copies of the DCIM folders is to change its name to a date or something similar after you copy it to your computer If you later decided to return the fol...

Page 91: ...ttings to avoid disturbing others around you It comes in handy when shooting in a museum or other areas where flash photograph is prohibited Turning on Silent enters the Silent mode which is indicated...

Page 92: ...n memory If you select an audio snapshot as the startup image the audio will not play at startup Formatting built in memory page 98 will delete the current startup image setting Configuring Camera Sou...

Page 93: ...urrent time setting by one hour during the summer months 3 Press SET towards 8 2 4 or 6 to select the geographic area you want and then press SET Specifying the File Name Serial Number Generation Rule...

Page 94: ...configure the camera to stamp the recording date only or date and time in the lower right corner of each snapshot Once date and time information is stamped into a snapshot it cannot be edited or delet...

Page 95: ...ng city is selected for your Home City the times and dates of all of the World Time cities page 93 will be wrong Procedure MENU Set Up Tab Date Style You can select from among three different styles f...

Page 96: ...a operation is performed for a preset period of time Press any button to turn the monitor screen back on Trigger Time Settings 30 sec 1 min 2 min Off Sleep is disabled while Off is selected Sleep is d...

Page 97: ...the video output system You can also specify an aspect ratio of 4 3 or 16 9 Select the aspect ratio 4 3 or 16 9 that matches the type of TV you plan to use Images will not display correctly if you sel...

Page 98: ...y card will delete the following data Protected images Make sure the camera s battery is sufficiently charged before starting a formatting operation Formatting may not be performed correctly and the c...

Page 99: ...e performed The example at left indicates that the power plug must be unplugged from the electrical socket WARNING Smoke abnormal odor overheating and other abnormalities Continued use of the camera w...

Page 100: ...aged creating the risk of fire and electric shock Be sure to observe the following precautions Never place heavy objects on the USB AC adapter or subject it to direct heat Do not modify the USB AC ada...

Page 101: ...ed service center Disassembly and Modification Never try to take the camera apart or modify it in any way Doing so creates the risk of electric shock burn injury and other personal injury Be sure to l...

Page 102: ...disassemble the battery pierce it with a needle or expose it to strong impact hit it with a hammer step on it etc and never apply solder to it Never place the battery into a microwave oven dehumidifi...

Page 103: ...of the power plug and in the area around them Rechargeable Battery If battery charging does not end normally within the specified charging time stop charging anyway and contact your local CASIO author...

Page 104: ...le parked in the sun or other areas subject to very high temperatures Monitor Screen Do not apply strong pressure to the LCD panel surface or subject it to strong impact Doing so can cause the display...

Page 105: ...of such devices is restricted Improper use creates the risk of serious accident Camera Jacket When wearing the strap around your neck the camera can unexpectedly bump into objects fall or become caugh...

Page 106: ...nvironment Operating Temperature Requirements 0 to 40 C 32 to 104 F Operating Humidity 10 to 85 non condensation Do not place the camera in any of the following locations In an area exposed to direct...

Page 107: ...l the covering off of the battery Do not try to take the battery apart Discarding or Transferring Ownership of a Memory Card or the Camera The format and delete functions of the camera do not actually...

Page 108: ...stributing them to third parties without the permission of the copyright holder is strictly prohibited by copyright laws and international treaties For example uploading or distributing on the Interne...

Page 109: ...ing on the setup of your computer you may not be able to charge the camera s battery over a USB connection The camera s battery can be charged using the USB cable and you should normally never need to...

Page 110: ...y out of the camera 3 Load the battery With the EXILIM logo on the battery facing upwards in the direction of the monitor screen hold the stopper next to the battery in the direction indicated by the...

Page 111: ...arged can cause deterioration of battery characteristics If you do not plan to use a battery for some time fully use up its charge before storing it Store batteries in a cool dry place 20 C 68 F or lo...

Page 112: ...ng of a memory card is recommended Electrostatic charge electrical noise and other phenomena can cause data to become corrupted or even lost Make sure that you always back up important data on other m...

Page 113: ...cording mode some of the items on the menu that appears may not be usable REC Mode REC Tab Quality Tab Reset Initial Default Settings Focus AF Focus Frame AF Area U Spot Face Detection On CS Off Anti...

Page 114: ...PLAY mode Menu Color Black Silent Off Sounds Startup Sound 1 Half Shutter Sound 1 Shutter Sound 1 Operation Sound 1 Operation Play Startup Off File No Continue World Time Timestamp Off Adjust Date Sty...

Page 115: ...ff Nothing happens when a button is pressed Remove the battery from the camera and then reload it page 109 Image Recording Image is not recorded when the shutter button is pressed 1 If the camera is i...

Page 116: ...for scenery or portraits Use Auto Focus for scenery and portrait shots page 49 3 You may be trying to use Auto Focus or Infinity when shooting a close up shot Use the Macro for close ups page 49 There...

Page 117: ...e out bad Use the following BEST SHOT scenes page 42 when shooting at night Night Scene for shooting night scenery only Night Scene Portrait for shooting people against night scenery Subjects are too...

Page 118: ...er camera File Deletion A file cannot be deleted The file may be protected Unprotect the file page 72 Other The wrong date and time are displayed or the wrong date and time are being stored along with...

Page 119: ...the image you are recording You can press SET towards 8 to select what information you want to include on the display page 11 The time and date settings configured the first time after purchasing the...

Page 120: ...ile there are already 9999 files stored in the 999th folder If you want to record more delete files you no longer need page 28 LENS ERROR This message appears and the camera turns off whenever lens pe...

Page 121: ...ination with another function Number of Snapshots Movie Recording Time Voice Recording Time Image Size Pixels Quality Approximate File Size Built in Memory 1 Recording Capacity microSD Memory Card 2 R...

Page 122: ...different capacity calculate the number of images as a percentage of 16GB Each movie can be up to 29 minutes long Movie recording stops automatically after 29 minutes of recording The maximum size and...

Page 123: ...l zoom Up to 79 7X when HD Zoom and Digital zoom are used in combination VGA size Focusing Contrast Detection Auto Focus Focus Modes Auto Focus Macro Focus Infinity Manual Focus AF Area Spot Multi Tra...

Page 124: ...Off On Red eye reduction Flash Range ISO Sensitivity Auto Wide Angle 0 4 m to 2 0 m 1 3 to 6 6 Telephoto 0 8 m to 1 0 m 2 6 to 3 3 Range is affected by optical zoom Flash Charging Time Approximately 5...

Page 125: ...starting from a full charge Repeated charging shortens battery life Frequency of flash zoom and Auto Focus usage and the time the camera is on greatly affects recording time and number of shots values...

Page 126: ...4 W x 39 5 H x 5 9 D mm 1 24 W x 1 56 H x 0 23 D Weight Approximately 15g 0 53 oz Input Power 100 to 240 V AC 50 60 Hz 100 mA Output Power 5 0 V DC 650 mA Operating Temperature Requirements 5 to 35 C...

Page 127: ...2012 CASIO COMPUTER CO LTD 6 2 Hon machi 1 chome Shibuya ku Tokyo 151 8543 Japan MA1208 A M29...

Reviews: