background image

Fn

BL

ABC

DEF

GHI

JKL

MNO

PQRS

BS

Alpha

TUV

WXYZ

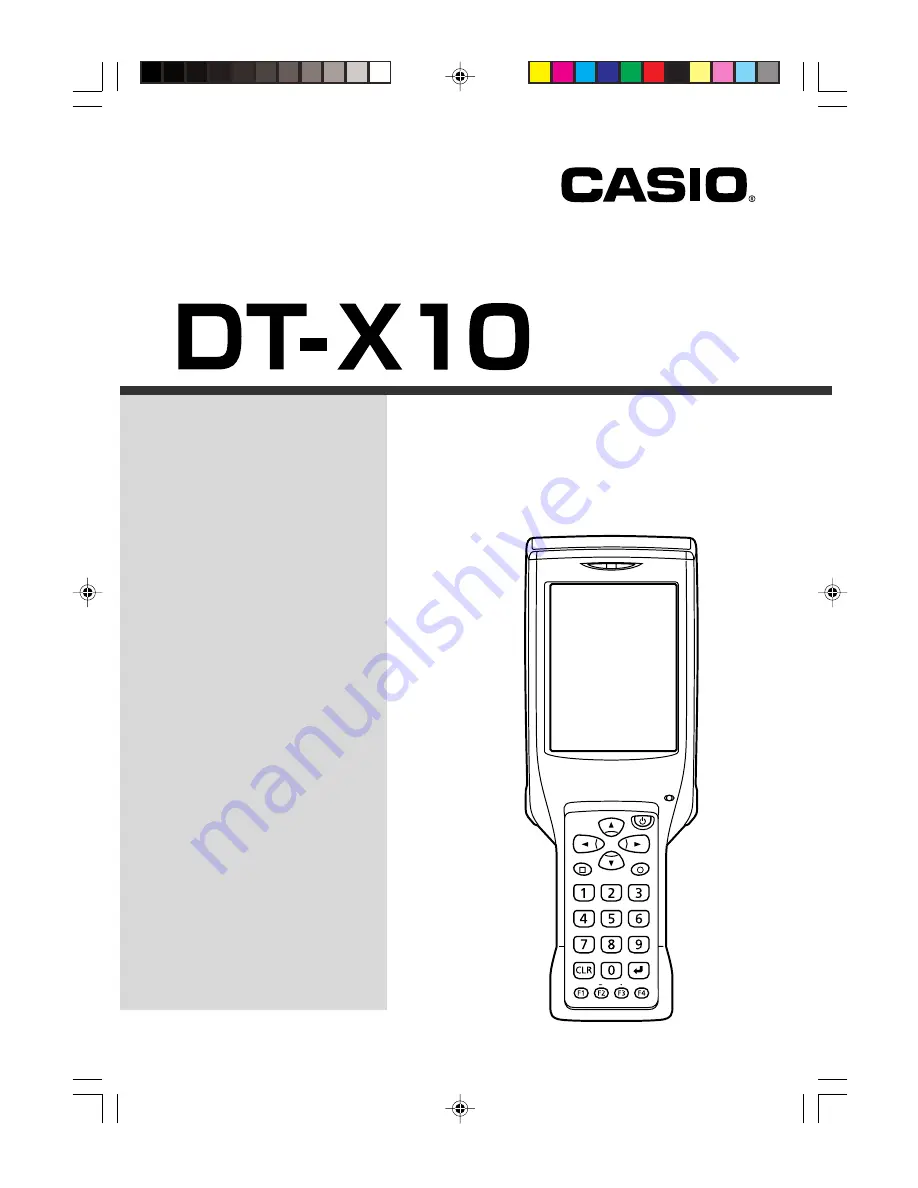
Handheld Terminal

User’s Guide

Series

Be sure to read  “Safety 
Precautions” inside this 
guide before trying to use 
your Handheld Terminal. 
After reading this guide, 
keep it in a safe place for 
future reference.

E

PN410369-005

DT-X10_E_Hyo_1_4.p65

05.4.1, 11:03 AM

3

Summary of Contents for DT-X10 - M30U - Win CE

Page 1: ...held Terminal User s Guide Series Be sure to read Safety Precautions inside this guide before trying to use your Handheld Terminal After reading this guide keep it in a safe place for future reference E PN410369 005 DT X10_E_Hyo_1_4 p65 05 4 1 11 03 AM 3 ...

Page 2: ...registered trademarks or trademarks of Microsoft Corporation in the United States and or other countries Compact Flash is a trademark of SanDisk Corporation in the United States Datalight is a registered trademark of Datalight Inc FlashFXTM is a trademark of Datalight Inc Copyright 1993 2000 Datalight Inc All Rights Reserved U S Patent Office 5 860 082 Other company names and product names used in...

Page 3: ...ly creates the possibility of personal injury or property damage A diagonal line indicates something you should not do The symbol shown here indicates you should not try to take the unit apart A black circle indicates something you should do The symbol shown here indicates you should unplug the unit from the wall outlet Precautions During Use Warning Disassembly and Modification Never try to disas...

Page 4: ...adle and other optional peripherals are not Keep loose metal objects and containers filled with liquids away from your Handheld Terminal and the optional peripherals Also never connect or disconnect peripherals to the Handheld Terminal while they are wet Water getting into the Handheld Terminal or its peripherals creates the danger of fire and electric shock Laser Light This product scans bar code...

Page 5: ...ions for a long period in a car parked in direct sunlight Heavy Objects Never place heavy objects on top of the Handheld Terminal and its options Doing so creates the danger of loss of balance and the objects falling which can cause personal injury LCD Screen Never apply strong pressure to the screen or subject it to strong impact Doing so can crack the screen or LCD panel glass which can cause th...

Page 6: ...losion and fire Never allow the positive and negative terminals of the battery pack to become connected shorted by metal Doing so creates the danger of battery pack heat emission explosion and fire Never transport or store the battery pack together with a necklace hair pins or other metal objects Doing so can short battery pack terminals creating the danger of battery pack heat emission explosion ...

Page 7: ...f explosion and fire Should fluid from the battery pack accidentally get into your eyes do not rub them Immediately rinse your eyes with clean tap water and then consult a physician immediately Caution Never use or leave the battery pack in an area exposed to direct sunlight in a car parked in direct sunlight or any other very hot area Doing so creates the danger of heat emission and fire as well ...

Page 8: ...air or replacement Use of a damaged electrical cord creates the danger of fire and electric shock Caution Keep the power cord away from stoves and other sources of extreme heat Heat can melt the covering of the power cord and create the danger of fire and electric shock Never pull on the power cord when unplugging it Doing so can damage the cord and create the danger of fire and electric shock Alw...

Page 9: ...damages or loss caused by deletion or corruption of data due to use of the Handheld Terminal malfunction or repair of the Handheld Terminal or its peripherals or due to the batteries going dead The Handheld Terminal employs electronic memory to store data which means that memory contents can be corrupted or deleted if power is interrupted due to the batteries going dead or incorrect battery replac...

Page 10: ...eates the risk of malfunction Avoid using the Handheld Terminal and its options in areas subject to the following conditions The following conditions create the risk of damage to the Handheld Terminal Large amounts of static electricity Extreme heat or extreme cold High humidity Sudden temperature extremes Large amounts of dust Use only the special stylus that comes with the Handheld Terminal to o...

Page 11: ...uide does not include any information about programming and download procedures See the applicable separate documentation for information about the procedures Warranty and After Service Should this product ever malfunction contact your original retailer providing information about the product name the date you purchased it and details about the problem This mark applies in EU countries only DT X10...

Page 12: ...iance could void the user s authority to operate the equipment Proper connectors must be used for connection to host computer and or peripherals in order to meet FCC emission limits Peripherals and Cables Battery Pack DT 5023BAT Large capacity Battery Pack DT 5025LBAT AC Adaptor AD S42120A Communication Card Cover DT 892TCV Communication Card Cover Large size DT 893LTCV CF Card Extension Unit DT 8...

Page 13: ...o terrestrial space radio communication and orbital resources so to as to avoid harmful interference as included in following standards Standard lssue date EN300 328 1 2000 07 EN300 328 2 2001 12 and therefore comply with the essential requirements and provisions of the Directive 1999 5 EC of the European Parliament and of the council of March 9 1999 on Radio equipment and Telecommunications Termi...

Page 14: ...ent E 25 Adjusting Display Contrast E 26 Adjusting Display Brightness E 26 Display Auto Dimmer E 26 Using the C MOS Imager C MOS Imager models only E 27 About the Class 1 LED Label E 28 Using the Laser Scanner Laser Scanner models only E 29 Warning Label E 30 Bar Code Scanning Position E 30 Performing Data Communication E 31 IR Data Communication E 31 Bluetooth Communication E 32 Resetting the Han...

Page 15: ... E 49 Cradle type Battery Charger DT 169CHGE Specifications E 49 Using the Dual Battery Charger E 50 General Guide E 50 Option E 50 Charging a Battery Pack E 52 Connecting Multiple Dual Battery Chargers E 53 Dual Battery Charger DT 5022CHG Specifications E 54 Using PC Card DT X10M30E M30U M10E E 55 Affixing a PC Card Remover E 55 To load a PC card E 55 Using CF Card Extension Unit E 57 Bundled Ite...

Page 16: ...ge the separately available battery pack DT 5023BAT or DT 5025LBAT You can use the Dual Battery Charger or the Cradle type Battery Charger or the Bridge Satellite Cradle to charge a battery pack For information using these options for charging see pages 37 46 and 50 3 Load the battery pack into the Handheld Terminal 1 Slide the two battery pack lock switches at the right and left sides to the FREE...

Page 17: ...tery pack mount the large capacity rechargeable battery pack cover 1 2 3 3 4 Hold down the power key for about one second to turn on the Handheld Terminal Start up the application you want to run Using the stylus Tap Lightly tap with the stylus once on the touch screen Tap and Hold Hold the tip of the stylus on the touch screen without moving it Drag Hold the tip of the stylus on the touch screen ...

Page 18: ... MNO PQRS BS Alpha TUV WXYZ Cradle type Battery Charger Required AC Adaptor AD S42120A DT 891WH Required Screws Required Screws DT 169CHGE Wall Mount Unit Laser Scanner models DT X10M10E DT X10M10RC2 C MOS Imager models DT X10M30E DT X10M30U DT X10M30RC2 DT X10M30URC2 This model is available in the USA and Canada DT X10_E_P14_36 p65 05 8 11 10 46 AM 16 ...

Page 19: ...E 17 DT 5023BAT Battery Pack DT 5025LBAT Large capacity Battery Pack Dual Battery Charger DT 5022CHG Battery Pack Required AC Adaptor MPC 577ADP DT X10_E_P14_36 p65 05 4 1 11 04 AM 17 ...

Page 20: ...emale Bridge Daisy Chain Cable USB Cable PC Connection Cable USB DT 887AXA DT 888RSC DT 380USB SB 201 CF Card Extension Unit DT 894CFU Bundled Items Large Card Cover 4 screws Communication Card Cover DT 892TCV DT 893LTCV DT X10_E_P14_36 p65 2005 4 15 11 40 AM 18 ...

Page 21: ...e power on or off These keys operate much like a computer s cursor keys They can be used to select items scroll screen contents etc This key can be assigned with any function available Use these keys to input numbers and letters Press to register an input value and advance to the next step These keys can be assigned any function other than barcode reading The following are the initial default sett...

Page 22: ...hen a function key or number key to configure settings or to run previously registered applications For insertion of a separately available PC card For connection to a computer or other device using a USB cable For connection of a commercially available headset 2 5mm Slide these switches to lock and release the battery pack cover Press to perform a code read operation This is also pressed to perfo...

Page 23: ...ns of this guide that cover the Dual Battery Charger the Cradle type Battery Charger and the Bridge Satellite Cradle for information about how to use them for charging Replacing the Battery Pack Important Always keep backup copies of all important data The main battery powers normal operation and also provides power required to maintain memory contents while the backup battery provides backup powe...

Page 24: ...e Handheld Terminal 3 Slide the two battery pack lock switches on both sides of the Handheld Terminal to the FREE position and then remove the battery pack cover 4 Remove the battery pack as shown in the illustration 5 Taking care to ensure it is oriented correctly load a new battery pack into the Handheld Terminal DT X10_E_P14_36 p65 05 4 1 11 04 AM 22 ...

Page 25: ... battery pack make sure you do not leave the Handheld Terminal without a battery pack for more than about 10 minutes Doing so can cause data in the memory to be deleted When replacing the battery be sure you carefully follow the proper procedure as explained in this guide Never try to use other type of battery than the one that is specified for this product 6 Replace the rechargeable battery pack ...

Page 26: ...attach the wrist strap 1 Pass the thin cord of the wrist strap through the wrist strap hole on the back of the Handheld Terminal 2 Pass the other end of the strap the part where you insert your wrist through the loop formed by the thin cord Important Do not swing the Handheld Terminal around holding the wrist strap DT X10_E_P14_36 p65 05 4 1 11 04 AM 24 ...

Page 27: ...ouch screen Press the Fn key and then press the 4 key after confirming that F is displayed in the lower right corner of the screen The following screen can also be displayed by consecutively tapping Stylus on the control panel Press the stylus against the center of the target mark mark as indicated on the screen The screen shown below appears after you press stylus against the target at five diffe...

Page 28: ...f the screen Pressing the 5 key adjusts brightness for a darker display while pressing the 6 key adjusts brightness for a brighter display In order to continue to make adjustments press the 5 key or 6 key after again first pressing the Fn key Brightness settings can also be made by consecutively tapping Brightness on the control panel Important If you use your Handheld Terminal in a location where...

Page 29: ...t If you have problem not properly reading a code change the angle and or the distance between the label and the Handheld Terminal and try reading the code again A code can be read from a distance of 65mm to 600mm 25 8 to 1 115 8 and a 2 dimensional code can be read from a distance of 60mm to 285mm 23 3 3 3 3 8 8 8 8 8 to 111 1 1 1 1 4 4 4 4 4 The actual reading distance depends on the code type a...

Page 30: ...E 28 About the Class 1 LED Label This label identifies the Handheld Terminal as a Class 1 LED product under IEC60825 1 1997 DT X10_E_P14_36 p65 05 4 1 11 04 AM 28 ...

Page 31: ...scanned properly Indicator 1 indicates a red light Important If you are unable to scan a bar code try changing the angle at which the scanner is held or distance from the scanner to the bar code and then try scanning again This Handheld Terminal is capable of scanning bar codes at a distance of about 40 300 mm 15 8 117 8 Furthermore the distance at which scanning is possible may vary according to ...

Page 32: ...t emitted by this laser scanner has a maximum output of less than 1 mW and a wavelength of 650 nm Bar Code Scanning Position Position the laser scanner close to the bar code when scanning small bar codes Position the laser scanner at a distance from the bar code so that the bars enter the light when scanning large bar codes Warning Never look directly into the laser light This product scans using ...

Page 33: ...separated by up to 1 meter 3 31 2 up to 25cm 97 8 for 4Mbps data communication Important A high sensitivity communication element is used during IR data communication In order to ensure successful communication avoid using cellular phones or other devices that emit radio wave in the area where you are performing IR data communication If you need to use such a device move away from the communicatin...

Page 34: ...wer is turned on proper data communication may prove impossible while this may also cause interference with TV and radio reception images produced by certain UHF and broadcast satellite channels may become blurry Normal data communication may not be possible in an area near a broadcast transmitter or wireless transmitter If this happens move to a different location Normal data communication may no...

Page 35: ...d If reset finds a memory problem A message like the one shown below appears on the display when the reset operation discovers a memory problem When this message appears press the R Trigger key to continue with the reset operation Note however that reset may not be successful depending on the condition of the memory In this case perform the full reset operation described on the next page Memory Co...

Page 36: ...h Memory a memory card or some other medium before performing a full reset 1 While the Handheld Terminal is turned on hold down the power key and push down the reset button for about one second until the message shown below appears on the display To cancel the full reset operation press the L Trigger key instead of the R Trigger key 2 Press the R Trigger key This causes the message shown below to ...

Page 37: ... 39 CODE 128 EAN128 Interleaved 2 of 5 ITF MSI Pressy IATA C MOS Imager Reading distance Barcode Within approximately 65mm to 600mm 25 8 to 1 115 8 2 dimensional code Within approximately 60mm to 285mm 23 8 to 111 4 Laser scanner scanning distance Within approximately 40 to 300mm 15 8 117 8 Serial Port Interface USB slave Mini B 5 Pin Transfer Rate 12Mbps max IR Port Interface IrDA Ver 1 1 Standar...

Page 38: ... Operation 1 Scanning 1 In the case of Standby 6 5 Scanning 1 5 Wireless 2 Memory backup Data Protection RAM 10 minutes when no power is being supplied by the installed battery pack Clock 2 weeks when no power is supplied by the battery pack Operating Temperature DT X10M30E M30U M30RC2 M30URC2 20 C to 50 C 4 F to 122 F DT X10M10E M10RC2 10 C to 50 C 14 F to 122 F Operating Humidity 10 to 80 RH non...

Page 39: ...data and file data between the Handheld Terminal and a computer over an RS 232C connection or USB connection You can also use the Bridge Satellite Cradle to charge the battery pack installed on the Handheld Terminal An optionally available wall mount unit DT 891WH lets you mount the Bridge Satellite Cradle on a wall General Guide Required AC Adaptor AD S42120A Option DT X10_E_P37_52 p65 05 4 1 11 ...

Page 40: ... port transfers data with the Handheld Terminal IR port non contact data communication Power is supplied to the Handheld Terminal via these contacts This lamp indicates the Power Status and the mounting status of the Handheld Terminal Off Power off Green Power on Handheld Terminal mounted correctly Red Power on Handheld Terminal not mounted This lamp shows when the Handheld Terminal is performing ...

Page 41: ...outlet 3 After making sure that the Bridge Satellite Cradle and your computer are both turned off remove the cap from the Bridge Satellite Cradle connection ports and then perform one of the following steps to connect to your computer Be sure to keep the Bridge Satellite Cradle connection ports covered whenever you are not using them RS 232C Connection Connect an RS 232C cable DT 887AXA to the RS ...

Page 42: ... X10 lights up in red When charging has been completed indicator 2 on the DT X10 changes color from red to green Important A high sensitivity communication element is used during IR data communication In order to ensure successful communication avoid using cellular phones or other devices that emit radio wave in the area where you are performing IR data communication If you need to use such a devi...

Page 43: ...Host Computer Interface Setting RS 232C USB 6 OFF ON Setting Intermediate Unit Daisy Chain Disabled Termination 5 OFF ON Setting Host Computer Daisy Chain 3 OFF ON 4 OFF OFF Daisy Chain Connection Type Setting 115 200bps Initial factory default setting 1 ON 2 OFF Bridge Satellite Cradle Data Rate Important Note that other DIP settings are used for testing and inspection purposes Because of this yo...

Page 44: ...it to the bottom of the Bridge Satellite Cradle and secure it in place with the wall mount unit screws 3 Drive one of the provided screws into the wall at the location where the upper hole of the wall mount unit to be when you mount the unit on the wall Do not drive the screw into the wall all the way Keep a space of about 2mm 1 8 between the head of the screw and the wall surface 4 Hook the upper...

Page 45: ...Loosen the upper screw and lower screw 2 Raise the Bridge Satellite Cradle and remove it from the screws Important While the Bridge Satellite Cradle is mounted on a wall be sure to check the wall screws periodically for looseness Tighten them as required Note use of the RS 232C cable is not supported by the wall mounted configuration Connect using a USB cable or daisy chain cable DT X10_E_P37_52 p...

Page 46: ... nearest to the host computer to the C IN port of the next unit that is sitting to the first unit with DT 888RSC cable Daisy chain connection cable as shown in the figure below To host computer Daisy chain connection cables DT 888RSC RS 232C cable or USB cable Important You can use optional daisy chain connection cables DT 888RSC to link up to eight Bridge Satellite Cradles DT X10_E_P37_52 p65 05 ...

Page 47: ...ixed voltage with current limiter Charge Time Approximately 2 5 hours standard battery pack Approximately 5 0 hours large capacity battery pack 6 Power Supply Power Requirement AC adaptor AD S42120A Power Consumption DC12V approximately 1600mA Output Handheld Terminal DC5V 2500mA max 7 AC Adaptor Model AD S42120A Input 100V to 240V AC 50 60Hz Output 12V DC 3500mA 8 Dimensions and Weight Dimensions...

Page 48: ...u charge the Handheld Terminal s battery simply by placing the Handheld Terminal onto the charger An optional wall mount unit lets you mount the Cradle type Battery Charger on a wall General Guide Back Top Front Right Bottom 1 4 3 6 5 2 7 Option Required AC Adaptor AD S42120A DT X10_E_P37_52 p65 05 4 1 11 04 AM 46 ...

Page 49: ...erminal is not seated correctly on the Cradle Power is supplied to the Handheld Terminal via these contacts This lamp indicates the power status and the mounting status of the Handheld Terminal Off Power off Red Power on Handheld Terminal not mounted Green Power on Handheld Terminal mounted correctly Turns the power on and off This is the base when using the Cradle in a desktop configuration Remov...

Page 50: ... their power contacts come into contact with each other place the Handheld Terminal onto the Cradle type Battery Charger This causes the Cradle type Battery Charger power indicator lamp to light in green When charging is initiated indicator 2 on the DT X10 lights up in red When charging has been completed indicator 2 on the DT X10 changes color from red to green Important Take care to avoid allowi...

Page 51: ... Supply Power Requirement AC adaptor AD S42120A Power Consumption 12V DC approximately 1 400mA Output Handheld Terminal 5V DC 2500mA max 3 AC Adaptor Model AD S42120A Input 100V to 240V AC 50 60Hz Output 12V DC 3500mA 4 Dimensions and Weight Dimensions Desktop Approximately 110 W X 139 D X 129 H mm 43 8 W 51 2 D 51 8 H Wall Mount Approximately 110 W 148 D 153 H mm 43 8 W 57 8 D 6 H Weight Desktop ...

Page 52: ...lable Dual Battery Charger DT 5022CHG allows for serial charging of two rechargeable battery packs General Guide Front Back Top 1 1 4 4 4 4 3 2 3 3 Bundled Items Connection Bracket 2 screws Option AC Adaptor MPC 577ADP DT X10_E_P37_52 p65 05 4 1 11 04 AM 50 ...

Page 53: ...r here Use this port to connect multiple Dual Battery Chargers to each other The connection bracket attaches here when you connect multiple Dual Battery Chargers to each other Important Each Dual Battery Charger comes with one connection bracket Since only one connection bracket is required when you connect two Dual Battery Chargers you will always have one left over Simply keep the other connecti...

Page 54: ...nto a wall outlet 3 Taking care that the battery pack is oriented correctly insert it into the Dual Battery Charger This causes the Charge Indicator Lamp to light in red indicating that charging has started Charge Indicator Lamp Off Not charging Red Charging Red Flashing Battery pack problem Green Charging complete DT X10_E_P37_52 p65 05 4 1 11 04 AM 52 ...

Page 55: ...e illustrations below remove the connector covers of the Dual Battery Chargers you want to connect to each other 2 Connect the two Dual Battery Chargers as shown below 3 Turn over the connected Dual Battery Chargers and attach a connection bracket securing it in place with screws You can repeat the above steps to connect up to three Dual Battery Chargers Connector cover DT X10_E_P53_59 p65 05 4 1 ...

Page 56: ...roximately 5 0 hours for two battery packs DT 5023BAT 2 Approximately 10 hours for two large capacity battery packs DT 5025LBAT 2 3 Power Supply Power Requirement AC adaptor MPC 577ADP Consumption Current Approximately 650mA 4 Operating Environment Temperature 0 C to 40 C 32 F to 104 F Humidity 30 to 80 RH non condensation 5 Dimensions and Weight Dimensions Approximately 110 W 100 D 49 H mm 43 8 W...

Page 57: ...ash card instead of the adaptor pulling the remover may end up pulling out the compact flash card only and make it impossible to remove the adaptor To load a PC card 1 Carefully lift up either end of the rubber PC card slot cover and remove the four screws that secure it in place Important Be gentle when lifting up the ends of the PC card slot cover rubber to expose the screws Pulling on the rubbe...

Page 58: ...over tape affixed to the card so it is not damaged when you replace the card compartment cover 4 Replace the PC card compartment cover and secure it in place with its screws Important If you cannot eject a PC card from the slot for some reason carefully use a flat blade screwdriver to pull out the lever located at the right of the card as shown in the illustration While pulling out on the tab pull...

Page 59: ...d When using a CF storage card be sure to close the card slot cover Attaching the CF Card Extension Unit Attach the CF Card Extension Unit to the back of the Handheld Terminal The CF Card Extension Unit connector is located under a protective cover 1 Loosen two screws and detach the protector from the connector 2 Attach the CF Extension Card Unit after peeling off the seals 2 on the back and then ...

Page 60: ... slot if it is not oriented correctly 4 Replace the CF card compartment cover and secure it in place with its screws When removing a card hook your finger on the rim of the card and pull CF Card Extension Unit DT 894CFU Specifications Card Slot Compact Flash Card Type I Type II 3 3V Dimensions Using Standard Card Cover Approximately 70 W 78 D 13 H mm 23 4 W 31 8 D 1 2 H Using Large Card Cover Appr...

Page 61: ...he capacity remained decreases due to spontaneous discharge or chemical decomposition by the battery pack itself If the battery pack fails to hold its operating duration after it has been fully charged replace it with a new one The battery pack may reach the end of its service life Battery Pack Specifications Model DT 5023BAT Rated Capacitance 1550mAh Rated Voltage 3 7V Dimensions Approximately 37...

Page 62: ...CASIO COMPUTER CO LTD 6 2 Hon machi 1 chome Shibuya ku Tokyo 151 8543 Japan Printed on recycled paper PN410369 005 MO0504 F Printed in Japan DT X10_E_Hyo_1_4 p65 05 4 1 1 22 PM 2 ...

Reviews: