CarVision BMW-CIC-LVDS Quick Start Manual Download Page 10


p

ag

e

10


3.


Interface operation 


3.1.


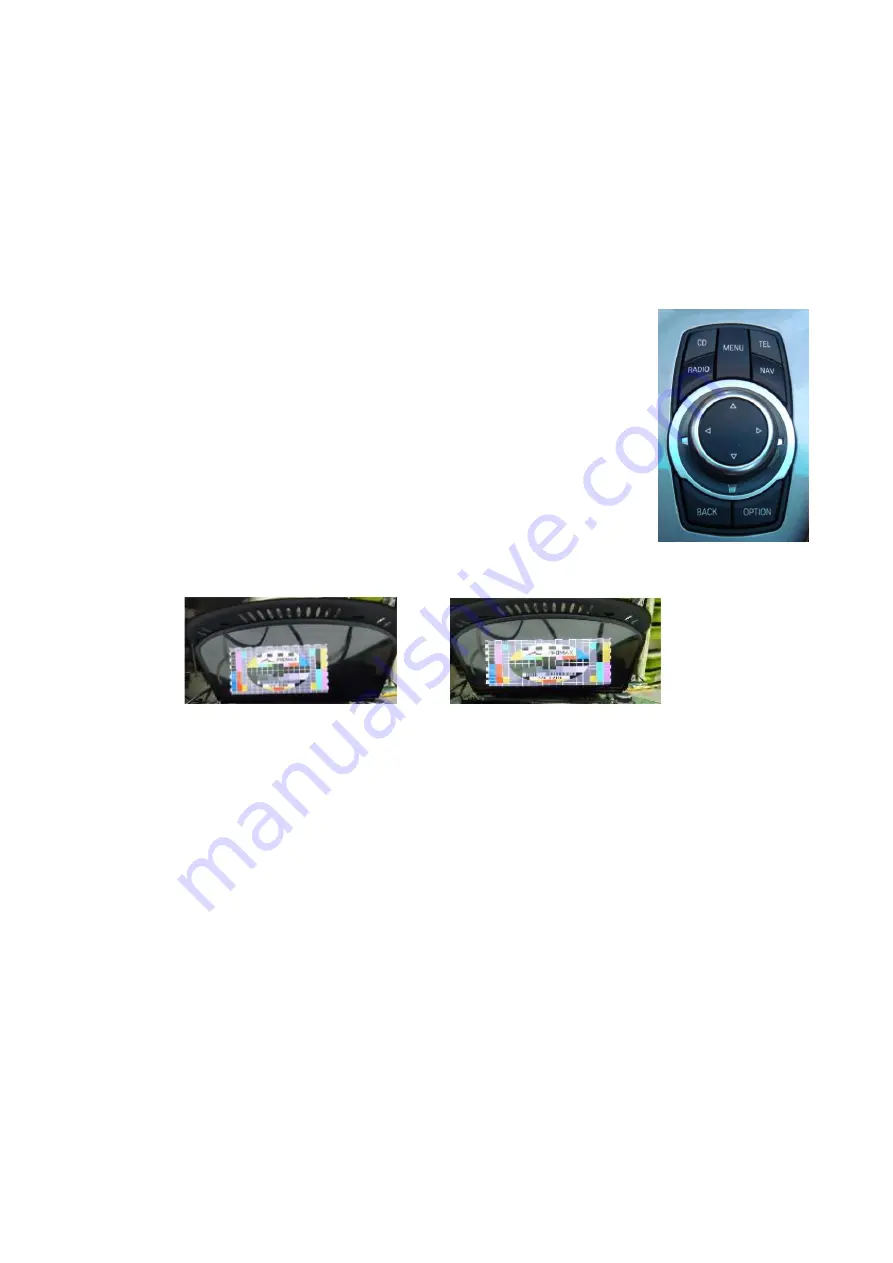
By factory infotainment buttons 


Some of the factory buttons can be used to execute interface functions. 
 

Longpress NAV (MAP)

(more than 1 second) to activate the interface video. Each longpress 

will switch to the next enabled input.  If all inputs are enabled the order is: 
 

Factory video 

 RGB-in 

 video IN1 

 video IN2 

 factory video 

… 

 
Inputs which are not enabled are skipped. If the audio cable is connected,  
when switching from video IN1 to video IN2, also the sound will be  
switched. 
 
When in interface video mode it is also possible to return to factory 
video by pressing 

RADIO

 or 

CD.


When in interface video mode, by pressing the 

OPTION

 button, it is  

possible to switch the picture ratio between 16:9 and 24:9  
(Only on vehicles with ultra-wide 8.8” or 10.2” screen). 


3.2.


By keypad 

 
Alternatively or additionally to the factory infotainment buttons the interface’s keypad can 
be used to execute interface functions. 
 

Shortpress keypad

 – video input switching, like longpress NAVI, see chapter 3.1. 


Longpress keypad

 – inserted picture ratio switching, like OPTION, see chapter 3.1. 


Summary of Contents for BMW-CIC-LVDS

Page 1: ...BMW monitors with 4pin HSD LVDS connector Video inserter with 2 video RGB rear view camera input and CAN control Video inserter BMW CIC LVDS...

Page 2: ...gal Information The driver must not be distracted by moving pictures By law watching mobbing pictures while driving is prohibited We do not accept any liability for material damage or personal injury...

Page 3: ...tching of video through external switch PAL NTSC input compatible Ultra wide picture mode 24 9 only BMW with ultra wide screen 8 8 or 10 2 Wrong plugging circuit protection 1 Prior to installation Rea...

Page 4: ...e coded by dealership 1 2 Checking the compatibility of vehicle and accessories 1 3 Dip switch settings With the video interface boxes dip switches it is possible to select vehicle navigation the inte...

Page 5: ...ork while connecting an after market rear view camera cut the green cable of the 6pin to 8pin cable at the black 8pin connector and connect it to the reverse gear light 12V For this use a relay becaus...

Page 6: ...o be avoided it is usually sufficient to put the vehicle is sleep mode In case the sleep mode does not show success disconnect the battery with a resistor lead If power source is not taken directly fr...

Page 7: ...V switch signal CAN box Pin definition black 4pin power connector Pin 4 red Battery 12V Pin 2 brown Ground Pin 1 grey CAN low Pin 3 blue CAN high Keypad for video source switching additional option 8p...

Page 8: ...connector of 6pin to 8pin cable into video interface Plug keypad into Switch connector Even if the keypad shall not be used its installation e g in a hidden spot is recommended for support reasons If...

Page 9: ...lready available in the vehicle If not on most infotainments which are compatible with this video interface it can be coded by the dealership 2 6 Connecting 2 AV Sources If two AV sources shall be con...

Page 10: ...ng from video IN1 to video IN2 also the sound will be switched When in interface video mode it is also possible to return to factory video by pressing RADIO or CD When in interface video mode by press...

Page 11: ...page 11 4 Specifications BATT ACC range 7V 25V Power 0 3A 12V Video input 0 7V 1V Video input formats PAL NTSC Weight 195g Dimensions box only B x H x T 182 x 24 x 100 mm...

Reviews: