Part Number 9991200 01/26/05
57 / 56 / 53 Voyager Setup
Page 3 of 11
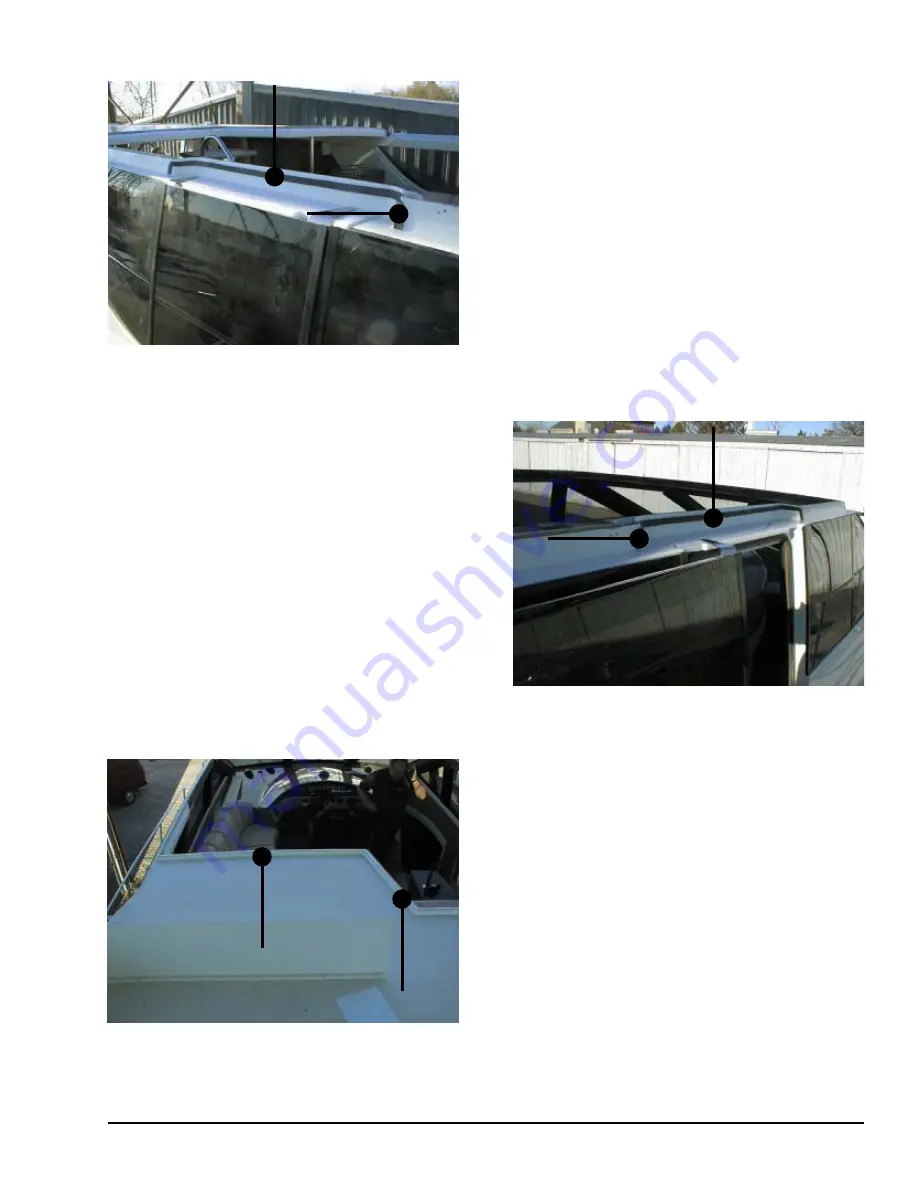
Section Above Pilothouse
Door
Same as above; different view.
Notice how sealant tape goes up and around
section.
Aft of Pilothouse
Page 1: ...ivider board under the seats 5 Run all wires up through bridge a Connect davit wires and light wires at port stern corner of bridge 57 56 53 57 56 53 57 56 53 57 56 53 57 56 53 V V V V Vo o o o oy y y y ya a a a ag g g g ger Setup er Setup er Setup er Setup er Setup b Pull coiled water drain hoses down through holes in bridge and route through holes in black air intake vents c Attach hoses to thru...
Page 2: ...s 10 Cosmetically seal bridge to deck using 732 multipurpose sealant Use black above windows and air intakes and white where white meets NOTE Leave a 3 inch long void in the forward corner of black air intake vents for drainage 11 Run wire under dash and icemaker a Hook up wet bar and icemaker hoses b Hook up mastlight antennas and radar scanner if optioned c Install the rest of the under seat div...
Page 3: ...r 9991200 01 26 05 57 56 53 Voyager Setup Page 3 of 11 Section Above Pilothouse Door Same as above different view Section Above Pilothouse Door Notice how sealant tape goes up and around section Aft of Pilothouse ...
Page 4: ...bottom of sealant tape SikaFlex 240 NOTE This section is critical because it keeps any water from entering the top sec tion of the salon door View Above Aft Salon Door Deck Above Salon Door Sealant tape should be placed 3 4 down from top of deck NOTE It is critical that the sealant tape and sealant are placed exactly as shown in the picture ...
Page 5: ...be drilled and screws added three above center section and two above aft window Forward window section will have a bolt Port Salon Windows Over the two port salon windows behind the galley drill five holes spaced as shown Forward Port Salon Window This area will have a bolt NOTE Early serial numbered boats have two screws if the metal plate and bolt hole are not installed ...
Page 6: ...Part Number 9991200 01 26 05 57 56 53 Voyager Setup Page 6 of 11 Above Port Salon Window Run sealant around bolt hole Section Above Port Salon Windows Section Above Starboard Salon Windows ...
Page 7: ...Section Above Pilothouse Door Notice how sealant tape goes up and around track section Seal as picture illustrates Starboard View Front Corner and Side Place sealant 3 4 below top of lip on cut out Port Pilothouse Window Place sealant 3 4 below top of lip on cut out ...
Page 8: ...0 01 26 05 57 56 53 Voyager Setup Page 8 of 11 Port Aft of Pilothouse Door Run sealant around bolt holes Above Port Salon Windows Run sealant around bolt hole Back Side of Pilothouse Run heavy bead of sealant against lip ...
Page 9: ...Part Number 9991200 01 26 05 57 56 53 Voyager Setup Page 9 of 11 Port Aft Corner Seal around opening for bridge drain hose Starboard Aft Corner Seal around opening for bridge drain hose ...
Page 10: ...ole 3 screws forward of the pilothouse door 3 screws across the pilothouse door 4 screws and 1 bolt aft of the pilothouse door 9 screws and 1 bolt on the port side 4 screws on the aft starboard side 3 screws in the center along the port side steps to the bridge 4 screws on the aft port side Salon 6 screws and 1 bolt on the starboard side 6 screws and 1 bolt on the port side Exterior 9 screws acros...
Page 11: ... 11 of 11 Fastener Locations NOTE All screws and bolts should be installed at the time of assembly The bolts are labeled as such all other fasteners are screws 9 5 on 530 7 on 570 9 4 3 3 4 4 3 3 3 Bolts 3 Bolts 1 Bolt 1 Bolt 1 Bolt 1 Bolt 5 on 530 7 on 570 ...