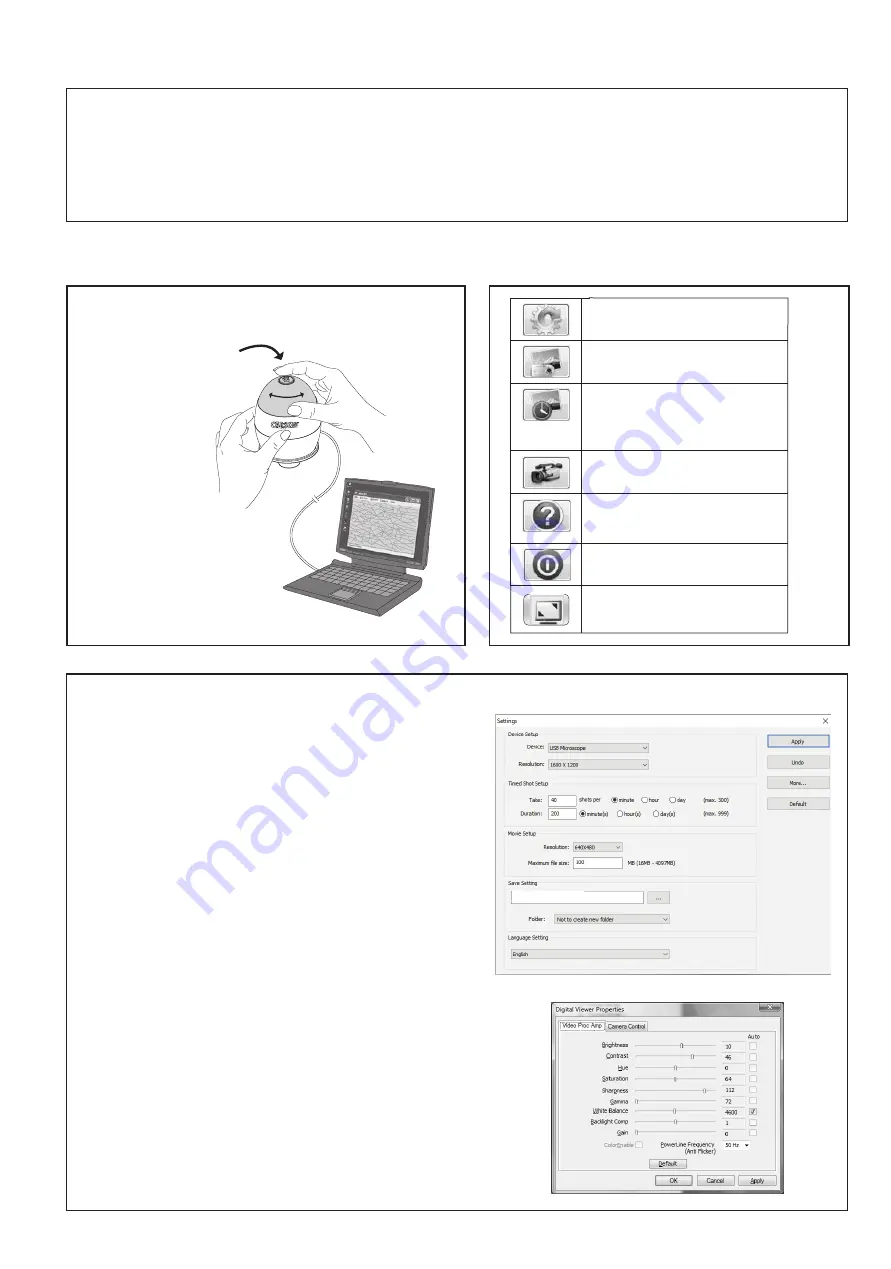
DOWNLOAD AND CONNECT THE DEVICE:
to download and install the latest Xploview software for your operating system.
• Compatible with Mac and Windows
• USB 2.0 / 3.0 required. No batteries required.
• Connect device to a computer using the attached USB cable. The LED light will turn on indicating that the device is
powered on.
• When device is connected to the computer for the first time, a driver will automatically be installed by Windows or Mac OS.
FOCUSING:
Rotate the focusing ring clockwise or counterclockwise until
the viewing image shown on the monitor is clear and sharp.
To take a quick image,
press the shutter button.*
*You can also capture an image by
clicking the camera icon on the
Xploview Default View Screen.
USING THE XPLOVIEW SOFTWARE:
Click to open the
Xploview settings
menu (see next section).
Click to
capture
an image.
Click to start and stop the
timed shot
feature. When activated, images will
be captured at a regular interval.
Click to start and stop the
video
recording
feature.
Click to show the copyright and
version
information
of the application
software.
Click to
close
the Xploview software.
Click to view in
full screen mode.
Button is on bottom right hand corner
of screen. Press “Esc” to exit mode.
åÖ
XPLOVIEW SETTINGS MENU:
The first time the Xploview software is started, the default
settings will be loaded. You may change these settings
manually in the system settings menu. Be sure to click “Apply”
to save setting changes.
•
Device Setup:
If the image captured by the Digital Microscope
was not displayed by default, you can change this by selecting it
from the “Device” drop-down menu. The resolution of images you
capture can be changed from the “Resolution” drop-down menu.
•
Timed Shot Setup:
The frequency and duration of automatic
images captured can be adjusted under this option.
•
Movie Setup:
The resolution of videos you record can be changed
from the “Resolution” menu. You can also set a maximum file size
for each video.
•
Save Setting:
The default location for captured images or videos
can be changed under this option.
•
Language Setting:
The language of the Xploview software can
be changed under this option.
•
“More”:
By clicking “More...” on the right side of Settings Menu,
you will access the Digital Viewer Properties where you can
manually adjust image settings. Depending on your operating
system, settings may differ. (See image on the right.)
2
Settings Menu
C:\Users\jsmith\Documents
Digital Viewer Properties Menu


