background image

D

35

11. Justierung der Empfindlichkeit „GAIN“  
 (Im 

Dual-Modus)

Die Empfindlichkeit des CG-1 Gyro-Systems lässt sich am Sender 
am besten über einen Schieberegler von 0 - 100% einstellen. 
Bei der eingestellten Empfindlichkeit von 0% ist die stabilisierende 
Wirkung des Gyro´s abgeschaltet und bei 100% ist die höchste 
Empfindlichkeit justiert.

Mit dem am Sender befindlichen Schieberegler wird nicht nur die 
Empfindlichkeit des CG-1 eingestellt, sondern auch die Betriebs-
art umgeschaltet. Aus diesem Grund entspricht die Mittelstellung 
des Schiebereglers (50%-Geberweg) einer Kreiselempfindlichkeit 
von 0%.

10. Initialisierung des CG-1

Für eine ordnungsgemäße Funktion muss der CG-1 Gyro 
initialisiert werden. Dieser interne Abgleich wird automatisch nach 
dem Einschalten der Empfangsanlage durchgeführt und dauert 
ca. 2 - 3 Sekunden. Während dieses Abgleichs darf das Modell 
und der Kreisel nicht bewegt bzw. gedreht werden. Nach erfolg-
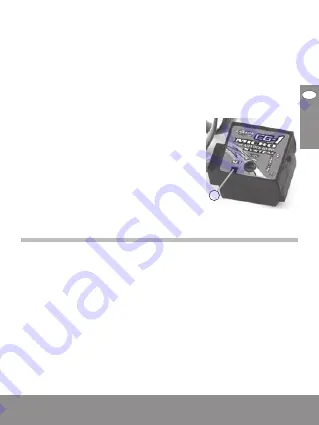
reichem Abschluss des Abgleichs bestätigt dies die LED-Anzeige 
(4).

Sollte z.B. das Ansteuersignal vom 
Empfänger fehlen oder nicht einwandfrei 
sein, so blinkt die LED-Anzeige nach 
dem Abgleich. In diesem Fall muss die 
Empfangsanlage noch mal ausgeschal-
tet werden und nach Beseitigung der 
Fehlerursache erneut mit der Initialisierung 
begonnen werden.

4

CARSON Gyro 507027

Summary of Contents for 507027

Page 1: ... Instruction Manual Page 2 21 쮕 Betriebsanleitung Seite 22 41 Mode d emploi Page 42 61 PIEZO MINI KREISEL MIT HEADING LOCK CARSON Gyro 507027 ...

Page 2: ...he operating and safety instructions the warranty will be void Keep this guide for future reference Limited Warranty This product is warranted by CARSON against manufacturing defects in materials and workmanship under normal use for 24 months from the date of purchase from authorised franchisees and dealers In the event of a product defect during the warranty period return the product along with y...

Page 3: ... attributable to acts of God abuse accident misuse improper or abnormal usage failure to follow instructions improper installation or maintenance alteration lightning or other incidence of excess voltage or current damage caused by losing control of your car any repairs other than those provided by a CARSON Authorised Service Facility consumables such as fuses or batteries cosmetic damage transpor...

Page 4: ...s forbidden to dispose of this equipment in the household waste We wish you lots of fun with your CARSON Gyro System Please read this manual carefully before using your new CARSON Gyro System CARSON Gyro 507027 ...

Page 5: ...Gyro System 10 7 Installation of the tail servo 12 8 Connecting the CG 1 Gyro 13 9 Operating the CG 1 Gyro 14 10 Initialisation of the CG 1 15 11 Setting the gyro sensitivity GAIN dual mode 15 12 Setting gyro sensitivity GAIN single mode 18 13 Setting the effective direction of your CG 1 19 14 Checking the gyro sensivity in flight 20 15 Care and maintenance 21 16 Technical data 21 CARSON Gyro 5070...

Page 6: ... small airplane models The gyro can optionally be operated in the normal mode or in the so called heading lock mode In the normal mode the downstream servo is only corrected as long as the rotary movement of the model is identified by the gyro In the heaing lock mode the downstream servo is corrected only as long as the original starting position angular position of the gyro has been achieved agai...

Page 7: ...ident and crash damages are also excluded from the guarantee and warranty The unauthorized conversion and or modification of the product is inadmissible because of safety and approval reasons CE In this case the operating licence lapses which can have particularly serious repercussions in the event of a claim When handling batteries speed controllers or electric motors with propellers and rotor bl...

Page 8: ... the transmitter on first Only then may the receiver with connected gyro be launched Otherwise there can be unforeseeable reactions of the model or of the servo Check the gyro CG 1 before every flight for correct function and secure fit in the model A loose and disconnected gyro makes the model uncontrollable 4 During or after operation Do not take any risks Your own safety and that of your envi r...

Page 9: ...witching the servo rotation direction Always leave the remote control transmitter turned on as long as the model is in operation Always switch your model off first before switching off the remote control sender In case of a fault or a malfunction correct the fault first then re start the model Do not expose your model the gyro and the remote control to direct sunlight or excessive heat for longer ...

Page 10: ...sitivity regulation is later carried out 6 Installation of the CG 1 Gyro system When installing the gyro ensure that you select a place of instal lation where the gyro is well protected from vibrations and heat fluctuations picture page 11 In most of the cases the manufacturers of the respective model set the exact place of installation for the gyro If this is not the case on your model select a p...

Page 11: ...ller and the slide switches must be easily accessible from the side The cables connected to the gyro must be laid so that they cannot be caught in rotating parts of the mechanics or be worn out on sharp edges 8 7 9 10 CARSON Gyro 507027 ...

Page 12: ...vo 11 and the tail rotor are normally precisely set out in the documents of the model helicopter The distance A is based on the model size and is normally stated in the documents of the model helicopter Observe an absolutely smooth and at the same time free of clearance control of the tail rotor Because only if the smallest of servo deflections trigger a control reaction on the model the gyro can ...

Page 13: ...is controlled on the sender with a sliding controller What connections on the receiver have to be exactly assigned depends on the remote control manufacturer and can be read up in the documents of the system used The tail rotor servo 11 is connected directly to the gyro Ensure correct polarity of the servo socket 14 The pulse line 15 of the servo cable depending on servo manufacturer yellow white ...

Page 14: ...yro Before you launch the gyro for the first time all tail mixed programs programmed in the sender such as revolution mix or gyro hide mixer must first be deactivated The gyro has no function switch The power supply is provided via the 3 pin plug connection which is connected to the receiver As soon as the receiving system is switched on the gyro is in operation The steering stick for the tail fun...

Page 15: ... the sliding controller 50 sensor route corresponds to a gyro sensitivity of 0 10 Initialisation of the CG 1 The gyro must be initialised for a correct function This internal coordination is carried out automatically after switching on the receiving system and lasts approx 2 3 seconds During this time the model and the gyro must not be moved or turned After successful completion of the initialisat...

Page 16: ...mode In this case the required setting values must be programmed in the ATV menu route settings of the control sensor In conjunction with a flight condition swit ching an individual gyro sensitivity can thus be programmed for hovering flight sightseeing flight and artistic flight In order to to check whether the gyro works in the correct mode for the respective sensor settings first launch the sen...

Page 17: ...sition the gyro is working in heading lock mode In this case change the function orientation of the sliding controller in the reverse menu on the sender Attention important If the servo lever runs in the heading lock operating type until the stop the sender trimming subtrim must be set so that the servo lever is nearly stable in the central position or runs only very slowly to the stop Tip The req...

Page 18: ...pposing turn Launch the sender and then turn on the model If the tail is now pressed by hand to the left when looking from the top the tail servo must perform a control movement which would turn the tail back to the right The turning movement of the servo must go in the same direction as when the sender of the control stick for the tail function is actuated to the left drawing A If the tail is now...

Page 19: ...tation direction created by the gyro only The control pulses created by the sender remain unaffected and are passed on to the tail servo 1 1 The switch for the servo rotation direction see page 18 6 is on the right side of the gyro Depending on the requirement you can set the rotation direction from A normal to B reverse Take a small settings screwdriver to operate the switch if required A B CARSO...

Page 20: ...the gyro sensitivity can be increased If however the tail swings out further the sensitivity is set too high The best sensitivity is achieved if the tail is just about to swing Please note The maximum adjustable gyro sensitivity depends on the rotation speed of the main rotor The higher the set main rotor speed the lower the maximum flyable gyro sensitivity At a gyro sensitivity of less than 70 th...

Page 21: ...ansing agents or chemical solvents since this might damage the surfaces Disposal Dispose of the product at the end of its lifecycle in accordance with the applicable legal regulations 16 Technical data Operating voltage 4 2 7 V DC Temperature range 5 C to 60 C Dimensions 17 x 17 x 14 mm Weight incl connection cable 7 g CARSON Gyro 507027 ...

Page 22: ...htung der Bedienungsanleitung und der enthaltenen Sicherheitsanweisungen erlischt der Garantieanspruch Bewahren Sie diese Anleitung zum Nachlesen auf und für die eventuelle Weitergabe des Modells an Dritte Garantiebedingungen Für dieses Produkt leistet CARSON eine Garantie von 24 Monaten betreffend Fehler bei der Herstellung in Bezug auf Material und Fertigung bei normalem Gebrauch ab dem Kauf bei...

Page 23: ...sanleitung höhere Gewalt Unfall fehlerhafte oder außergewöhnliche Beanspru chung fehlerhafte Handhabung eigenmächtige Veränderungen Blitz schlag oder anderer Einfluss von Hochspannung oder Strom Schäden die durch den Verlust der Kontrolle über Ihr Modell entstehen Reparaturen die nicht durch einen autorisierten CARSON Service durchgeführt wurden Verschleißteile wie etwa Sicherungen und Batterien r...

Page 24: ...em CARSON Gyro System Vor dem Gebrauch Ihres neuen Carson Gyro Systems lesen Sie bitte dieses Handbuch sorgfältig durch Durch diese Garantie erhalten Sie spezielle Rechte darüber hinaus ist auch eine von Land zu Land verschiedene Geltend machung anderer Ansprüche denkbar CARSON Gyro 507027 ...

Page 25: ...Gyro Systems 30 7 Installation des Heckservos 32 8 Anschluss des CG 1 Gyro 33 9 Betrieb des CG 1 Gyro 34 10 Initialisierung des CG 1 35 11 Justierung der Empfindlichkeit GAIN Im Dual Modus 35 12 Justierung der Empfindlichkeit GAIN Im Single Modus 38 13 Einrichten der Wirkrichtung des Kreisels 38 14 Überprüfung der Gyro Empfindlickeit im Flug 40 15 Wartung und Pflege 41 16 Technische Daten 41 CARSO...

Page 26: ...Es kann aber auch in größeren Hubschraubern oder Flugmodellen eingesetzt werden Der CG 1 kann im Normal Modus oder im Heading Lock Modus betrieben werden Beim Normalmodus korrigiert das am Gyro angeschlossene Servo nur solange wie auch eine Drehbewegung des Modells vom Gyro erkannt wird Im Heading Lock Modus korregiert das angeschlossene Servo solange bis die ursprüngliche Ausgangslage des CG 1 Gy...

Page 27: ... des Produkts nicht gestattet In diesem Falle erlischt die Betriebserlaubnis was vor allem im Versicherungsfalle schwerwiegende Folgen nach sich ziehen kann Achten Sie beim Umgang mit Akkus Fahrtreglern und Elektro motoren mit Luftschrauben und Rotorblättern darauf dass sich niemals Körperteile oder Gegenstände im Dreh und Ansaugbe reich des Propellers Rotors befinden Überschreiten Sie niemals die...

Page 28: ...enem Kreisel ein Ansonsten kann es zu unvorhersehbaren Reaktionen des Modells bzw der Servos kommen Prüfen Sie den CG 1 Gyro vor jedem Flug auf korrekte Funktion und sicheren Sitz am Modell Durch einen gelockerten oder losgelösten Kreisel wird das Modell unkontrollierbar und kann somit zum Absturz führen 4 Nach bzw während des Betriebes Gehen Sie beim Betrieb im Flug kein Risiko ein Ihre eigene un...

Page 29: ...rnsteuerung Sender eingeschaltet solange das Modell in Betrieb ist Immer erst das Modell ausschalten erst danach darf der Fern steuersender ausgeschaltet werden Bei einem Defekt oder einer Fehlfunktion ist zuerst die Ursache der Störung zu beseitigen bevor Sie einen neuen Start mit Ihrem Modell durchführen Setzen Sie Ihr Modell den Kreisel und die Fernsteueranlage nie über längere Zeit der direkte...

Page 30: ...altet Zusätzlich wird der Gyro mit den Empfängerstecker GAIN 2 an einem zweiten Empfängersteckplatz verbunden über den später die Empfindlichkeit über den Sender eingestellt werden kann 6 Installation des CG 1 Gyro Systems Bei der Installation des Gyro s achten Sie immer drauf dass Sie den richtigen Einbauort wählen Abbildung Seite 30 Der CG 1 muss gut vor Vibrationen und Wärmeschwankungen geschüt...

Page 31: ...Kabel müssen zum Ende der Installation so verlegt werden dass sie in keine drehende Teile der Mechanik gelangen können bzw an scharfen Kanten beschädigt werden Zur Befestigung verwenden Sie ausschließlich doppelseitig klebende Schaumstoffpads 9 Parallel zur Hauptrotorwelle verläuft dann die Stabilisierungsachse des CG 1 Gyro s 10 8 7 9 10 CARSON Gyro 507027 ...

Page 32: ...g des Heckrotors sind im Normalfall in den Unterlagen Bauanleitung des Modellhubschraubers genau vorge geben Das gleiche gilt auch für den Abstand A der sich je nach Modell unter scheidet Wichtig ist auch eine absolut leicht gängige zugleich spielfreie Anlenkung des Heckrotors und ein spielfreies und schnelles Heckservo Denn nur wenn bereits kleinste Servoausschläge eine Steuerreaktion am Modell h...

Page 33: ...r mit einem Schiebe regler oder einen 2 Stufenschalter belegt ist Empfängersteckplatzbelegung ist je nach Hersteller des Senders unterschiedlich und muss in den Unterlagen des Fernsteuer systems entnommen werden Das Heckrotorservo 11 muss direkt am CG 1 Gyro angeschlos sen werden Dabei müssen Sie auf die richtige Polung des Servosteckers 14 achten Die Impulsleitung 15 des Servokabels je nach Herst...

Page 34: ...o Ehe der CG 1 zum ersten mal in Betreib genommen wird müssen alle im Sender programmierten Heckservo Mixprogramme oder Kreisel Ausblendmischer deaktiviert werden Der Gyro hat keinen eignen On Off Schalter und versorgt sich über den 3 poligen Stecker der am Empfänger angeschlossen ist mit Strom Sobald der Empfänger Spannung hat ist auch der CG 1 in Betrieb Der Heckrotor Steuerknüppel des Senders s...

Page 35: ...ers 50 Geberweg einer Kreiselempfindlichkeit von 0 10 Initialisierung des CG 1 Für eine ordnungsgemäße Funktion muss der CG 1 Gyro initialisiert werden Dieser interne Abgleich wird automatisch nach dem Einschalten der Empfangsanlage durchgeführt und dauert ca 2 3 Sekunden Während dieses Abgleichs darf das Modell und der Kreisel nicht bewegt bzw gedreht werden Nach erfolg reichem Abschluss des Abgl...

Page 36: ...chen Einstellwerte im ATV Menü Wegeinstellung der Steuergeber zu programmieren In Verbindung mit einer Flugzustandsumschaltung kann so für den Schwebeflug für den Rundflug und für den Kunstflug eine individuelle Empfindlichkeit des CG 1 programmiert werden Um zu prüfen ob der CG 1 Gyro bei der jeweiligen Geber Einstel lung in der richtigen Betriebsart arbeitet schalten Sie zunächst den Sender ein ...

Page 37: ...eht wurde arbeitet der Gyro im Heading Lock Modus In diesem Fall müssen Sie am Sender im Reverse Menü die Funktionsrichtung des Schiebereglers ändern WICHTIG ACHTUNG Wenn der Servohebel des Heckrotorservos im Heading Lock Modus in eine Richtung bis auf Anschlag geht so ist die Sender Trimmung Sub Trimm so einzustellen dass der Servohebel etwa stabil in der Mittelstellung steht bzw nur sehr langsam...

Page 38: ... Hubschraubermodells abgibt Nehmen Sie den Sender in die Hand und schalten Sie anschließend das Modell an Wird nun das Heck des Modells von oben gesehen mit der Hand nach links gedrückt so muss das Heckrotor Servo eine Steuer bewegung ausführen die das Heck zurück nach rechts drücken würde Die Drehbewegung des Servos muss in dieselbe Richtung gehen als wenn am Sender der Steuerknüppel für die Heck...

Page 39: ...uf die vom Kreisel erzeugten Steuerimpulse Die Steuerimpulse die vom Sender erzeugt werden und über den Kreisel an den Heckrotor Servo weitergegeben werden bleiben davon unberührt Der Reverse Schalter für die Servo Drehrichtung siehe Seite 38 Pos 6 befindet sich an der rechten Seite des CG 1 Gyro Gehäuses Je nach Notwendigkeit können Sie die Drehrichtung von A Normal auf B Reverse einstellen Nehme...

Page 40: ...eutralstellung federt Neutralisiert sich das Heck wieder ohne dabei aufzuschwingen kann die Gyro Empfindlichkeit weiter vergrößert werden Schwingt das Heck jedoch weiter auf ist die Empfindlichkeit zu hoch justiert Die optimale Empfindlichkeits Einstellung ist dann erreicht wenn das Heck kurz davor ist weiter aufzuschwingen Bitte beachten Sie Die maximal einstellbare Empfindlichkeit ist von der Ha...

Page 41: ...trockenem Tuch oder einem Pinsel gereinigt werden Verwenden Sie auf keinen Fall aggressive Reinigungsmittel oder chemische Lösungen da sonst die Oberflächen beschädigt werden können Entsorgung Entsorgen Sie das Produkt am Ende seiner Lebensdauer gemäß den geltenden gesetzlichen Vorschriften 16 Technische Daten Betriebsspannung 4 2 7 V DC Temperaturbereich 5 C bis 60 C Abmessungen 17 x 17 x 14 mm G...

Page 42: ...urité s y trouvant annule automatiquement tout effet de garantie Veuillez conserver le présent mode d emploi pour consultation ultérieure et pour la transmission éventuelle du modèle réduit à un tiers Conditions de garantie CARSON vous garantit pour 24 mois à partir de la date d achat pièces justificatives à l appui que la voiture est exempte de tout défaut L utilisation inappropriée l usure des é...

Page 43: ...suffisante altération éclair ou tout autre conséquence d une surtension ou d un courant excessif tout dommage provoqué par la perte de contrôle de la voiture toute réparation autre que celles réalisées par un organisme agrée par CARSON les consommables tels que les fusibles et les batteries des dommages esthétiques le transport l expédition et les frais d assurance et les frais de retour d install...

Page 44: ...rite Nous vous souhaitons beaucoup de plaisir avec votre Gyroscope à conservateur de cap Heading Lock CG 1 de CARSON Lire attentivement ce manuel avant l utilisation de votre nouveau Gyroscope à conservateur de cap Heading Lock CG 1 de Carson CARSON Gyro 507027 ...

Page 45: ...CG 1 50 7 Montage du servo arrière 52 8 Branchement du gyroscope CG 1 53 9 Mise en marche du gyroscope CG 1 54 10 Initialisation du gyroscope CG 1 55 11 Réglage de la sensibilité gyroscopique mode dual 55 12 Réglage de la sensibilité gyroscopique mode simple 58 13 Régler la direction de l effet du gyroscope 58 14 Vérifier la sensibilité du gyroscope en vol 60 15 Entretien et nettoyage 61 16 Caract...

Page 46: ...dèles réduits d avion Vous pouvez utiliser le gyroscope ou bien en mode normal ou bien en mode appelé Heading Lock En mode normal la correction de position par le servo connecté en aval est effectué aussi longtemps que le gyroscope reconnaît un mouvement rotatif du modèle réduit En mode Heading Lock la correction de position par le servo connecté en aval est effectué jusqu à ce que la position ini...

Page 47: ...oit à la garantie est annulé Pour des raisons de sécurité et d homologation CE il est interdit de modifier la construction et ou de transformer le produit soi même Dans ce cas l agréation expire ce qui peut avoir des conséquences graves en cas de sinistre Lors de la manipulation des accus des variateurs et des moteurs électriques avec des hélices et des pales de rotor veiller à ce qu aucune partie...

Page 48: ...rvice le récepteur avec le gyroscope connecté Autrement le modèle réduit et les servos peuvent réagir de manière inattendue Avant toute utilisation du gyroscope contrôlez son bon fonctionnement et sa fixation correcte dans le modèle réduit Un gyroscope mal fixé ou détaché rend le modèle réduit incontrôlable 4 Pendant ou après le service Ne prenez aucun risque pendant le fonctionnement de l apparei...

Page 49: ...z toujours la télécommande émetteur allumée tant que le modèle réduit est en service Eteignez toujours en premier le modèle réduit ce n est qu après que l émetteur de la télécommande doit être éteint En cas de défaut ou de dysfonctionnement il est impératif d en éliminer la cause avant de redémarrer votre modèle réduit N exposez pas votre modèle le gyroscope ou la télécommande pendant une période ...

Page 50: ...lié à une autre sortie du récepteur 2 par le biais duquel s effectuera ultérieurement le réglage de la sensiblité 6 Montage du gyroscope CG 1 Lors du montage du gyroscope veillez toujours à choisir un emplacement de montage protégeant le gyroscope des vibrations et des variations de température image page 51 Souvent les fabricants des différents modèles réduits d hélicoptères spécifient l endroit ...

Page 51: ...tre posés de manière à ce qu ils ne puissent pas pénétrer dans les pièces rotatives de la mécanique ou être détruits par des bords coupants Pour sa fixation utilisez uniquement les pads en mousse adhésifs double face 9 fournis avec l appareil L axe de stabilisation 10 du gyroscope est alors parallèle à l arbre de rotor principal 8 7 9 10 CARSON Gyro 507027 ...

Page 52: ...ent définis dans la documentation du modèle réduit d hélicoptère La distance A dépend de la taille du modèle réduit elle est normalement indiquée dans la documentation fourni avec le modèle réduit d hélicoptère Veillez également à ce que la com mande du rotor arrière soit absolument souple mais sans jeu En effet pour que le gyroscope puisse fonctionner de manière optimale il est nécessaire que déj...

Page 53: ...e règle sur l émetteur à l aide d un interrupteur à coulisse L occupation des connexions à effectuer sur le récepteur dépend du fabricateur de la télécommande elle est indiquée dans la documentation fournie avec l installation correspondante Le servo du rotor arrière 11 se raccorde directement au gyroscope Veillez à la polarité correcte du connecteur servo 14 La ligne d impulsion 15 du câble servo...

Page 54: ...pour la première fois il est nécessaire de désactiver toutes les fonctions de mixage anti couple programmées tel que Revolution Mixing ou un mixage à discrimination du gyroscope Le gyroscope ne dispose pas de propre interrupteur de fonctionnement L alimentation se fait par la prise à trois broches qui est reliée au récepteur Dès que l installation de réception est mise en marche le gyroscope est a...

Page 55: ...terrupteur à coulisse 50 de la course du transmetteur correspond à une sensibilité gyroscopique de 0 10 Initialisation du gyroscope CG 1 Pour pouvoir atteindre le fonctionnement correct le gyroscope doit être initialisé Cet ajustement interne se fait automatiquement après la mise en marche de l installation émettrice et dure env 2 à 3 secondes Pendant ce temps le modèle réduit et alors également l...

Page 56: ...de service Dans ce cas vous devez programmer les valeurs de réglage nécessaires dans le menu ATV réglage de la course des émetteurs de commande En liaison avec une commutation de l état de vol vous pouvez ainsi programmer des valeurs différentes pour la sensibilité du gyroscope pendant le vol stationnaire le vol de plaisance et le vol artistique Pour pouvoir vérifier le mode correct pour chacun de...

Page 57: ...ode Heading Lock Dans ce cas modifiez la direction de fonctionnement de l interrupteur à coulisse dans le menu Reverse sur l émetteur Attention important Si en mode Heading Lock le levier servo se déplace dans une sens jusqu à la butée vous devez régler la compensation de l émetteur sous compensation de sorte que le levier servo reste à peu près stablement en position médiane ou qu il ne se déplac...

Page 58: ...mmande du servo arriére qui provoque un moment anti couple Mettez en service l émetteur ensuite le modèle réduit Si vous poussez l arrière par la main vers la gauche vu d en haut le servo arrière doit effectuer un braquage qui ramènerait l arrière vers la droite La rotation du servo doit s effectuer dans la même direction que lorsque vous actionnez le levier de commande de l émetteur pour la fonct...

Page 59: ...mande générées par le gyroscope Les impulsions de commande générées par l émetteur et transmises via le gyro scope au servo arrière en restent inchangées Le commutateur du sens de rotation du servo voir page 58 6 se trouve sur le côté droit du gyroscope CG 1 Selon vos besoins vous pouvez changer le sens de rotation de A normal sur B reverse Si nécessaire utilisez un petit tournevis de réglage pour...

Page 60: ... autour de la position neutre Si l arrière se ressaisit sans s élever la sensibilité gyroscopique peut être augmentée Si l arrière continue de s élever cependant la sensibilité est réglée trop haute La sensibilité optimale est atteinte lorsque l arrière est tout près de s élever encore Important La sensibilité gyroscopique maximale réglable dépend du régime du rotor principal Plus le régime du rot...

Page 61: ...lisez unique ment un chiffon sec et doux N utilisez en aucun cas un détergent agressif ou une solution chimique ceux ci pouvant détériorer les surfaces du produit Elimination Il convient de procéder à l élimination du produit au terme de sa durée de vie conformément aux prescriptions légales en vigueur 16 Caractéristiques techniques Tension de service 4 2 à 7 V DC Plage de température de 5 C à 60 ...

Page 62: ...62 Notiz CARSON Gyro 507027 ...

Page 63: ...63 Notiz CARSON Gyro 507027 ...

Page 64: ...port de CARSON Model Sport Werkstraße 1 D 90765 Fürth Germany For Germany Service Hotline Mo Do 8 00 17 00 Uhr Fr 8 00 14 30 Uhr 01805 73 33 00 12 ct min CARSON Model Sport Abt Service Mittlere Motsch 9 96515 Sonneberg ...

Reviews: