

2
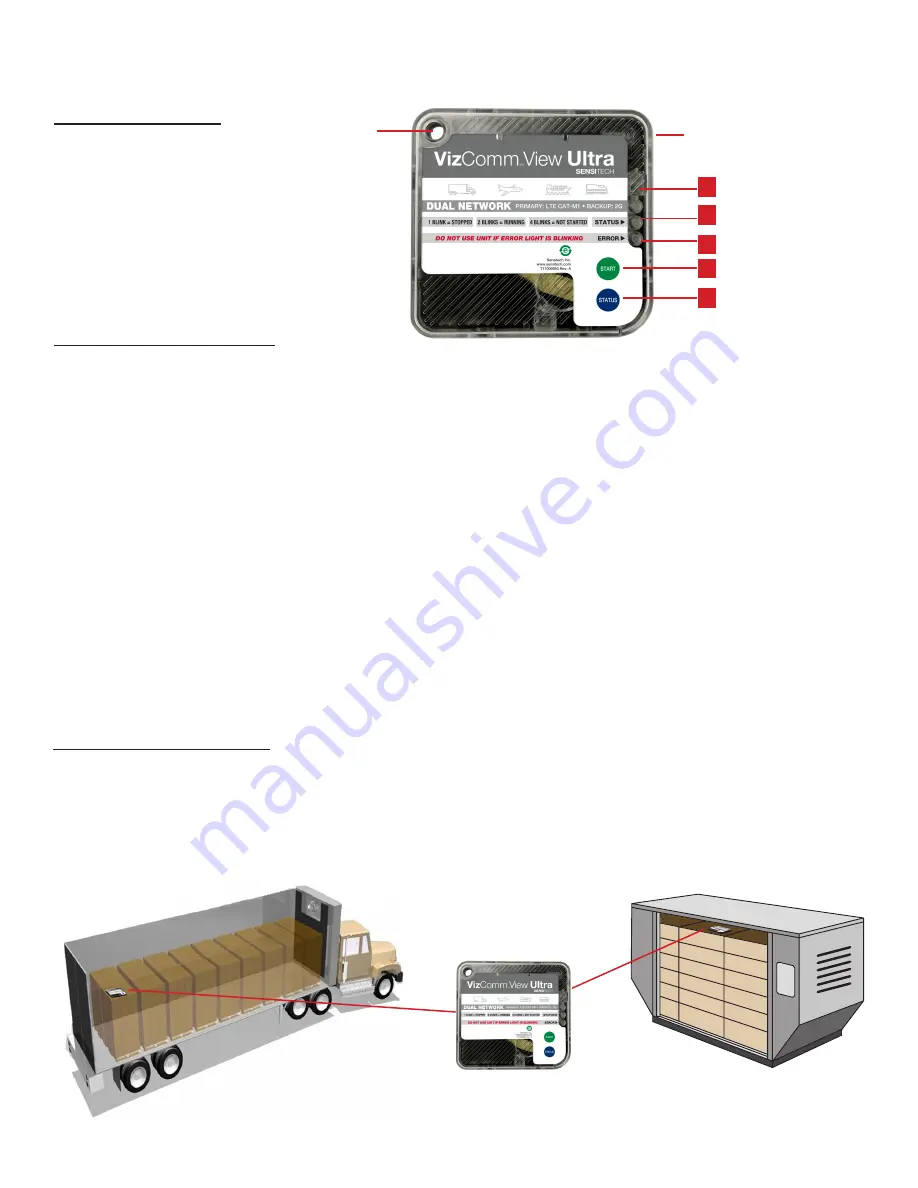
Front of Housing
1. Light Sensor
2. Status LED
3. Error LED
4. Start/Stop Button
5. Status Button
VizComm
™
View Ultra Instructions for Use
Tie-wrap
attachment
point
Sticky pad
(on reverse side)
1
3
2
4
5
Mounting the Monitor
• Remove the protective paper from the adhesive strip on the back of the VizComm View Ultra and place it on the
TOP of the LAST pallet loaded on the passenger side of the trailer, closest to the door. For air shipments on ULD
containers, place the monitor on the top or top side of the pallet facing the door. This improves cellular communication.
• One alternative mounting method is to use a tie-wrap placed through the upper left hole of the device and affixed to a
container. Other methods of mounting can be utilized—contact Sensitech for specific recommendations.
Operating the Monitor
1. Starting and using the monitor:
• Press the
START/STOP
button
(4)
for 3 seconds.
• The STATUS LED
(2)
will blink rapidly for 30-60 seconds as the monitor powers up.
• Once the STATUS LED stops blinking the monitor is ready to be placed on a shipment.
•
DO NOT USE THE MONITOR IF THE ERROR LED (3) BLINKS RED.
2. Stopping the monitor:
• Press the
START/STOP
button
(4)
for 3 seconds to stop the monitor.
NOTE:
Once the device has been stopped, it cannot be restarted.
3. Determine monitor status:
• Press the
STATUS
button
(5)
briefly.
• The STATUS LED
(2)
will indicate the monitor’s status.
• 4 blinks = NOT STARTED (monitor ready to be started)
• 2 blinks = RUNNING (monitor has already been started)
• 1 blink = STOPPED (monitor has stopped and cannot be started)
• The
STATUS
button may be pressed multiple times.


