background image

39

Causes of TXV Failure  — The most common causes of TXV

failure are:

1. A cracked, broken, or damaged sensing bulb or capillary

can be caused by excessive vibration of the capillary

during shipping or unit operation.   
If the sensing bulb is damaged or if the capillary is

cracked or broken, the valve will be considered failed and

must be replaced. Replacement of the TXV “power head”

or sensing bulb, capillary, diaphragm assembly is possi-

ble on some TXVs. The power head assembly screws

onto most valves, but not all are intended to be replace-

able. If the assembly is not replaceable, replace the entire

valve.

2. Particulate debris within the system can be caused by sev-

eral sources including contaminated components, tubing,

and service tools, or improper techniques used during

brazing operations and component replacement.   
Problems associated with particulate debris can be com-

pounded by refrigerant systems that use POE (polyol es-

ter oil). POE oil has solvent-like properties that will clean

the interior surfaces of tubing and components. Particu-

lates can be released from interior surfaces and may mi-

grate to the TXV strainer, which can lead to plugging of

the strainer. 

3. Corrosive debris within the system may happen after a

failure, such as a compressor burn out, if system was not

properly cleaned. 

4. Noncondensables may be present in the system. Non-

condensables includes any substance other than the

refrigerant or oil such as air, nitrogen, or water. Contami-

nation can be the result of improper service techniques,

use of contaminated components, and/or improper evacu-

ation of the system. 

Symptoms — The symptoms of a failed TXV can be varied

and will include one or more of the following:
• Low refrigerant suction pressure 

• High refrigerant superheat

• High refrigerant subcooling

• TXV and/or low pressure tubing frosting

• Equalizer line condensing and at a lower temperature

than the suction line or the equalizer line frosting 

• FP1 faults in the heating mode in combination with any

of the symptoms listed above

• FP2 faults in the cooling mode in combination with any

of the symptoms listed above. Some symptoms can

mimic a failed TXV but may actually be caused be

another problem.
 Before conducting an analysis for a failed TXV the follow-

ing must be verified:
• Confirm that there is proper water flow and water tem-

perature in the heating mode.

• Confirm that there is proper airflow and temperature in

the cooling mode. 

• Ensure coaxial water coil is clean on the inside; this

applies to the heating mode and may require a scale

check. 

• Refrigerant may be undercharged. To verify, subcooling

and superheat calculations may be required.

Diagnostics—Several tests may be required to determine if

a TXV has failed. The following tools may be required for

testing:

1. Refrigerant gage manifold compatible with the refriger-

ant in the system. 

2. Digital thermometer, preferably insulated, with wire leads

that can be connected directly to the tubing.

3. Refrigerant pressure-temperature chart for the refrigerant

used. 

To determine that a TXV has failed, verify the following: 
• The suction pressure is low and the valve is non-respon-

sive. 
The TXV sensing bulb can be removed from the suction

line and warmed by holding the bulb in your hand. This

action should result in an increase in the suction pressure

while the compressor is operating. The sensing bulb can

also be chilled by immersion in ice water, which should

result in a decrease in the suction pressure while the

compressor is operating. No change in the suction pres-

sure would indicate a nonresponsive valve. 

• Simultaneous LOW suction pressure, HIGH refrigerant

subcooling and HIGH superheat.

• LOW suction pressure, LOW subcooling and HIGH

superheat may indicate an undercharge of refrigerant.

HIGH subcooling and LOW superheat may indicate an

overcharge of refrigerant. The suction pressure will usu-

ally be normal or high if there is an overcharge of refrig-

erant. 

• LOW suction pressure and frosting of the valve and/or

equalizer line may indicate a failed valve. However,

these symptoms may also indicate an undercharge of

refrigerant. Calculate the subcooling and superheat to

verify a failed valve or refrigerant charge issue. 

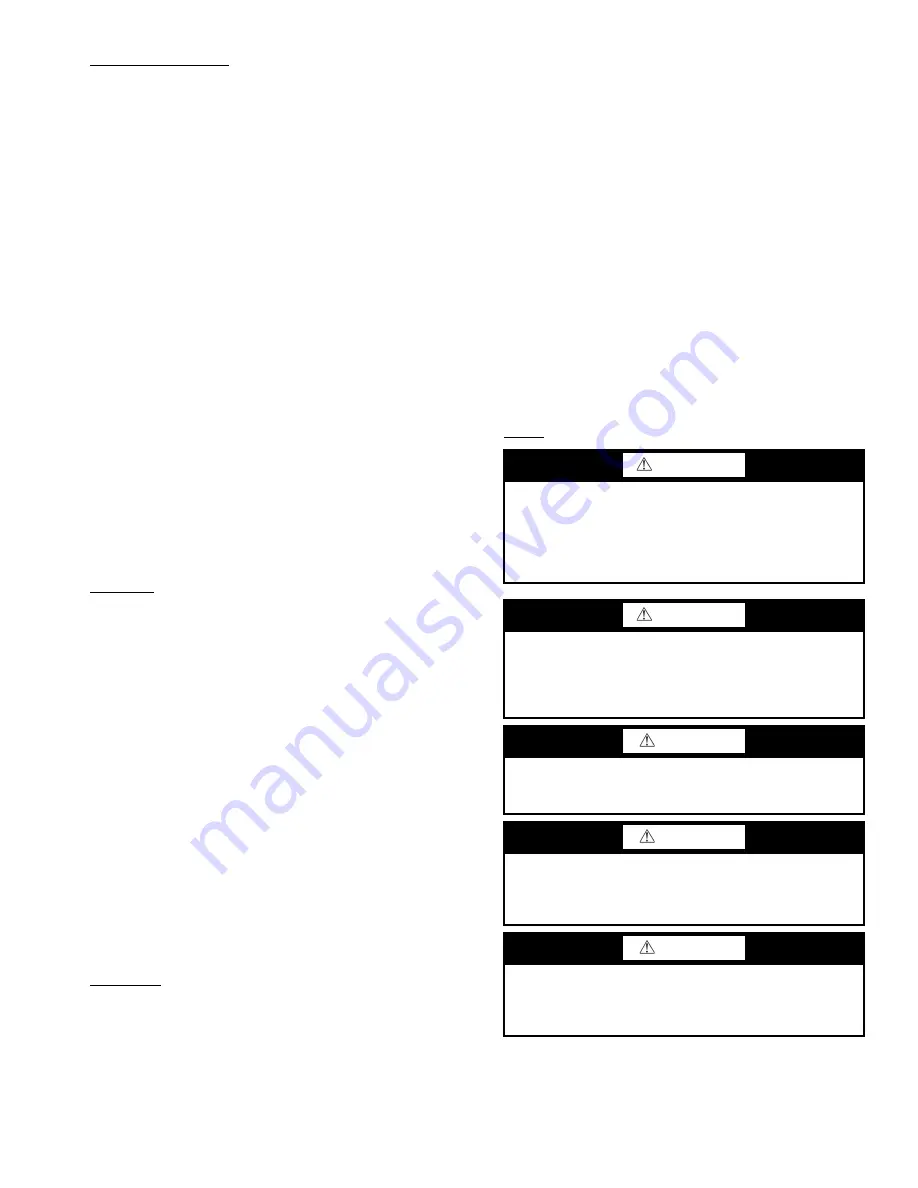
Repair

WARNING

Puron

®

 refrigerant (R-410A) operates at higher pressure

than R-22, which is found in other WSHPs. Tools such as

manifold gages must be rated to withstand the higher pres-

sures. Failure to use approved tools may result in a failure

of tools, which can lead to severe damage to the unit, injury

or death.

WARNING

Most TXVs are designed for a fixed superheat setting and

are therefore considered non-adjustable. Removal of the

bottom cap will not provide access for adjustment and can

lead to damage to the valve or equipment, unintended vent-

ing of refrigerant, personal injury, or possibly death.

CAUTION

Always recover the refrigerant from the system with suit-

able approved tools, recovery equipment, and practices

prior to attempting to remove or repair any TXV. 

CAUTION

Use caution when tightening the strap. The strap must be

tight enough to hold the bulb securely but caution must be

taken not to over-tighten the strap, which could dent, bend,

collapse or otherwise damage the bulb.

CAUTION

Puron

®

 refrigerant (R-410A) requires the use of synthetic

lubricant (POE oil). Do not use common tools on systems

that contain R-22 refrigerants or mineral oil. Contamina-

tion and failure of this equipment may result.

Summary of Contents for Aquazone 50PCD

Page 1: ...alves 38 50PCH PCV PCD START UP CHECKLIST CL 1 SAFETY CONSIDERATIONS Installation and servicing of air conditioning equipment can be hazardous due to system pressure and electrical compo nents Only trained and qualified service personnel should install repair or service air conditioning equipment Untrained personnel can perform basic maintenance func tions of cleaning coils and filters and replaci...

Page 2: ...h to the unit within the closet or mechanical room Space should be sufficient to allow return air to freely enter the space 9 Provide ready access to water valves and fittings and screwdriver access to unit side panels discharge collar and all electrical connections 10 Where access to side panels is limited pre removal of the control box side mounting screws may be necessary for future servicing S...

Page 3: ... 9 x 7 ECM FAN MOTOR AND BLOWER Fan Motor Type Speeds N A C T ECM Fan Motor hp 1 3 Blower Wheel Size Dia x W in 9 x 7 WATER CONNECTION SIZE FPT in 3 4 Coaxial Coil Volume gal 0 06 0 08 0 09 0 14 0 24 VERTICAL CABINET Refrigeration Charge oz 14 15 21 19 17 28 29 37 Air Coil Dimensions H x W 10 x 14 12 X 16 5 16 X 16 5 20 x 16 5 Std Filter 1 in Throwaway L x H 10 x 16 16 x 20 20 x 20 Opt Filter 2 in...

Page 4: ...n Charge oz 48 52 59 73 Air Coil Dimensions H x W 24 x 20 2 20 x 16 24 x 20 2 24 x 26 75 32 x 26 6 Std Filter 1 in Throwaway L x H 24 x 24 20 x 20 24 x 24 24 x 30 16 x 30 2 Opt Filter 2 in MERV 8 or 13 Throwaway L x H 24 x 24 20 x 20 24 x 24 24 x 30 16 x 30 2 Weight Operating lb 229 217 239 287 307 336 Weight Shipping lb 255 243 265 312 331 360 HORIZONTAL CABINET Refrigeration Charge oz 46 N A 43 ...

Page 5: ... FILTER RACK R A DUCT WIDTH CAB FRONT TO FILTER RACK WATER INLET WATER OUTLET SIDE TO DISC WIDTH DISC WIDTH TOP TO DISC FLE AND FRS DISC HEIGHT END TO DISC STR TOP TO DISC FRE AND FLS FILTER RACK HEIGHT R A DUCT FLANGE HEIGHT 007 19 0 33 0 11 5 1 5 16 15 15 35 2 38 9 50 5 375 6 30 5 97 4 10 4 875 1 41 11 3 8 6 3 4 10x16x1 009 19 0 33 0 11 5 1 5 16 15 15 35 2 38 9 50 5 375 6 30 5 97 4 10 4 875 1 41...

Page 6: ...C WATER INLET WATER OUTLET CONDEN SATE DRAIN R A DUCT WIDTH R ADUCT FLANGE HEIGHT FILTER RACK HEIGHT 007 19 0 19 00 24 25 10 0 8 0 4 5 9 3 2 44 9 68 13 87 16 0 8 0 10 0 5 4 3 4 10x16x1 009 19 0 19 00 24 25 10 0 8 0 4 5 9 3 2 44 9 68 13 87 16 0 8 0 10 0 5 4 3 4 10x16x1 012 19 0 19 00 24 25 10 0 8 0 4 5 9 3 2 44 9 68 13 87 16 0 8 0 10 0 5 4 3 4 10x16x1 015 21 5 21 50 32 25 10 0 8 0 5 8 10 0 2 85 8 4...

Page 7: ...he unit The 2 in filter rack is 4 sided with a filter access door on one end and can accept either a 1 in or 2 in filter 50PCD UNIT SIZE A B C H J M N P CONDENSER WATER CONNECTIONS FPT RECOMMENEDED REPLACEMENT NOMINAL FILTER SIZE WIDTH DEPTH HEIGHT WATER INLET WATER OUTLET R A DUCT WIDTH R A DUCT FLANGE HEIGHT FILTER RACK HEIGHT 015 21 5 21 50 32 25 19 9 25 5 20 0 14 0 16 0 3 4 16x20x1 018 21 5 21...

Page 8: ...l surface strong enough to hold their weight they are typically suspended above a ceiling by thread ed rods All horizontal units come with a Hanging Bracket Kit to facilitate suspended unit mounting Hanging brackets are in stalled as shown in Fig 4 Fig 4 Hanging Bracket Locations The hanging bracket kit includes the following 5 Brackets 5 Rubber vibration isolators 8 Screws 10 x 1 2 in 10 Bolts 1 ...

Page 9: ...r existing leaks and repair The duct system and all diffusers should be sized to handle the designed airflow qui etly To maximize sound attenuation of the unit blower the supply and return air plenums should be insulated There should be no direct straight air path throught the air grille into the heat pump The return air inlet to the heat pump must have at least one 90 degree turn away from the sp...

Page 10: ...LEVEL 1 4 UNIT SIZE MOTOR HP TAP 1 TAP 2 TAP 3 007 1 10 LOW MED HIGH 009 1 10 LOW MED HIGH 012 1 10 LOW MED HIGH 015 1 6 LOW MED HIGH 018 1 4 LOW MED HIGH 024 1 4 LOW MED HIGH 030 1 4 LOW MED HIGH 036 1 2 LOW MED HIGH 041 3 4 LOW MED HIGH 042 1 2 LOW MED HIGH 048 3 4 LOW MED HIGH 060 1 LOW MED HIGH 070 1 LOW MED HIGH UNIT SIZE MOTOR HP TAP 1 TAP 2 TAP 3 TAP 4 TAP 5 015 1 3 LOW MED LOW MED MED HI H...

Page 11: ...flange fitted substitute Do not overtighten connections Route piping to avoid service access areas to unit Use pressure temperature P T plugs to measure flow of pressure drop INSTALLING SUPPLY AND RETURN HOSE KIT Follow these piping guidelines 1 Install a drain valve at the base of each supply and return riser to facilitate system flushing 2 Install shutoff balancing valves and unions at each unit...

Page 12: ... mounted dis connect switches except units with dual power supply power is connected to the line L side of the compressor contactor and the ground lug in the unit electrical box Units with Dual Power Supplies For models with dual power supplies special order one power supply feeds the compressor and a second power supply feeds the unit fan mo tor and control circuit The compressor power supply sho...

Page 13: ... Stage Complete C Control UPM STATUS LED BLINK CODES 1 HIGH PRESSURE FAULT 2 LOW PRESSURE FAULT 3 CONDENSER FREEZE CONDITION 4 CONDENSATE OVERFLOW FAULT 5 BROWN OUT FAULT 6 EVAPORATOR FREEZE CONDITION BLK HI BLU MED RED LOW 50PC111000 REV 5 ...

Page 14: ...e Stage Deluxe D Control UPM STATUS LED BLINK CODES 1 HIGH PRESSURE FAULT 2 LOW PRESSURE FAULT 3 CONDENSER FREEZE CONDITION 4 CONDENSATE OVERFLOW FAULT 5 BROWN OUT FAULT 6 EVAPORATOR FREEZE CONDITION BLK HI BLU MED RED LOW 50PC111001 REV 5 ...

Page 15: ...ingle Phase Single Stage Complete C Control UPM STATUS LED BLINK CODES 1 HIGH PRESSURE FAULT 2 LOW PRESSURE FAULT 3 CONDENSER FREEZE CONDITION 4 CONDENSATE OVERFLOW FAULT 5 BROWN OUT FAULT 6 EVAPORATOR FREEZE CONDITION 50PC111002 REV 3 ...

Page 16: ...Single Phase Single Stage Deluxe D Control UPM STATUS LED BLINK CODES 1 HIGH PRESSURE FAULT 2 LOW PRESSURE FAULT 3 CONDENSER FREEZE CONDITION 4 CONDENSATE OVERFLOW FAULT 5 BROWN OUT FAULT 6 EVAPORATOR FREEZE CONDITION 50PC111003 REV 6 ...

Page 17: ... Stage Complete C Control UPM STATUS LED BLINK CODES 1 HIGH PRESSURE FAULT 2 LOW PRESSURE FAULT 3 CONDENSER FREEZE CONDITION 4 CONDENSATE OVERFLOW FAULT 5 BROWN OUT FAULT 6 EVAPORATOR FREEZE CONDITION BLK HI BLU MED RED LOW 50PC311000 REV 4 ...

Page 18: ...hree Phase Single Stage Complete C Control UPM STATUS LED BLINK CODES 1 HIGH PRESSURE FAULT 2 LOW PRESSURE FAULT 3 CONDENSER FREEZE CONDITION 4 CONDENSATE OVERFLOW FAULT 5 BROWN OUT FAULT 6 EVAPORATOR FREEZE CONDITION 50PC311002 REV 3 ...

Page 19: ...le Stage WSHP Open UPM STATUS LED BLINK CODES 1 HIGH PRESSURE FAULT 2 LOW PRESSURE FAULT 3 CONDENSER FREEZE CONDITION 4 CONDENSATE OVERFLOW FAULT 5 BROWN OUT FAULT 6 EVAPORATOR FREEZE CONDITION BLK HI BLU MED RED LOW ORG BLU RED BLK 50PC311016 REV 5 ...

Page 20: ... 1 60 238 292 1 8 5 46 0 1 60 0 25 10 10 12 2 20 3 208 230 3 60 197 253 1 6 9 63 0 1 80 0 25 8 70 10 4 15 4 460 3 60 414 506 1 5 4 30 0 0 90 0 25 6 30 7 7 15 036 1 208 230 1 60 197 253 1 13 0 74 0 4 40 0 50 17 40 20 7 30 2 265 1 60 238 292 1 11 3 67 0 3 30 0 50 14 60 17 4 25 3 208 230 3 60 197 253 1 7 8 68 0 4 40 0 50 12 20 14 2 20 4 460 3 60 414 506 1 3 9 34 0 1 80 0 50 5 70 6 7 15 041 1 208 230 ...

Page 21: ... 15 2 265 1 60 238 292 1 6 7 46 2 6 0 33 9 3 11 0 15 3 208 230 3 60 197 253 1 5 9 63 2 8 0 33 8 7 10 2 15 4 460 3 60 414 506 1 2 9 30 2 1 0 50 5 0 5 7 15 030 1 208 230 1 60 197 253 1 9 9 54 2 8 0 33 12 7 15 2 25 2 265 1 60 238 292 1 8 5 46 2 6 0 33 11 1 13 2 20 3 208 230 3 60 197 253 1 6 9 63 2 8 0 33 9 7 11 4 15 4 460 3 60 414 506 1 5 4 30 2 1 0 50 7 5 8 9 15 036 1 208 230 1 60 197 253 1 13 0 74 ...

Page 22: ...ut or relay See Table 9 for UPM board fault blink codes Fig 20 Unit Protection Module UPM Table 8 Low Voltage VA Draw IMPORTANT Exceptionally long runs of thermostat wire should be avoided to prevent voltage drops in the control circuit CAUTION Exceeding the transformer capacity can result in low con trol voltage erratic unit operation or damage to the heat pump WARNING To avoid possible injury or...

Page 23: ...arge inrush current Low Pressure Bypass Timer If the compressor is running and the low pressure switch opens the controller will keep the compressor ON for 120 seconds After 2 minutes if the low pressure switch remains open the controllers will shut down the compressor and enter a soft lockout The compressor will not be energized until the low pressure switch closes and the anti short cycle time d...

Page 24: ...with this alarm condition If this alarm oc curs 2 times or 4 if DIP switch is set to 4 within an hour the controller will enter into a hard lockout condition Intelligent Reset If a fault condition is initiated the 5 min ute delay on break time period is initiated and the unit will restart after these delays expire During this period the fault LED will indicate the cause of the fault If the fault c...

Page 25: ...K START TIMER NO YES NO YES NO YES T ASC OR RS SEC YES NO NO YES START ANTI SHORT CYCLE INITIAL POWER UP YES NO START RANDOM START UP START COUNTER NEEDED YES COUNT 2 OR COUNT 4 BLINK CODE ON STATUS LED DISPLAY OUTPUT PULSE ALR OUTPUT ON PULSE NO YES HARD LOCKOUT CC OUTPUT OFF V 18VAC NO YES YES NO BLINK CODE ON STATUS LED NO RESET ON Y CLEAR FAULTS R 24VAC NO YES NO YES NO YES HPC CLOSED RESET ON...

Page 26: ...l static 0 15 in wg on medium speed factory setting and rated airflow at a higher static 0 4 to 0 5 in wg on high speed for applications where higher static is required Low speed will deliver approximately 85 of rated airflow at 0 10 in wg NOTE Blower performance is shown in Tables 11 and 12 Table 11 50PCH PCV 007 070 50PCD 015 070 PSC Blower Performance NOTE 575V models employ 1 speed motors high...

Page 27: ...0 970 920 860 810 750 660 530 024 1 850 650 610 580 560 520 2 740 720 690 660 620 570 3 850 830 800 770 730 690 630 4 950 920 890 870 840 820 770 650 5 1160 1110 1050 990 920 800 670 560 030 1 950 620 600 570 540 490 2 730 710 670 640 610 550 3 820 790 760 740 710 670 630 4 940 910 880 850 800 740 660 5 1070 1010 950 900 840 760 670 036 1 1200 1120 1090 1055 1030 1000 2 1260 1230 1200 1170 1140 10...

Page 28: ...g P T plugs Check the elevation and cleanliness of the condensate lines any dripping could be a sign of a blocked line Be sure the condensate trap in cludes a water seal 4 Check the temperature of both supply and discharge wa ter Compare to Tables 14 25 If temperature is within range proceed If temperature is outside the range check the cooling refrigerant pressures in Tables 14 25 5 Check air tem...

Page 29: ... 39 48 2 4 128 157 296 362 9 10 20 25 197 241 355 434 8 10 41 51 100 1 8 140 171 345 422 12 14 19 23 2 4 133 162 328 401 8 10 20 24 DB Dry Bulb No Operation in This Temperature Range ENTERING WATER TEMP F WATER FLOW GPM TON COOLING HEATING SUCTION PRESSURE PSIG DISCHARGE PRESSURE PSIG WATER TEMP RISE F AIR TEMP DROP F DB SUCTION PRESSURE PSIG DISCHARGE PRESSURE PSIG WATER TEMP DROP F AIR TEMP RISE...

Page 30: ... 144 176 328 401 8 9 17 21 156 191 327 400 6 7 26 32 100 2 8 155 189 392 480 13 16 16 19 3 8 149 182 369 451 8 9 17 21 DB Dry Bulb No Operation in This Temperature Range ENTERING WATER TEMP F WATER FLOW GPM TON COOLING HEATING SUCTION PRESSURE PSIG DISCHARGE PRESSURE PSIG WATER TEMP RISE F AIR TEMP DROP F DB SUCTION PRESSURE PSIG DISCHARGE PRESSURE PSIG WATER TEMP DROP F AIR TEMP RISE F 30 3 0 65 ...

Page 31: ...9 48 7 0 121 148 320 392 9 10 20 25 176 215 416 509 8 10 41 51 100 5 0 130 159 374 457 12 14 19 23 7 0 124 151 355 434 8 10 20 24 DB Dry Bulb No Operation in This Temperature Range ENTERING WATER TEMP F WATER FLOW GPM TON COOLING HEATING SUCTION PRESSURE PSIG DISCHARGE PRESSURE PSIG WATER TEMP RISE F AIR TEMP DROP F DB SUCTION PRESSURE PSIG DISCHARGE PRESSURE PSIG WATER TEMP DROP F AIR TEMP RISE F...

Page 32: ...44 176 328 401 8 9 17 21 156 191 327 400 6 7 26 32 100 4 5 155 189 392 480 13 16 16 19 9 0 149 182 369 451 8 9 17 21 DB Dry Bulb No Operation in This Temperature Range ENTERING WATER TEMP F WATER FLOW GPM TON COOLING HEATING SUCTION PRESSURE PSIG DISCHARGE PRESSURE PSIG WATER TEMP RISE F AIR TEMP DROP F DB SUCTION PRESSURE PSIG DISCHARGE PRESSURE PSIG WATER TEMP DROP F AIR TEMP RISE F 30 6 0 64 78...

Page 33: ...0 0 139 170 347 424 11 14 17 21 151 185 371 453 10 12 32 39 100 6 0 149 183 415 508 19 24 16 19 10 0 143 175 391 477 11 14 17 21 DB Dry Bulb No Operation in This Temperature Range ENTERING WATER TEMP F WATER FLOW GPM TON COOLING HEATING SUCTION PRESSURE PSIG DISCHARGE PRESSURE PSIG WATER TEMP RISE F AIR TEMP DROP F DB SUCTION PRESSURE PSIG DISCHARGE PRESSURE PSIG WATER TEMP DROP F AIR TEMP RISE F ...

Page 34: ...5 To purge keep the pump at 50 psig until maximum pumping pressure is reached 6 Open the return valve to send a pressure surge through the loop to purge any air pockets in the piping system 7 A noticeable drop in fluid level will be seen in the flush cart tank This is the only indication of air in the loop NOTE If air is purged from the system while using a 10 in PVC flush tank the level drop will...

Page 35: ... a 5 minute anti short cycle upon power up Units with Complete C or Deluxe D Controls STANDBY Y and W terminals are not active in Standby mode however the O and G terminals may be active depend ing on the application The compressor will be off COOLING Y and O terminals are active in Cooling mode After power up the first call to the compressor will initiate a 270 to 300 second random start delay an...

Page 36: ...If continual lockouts occur call a mechanic immediately and have them check for water flow problems water temperature problems airflow problems or air temperature problems Use of the pres sure and temperature charts for the unit may be required to properly determine the cause Filters Filter changes or cleanings are required at regular intervals The time period between filter changes will depend up...

Page 37: ...nser with a supply line valve If pump is a nonoverloading type the valve may be fully closed while pump is running For average scale deposit allow solution to remain in condenser overnight For heavy scale deposit allow 24 hours Drain condenser and flush with clean water Follow acid manu facturer s instructions Checking System Charge Units are shipped with full operating charge If recharging is nec...

Page 38: ... the temperature of and pressure within the bulb decreases the valve will modulate closed and restrict the refrigerant flow through the valve The result is less refrigerant in the evaporator and an increase in the superheat As the temperature at the bulb increases the dia phragm pressure will increase which opens the valve and allows more refrigerant flow and a reduction in the superheat If the se...

Page 39: ... superheat calculations may be required Diagnostics Several tests may be required to determine if a TXV has failed The following tools may be required for testing 1 Refrigerant gage manifold compatible with the refriger ant in the system 2 Digital thermometer preferably insulated with wire leads that can be connected directly to the tubing 3 Refrigerant pressure temperature chart for the refrigera...

Page 40: ... understood and carefully followed Fail ure to follow these instructions can result in a system that is contaminated with moisture to the extent that sev eral filter drier replacements may be required to properly dry the system IMPORTANT Repair of any sealed refrigerant system requires training in the use of refrigeration tools and proce dures Repair should only be attempted by a qualified ser vic...

Page 41: ...k for blockage Check that there is adequate space between the return air open ing and walls or other obstructions on free return applications X X Is fault LED Blinking 5 times Brown out fault low supply voltage Check primary voltage ensure it is within the limits listed on the unit data plate Brown out fault overloaded control circuit Check control voltage if it is below 18 V check acces sories co...

Page 42: ...P switches are in the proper configuration refer to the blower performance tables Faulty motor Check supply voltage to the motor Check that all motor wires are secure Move the TEST DIP switch to ON and the other switches to OFF on the ADJUST switch block on the interface board the motor should run at 70 torque whrn G is called With power off spin the motor shaft noise resistance or uneven motion c...

Page 43: ...irflow Fan speed setting too high Consult blower performance table and reduce fan speed if possible Structure bourne noise Unit not mounted on full vibra tion pad Mount unit on a vibration pad Unit not connected with flexi ble conduit water lines and or ductwork Install unit in accordance with instructions Unit cabinet touching wall or other building component Adjust unit location to avoid unit to...

Page 44: ...to discontinue or change at any time specifications or designs without notice and without incurring obligations Catalog No 04 53500191 01 Printed in U S A Form 50PC 5SI Pg 44 9 18 Replaces 50PC 4SI Carrier Corporation 2018 8733952368 ...

Page 45: ... AT HEAT EXCHANGER Y N HAS PUMP BEEN TURNED ON AND ARE ISOLATION VALVES OPEN Y N HAS CONDENSATE CONNECTION BEEN MADE AND IS ATRAP INSTALLED Y N IS AN AIR FILTER INSTALLED Y N II START UP IS FAN OPERATING WHEN COMPRESSOR OPERATES Y N IF 3 PHASE SCROLL COMPRESSOR IS PRESENT VERIFY PROPER ROTATION PER INSTRUCTIONS Y N UNIT VOLTAGE COOLING OPERATION PHASE AB VOLTS PHASE BC VOLTS PHASE CAVOLTS if 3 pha...

Page 46: ...COOLING CYCLE AIR IN F AIR OUT F HEATING CYCLE AIR IN F AIR OUT F a50 8445 SUCTION COMPRESSOR DISCHARGE COAX EXPANSION VALVE F F AIR COIL F PSI WATER OUT WATER IN F PSI LOOK UP PRESSURE DROP IN TABLE 26 TO DETERMINE FLOW RATE F LIQUID LINE PSI F SAT SUCTION COMPRESSOR DISCHARGE COAX EXPANSION VALVE F F AIR COIL F PSI WATER OUT WATER IN F PSI LOOK UP PRESSURE DROP IN TABLE 26 TO DETERMINE FLOW RATE...

Page 47: ...OF REJECTION FLOW RATE GPM x TEMP DIFF DEG F x FLUID FACTOR Btu hr SUPERHEAT SUCTION TEMPERATURE SUCTION SATURATION TEMPERATURE DEG F SUBCOOLING DISCHARGE SATURATION TEMPERATURE LIQUID LINE TEMPERATURE DEG F Use 500 for water 485 for antifreeze ...

Page 48: ...e at any time specifications or designs without notice and without incurring obligations Catalog No 04 53500191 01 Printed in U S A Form 50PC 5SI Pg CL 4 9 18 Replaces 50PC 4SI Carrier Corporation 2018 CUT ALONG DOTTED LINE CUT ALONG DOTTED LINE 8733952368 ...

Reviews: