background image


P a g e  | 

11 

3.2  Cables 

All supplied cables must be connected and correctly interfaced for the Merlin LT to run fully optimised operations.  


When secured to the back of the Merlin LT, each connection is protected against the environment.  


3.2.1  Ethernet cable 


The Ethernet cable provides communication between the Merlin LT and the vessel’s main PC running navigation 

software. 


The Cat 6 Ethernet cable attaches to the back of the Merlin LT with a four-pin female Souriau connector. The 

standard RJ45 connector connects to the PC. 

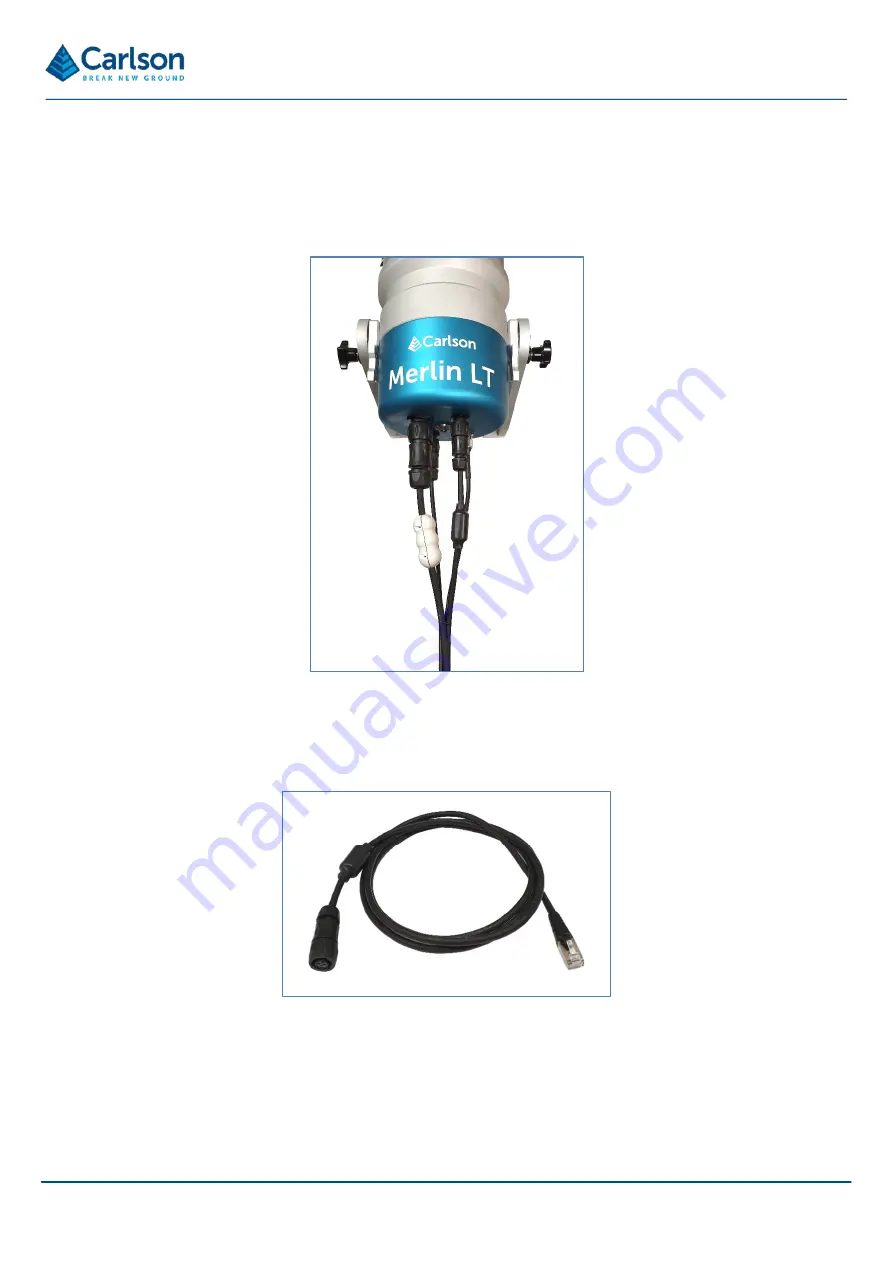
Figure 5 All cables connected to the Merlin LT


Figure 6 Ethernet cable


Summary of Contents for Merlin LT

Page 1: ...Merlin LT user manual H 0218 8000 01 B January 2020 Merlin LT Vessel based LIDAR system user manual...

Page 2: ......

Page 3: ...ng location for the Merlin LT 16 4 2 Choosing an appropriate orientation 19 4 3 Lever arm offset measurement 20 4 4 Lever arm offset measurement when using the mounting plate 23 4 5 Cable runs 29 5 El...

Page 4: ...of Merlin LT 52 8 1 General 52 8 2 Preventative maintenance 52 9 Mechanical drawings 53 9 1 Merlin LT positioned at 90 vertical angle 53 9 2 Merlin LT positioned at 0 vertical angle 54 10 Laser safet...

Page 5: ...ing of the Merlin LT This manual does not cover the calibration of the Merlin LT in hydrographic acquisition software packages These are detailed in separate quick start guides QINSy Carlson part no H...

Page 6: ...ed in Carlson product documentation The Merlin LT system must be transported in Carlson supplied packaging This equipment is not suitable for use in a potentially explosive atmosphere 1 3 2 Precaution...

Page 7: ...h as cliff faces and rock groynes from the relative safety of the survey vessel With the Merlin LT integrated into the vessel s navigation system and the sensors all calibrated with respect to the IMU...

Page 8: ...ring laser is fired and its reflected light is received back into the instrument The laser measures 36 000 ranges each second to an accuracy of 1 cm The laser ranges up to a limit of 250 m to 90 refle...

Page 9: ...re of the scene being scanned and on the specific project requirements Leave the pod horizontal at 90 to generate vertical sections of points as the laser rotates Incline the laser to 45 and the secti...

Page 10: ...e the Merlin LT to the mounting plate see section 3 6 1 A central point on the base plate marks a measurement datum point which you can use when surveying the lever arm offset 3 1 3 Connectors There a...

Page 11: ...s protected against the environment 3 2 1 Ethernet cable The Ethernet cable provides communication between the Merlin LT and the vessel s main PC running navigation software The Cat 6 Ethernet cable a...

Page 12: ...This connects to the source of the PPS output 3 2 3 Serial cable The serial cable delivers ZDA timing messages from an external timing source to the Merlin LT unit The serial cable attaches to the bac...

Page 13: ...connections 3 3 Transit case The Merlin LT system is supplied in a rugged transit case designed to transport the unit and all accessories The case protects the equipment from minor shocks and from th...

Page 14: ...T system It is loaded on the USB stick that is supplied in the Merlin LT transit case Plug the USB stick into the your PC and double click on the installer application to launch it Follow the on scree...

Page 15: ...oduces horizontally offset scans which help when surveying features perpendicular to the vessel s sailing line for example the sides of buildings facing the vessel 45 rotation port and starboard Produ...

Page 16: ...lin LT is an optical device that relies upon a clear line of sight to the survey area Ensure the field of view of the laser will not be restricted by any vessel infrastructure such as railings masts o...

Page 17: ...ACK or PDS 4 1 2 Securing the base plate The base plate has four holes to allow the Merlin LT to be secured to the vessel The holes take M8 bolts The use of Nyloc nuts is recommended for a stable bolt...

Page 18: ...ngles at which the Merlin LT laser can be positioned Changing the vertical angle can help to optimise the point cloud produced by the Merlin LT specifically for your operation To set the desired verti...

Page 19: ...c project Note that some projects would benefit from using the optional mounting plate which allows the Merlin LT to be mounted at fixed horizontal angles from the vessel s centre line see section 4 4...

Page 20: ...esired vertical angle Determine the vertical laser offset adjustment from Table 1 Apply the vertical laser offset adjustment to the measured XYZ lever arm Enter the final lever arm into your navigatio...

Page 21: ...the Merlin LT is facing fore or aft the measurement is to the measurement datum point in the centre of the base plate Sign conventions may differ between different navigation packages The lever arm ma...

Page 22: ...vertical angle that the Merlin LT has been positioned at and on the direction fore or aft that the Merlin LT is pointing on the vessel In the table below select the relevant row according to the verti...

Page 23: ...in LT at the centre point of the laser s horizontal rotation The lever arm is expressed as an XYZ coordinate on the vessel reference frame This coordinate is entered into the navigation software and e...

Page 24: ...late secured in place on the vessel the physical measurement of the XYZ lever arm should be carried out before the Merlin LT is fitted in position Navigation software packages require an XYZ measureme...

Page 25: ...ate values it is recommended to carry out this measurement while the vessel is in a dry dock If this is not practical then the measurements can be taken from the nearest known point For example the XY...

Page 26: ...gle at which the Merlin LT has been positioned the horizontal angle cw or acw that the Merlin LT has been rotated to on the mounting plate From Table 2 and Table 3 below select the relevant table acco...

Page 27: ...justment can now be applied to the initial physical XYZ lever arm measurement Two examples are illustrated in Figure 20 below Example 1 the Merlin LT is set at a 90 vertical angle and 22 5 cw horizont...

Page 28: ...ments correctly Example 1 Merlin facing fore Mounted at a horizontal angle of 22 5 cw Vertical angle of 90 Example 2 Merlin facing aft Mounted at a horizontal angle of 45 cw Vertical angle of 45 Figur...

Page 29: ...ble ties or cable clips to keep them from obstructing walkways doorways and emergency access points All cable runs should be protected as much as possible The cables should be adequately secured and s...

Page 30: ...rations when selecting the power supply to be used If a single Merlin LT unit is operating at 12 Vdc it has the potential to draw up to 8 5 A at start up Any voltage source connected to the Merlin LT...

Page 31: ...e outlined in the schematic and pin out table below Connection Wire list Function Connection P1 Pin 1 Black 1 0 V P2 P1 Pin 4 G Black 2 0 V P2 P1 Pin 2 Black 3 V P3 P1 Pin 3 Black 4 V P3 Table 4 Power...

Page 32: ...ontain a 34 character string after the 1 PPS signal is active GPZDA 043342 00 08 12 2009 64 cr lf Novatel Coda the laser will expect a 35 character string after the 1 PPS signal is active The falling...

Page 33: ...and the external timing source should be configured at 115 200 baud 8 data bits no parity 1 stop bit with no flow control The voltage levels of the PPS signal input to the Merlin LT should ideally be...

Page 34: ...on is standard RS232 communications will be correct If the pin configuration is not compatible with the supplied ZDA cable an adaptor cable will need to be sourced Contact Carlson for further assistan...

Page 35: ...t connection with a PC The correct Ethernet parameters need to be established namely IP Internet Protocol address and subnet mask Each Merlin LT is first delivered with a pre set IP address of 192 168...

Page 36: ...te It is important that both the IP address and subnet mask are entered correctly Any deviation from this will result in the PC and Merlin LT not communicating with each other 7 2 Pinging the Merlin L...

Page 37: ...then there is a communication issue Check the Merlin LT power source the hardware cable connections and the IP addresses of the Merlin LT and PC to make sure everything is correctly configured Figure...

Page 38: ...diagnostic tool main window appears The Laser section in the bottom left hand corner of the window contains the IP address and Port text entry boxes for the Merlin LT laser These automatically populat...

Page 39: ...ul a Connect Error warning is displayed Unable to connect Please check the connection parameters and try again In this case check the following the network parameters of the laser the LAN settings of...

Page 40: ...tic tool window click File Configure Network The Configuration window appears Enter the IP address and or Port number to a new value to fit into the existing vessel network In the example in Figure 32...

Page 41: ...ddress A message appears prompting you to confirm the IP address and to power cycle the system At this stage do not select the tick boxes Figure 32 Entering a new IP address in the Configuration windo...

Page 42: ...et Properties window Double click on Internet Protocol Version 4 TCP IPv4 The Internet Protocol Version 4 TCP IPv4 Properties window appears Enter an IP address for the PC This IP address should be sa...

Page 43: ...ork as Merlin Tick the check box beside the statement I confirm I have power cycled the Merlin Click OK to return to the main Merlin diagnostic tool window Note when you click OK the connection with t...

Page 44: ...the timing source option matching your hardware set up from the protocols as detailed in section 6 1 1 Note In this example the external timing source selected is Trimble Applanix Click Save A Warnin...

Page 45: ...ic tool software Ensure that the Merlin LT is connected to the Merlin diagnostic tool software see section 7 3 1 With the Status Idle message displayed click the Start button WARNING Beware of the con...

Page 46: ...n prior to connection to the navigation software To change the laser rotation speed prior to starting the laser enter a value 1 20 in the Speed Hz text entry box This is found within the Laser frame o...

Page 47: ...ey operations the only acceptable Status message is Running GPS If the Time source is shown as GPS both a valid PPS and ZDA message are being received After GPS the selected timing source is indicated...

Page 48: ...P a g e 48 Figure 41 Status Running GPS Figure 42 Status Running synched no GPS...

Page 49: ...P a g e 49 Figure 43 Status Running initialised Time UTC current Figure 44 Status Running uninitialised Time UTC 01 01 2000...

Page 50: ...50 Note If timing is never received a warning appears see Figure 45 The listed actions should be verified to resolve the timing issue Figure 45 Warning message no timing received Figure 46 Status Inva...

Page 51: ...enables automatic zooming of the Output frame to the full extent of the laser section When using a mouse the view of the data in the Output frame can be altered Use the middle scroll wheel to zoom the...

Page 52: ...se or when being moved When moving the Merlin LT use the A frame to carry and support the Merlin LT wherever possible Do not use paint solvents to clean the outer structure of the instrument Use a mil...

Page 53: ...P a g e 53 9 Mechanical drawings 9 1 Merlin LT positioned at 90 vertical angle All dimensions in millimetres...

Page 54: ...P a g e 54 9 2 Merlin LT positioned at 0 vertical angle All dimensions in millimetres...

Page 55: ...sified as a Class 1 laser product with reference to the international standard BS EN 60825 1 2007 Safety of Laser Products As a Class 1 product such devices require no engineering controls beyond requ...

Page 56: ...r emitter Only qualified and trained persons should be assigned to operate the Merlin product portfolio When not in use the device should be stored in a location where unauthorised personnel cannot ga...

Page 57: ...f each considered assembly was defined as the distance between the nearest point of the unit and the centre of the compass or magnetometer at which the assembly would not produce a deviation in the st...

Page 58: ...ond 36 000 Physical data Power input 12 V dc Weight Merlin LT with A frame and base plate 8 0 kg Weight system in transit case 14 3 kg Dimensions Merlin L x W x H 28 0 cm x 27 4 cm x 31 0 cm Dimension...

Page 59: ...to the following conditions Carlson EMEA B V shall be under no liability in respect of any defects in the equipment arising from any drawing design or specification supplied or modification requested...

Page 60: ...d European Standards BS EN ISO 12100 2010 Safety of machinery General principles for design EN 60945 2002 Maritime navigation and radio communication equipment and systems General requirements Methods...

Page 61: ...son or authorised representative could void the user s authority to operate the equipment Information to the user 47CFR section 15 105 This equipment has been tested and found to comply with the limit...

Page 62: ...teries Do not swallow the batteries Keep the batteries out of the reach of children Do not get batteries wet If a battery is damaged exercise caution when handling it Battery disposal The use of this...

Reviews: