background image

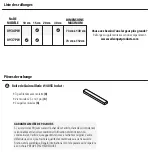
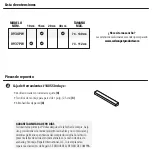
MODEL NO.

MAX SIZE

NOTE

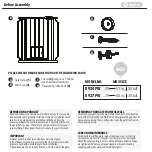
Before Assembly

A

B

C

D

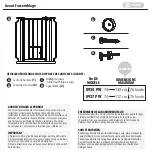
PLEASE CHECK TO MAKE SURE YOU HAVE THE FOLLOWING PARTS:

A
B

C
D

Gate Frame (1)
Wall Cups (4)

Screws (4) (requires a Phillips/ 

cross-headed screwdriver)

Threaded Spindle Rods (4)

English

BEFORE USING PRODUCT 

Read and follow all instructions carefully to ensure that your gate 

and extensions are properly installed. Improper installation could 

result in the gate becoming unstable or dislodged from the 

doorway. Always make sure the extension is securely attached to 

the gate before using. The safety of your pet and/or child is your 

responsibility. Please keep these instructions for your reference.

To remove your gate from the wall, rotate the adjustment wheels on 

each of the (4) threaded spindle rods to depressurize the gate from its 

doorway or opening. Then, gently pull or push the gate free from its 

doorway or opening. 

Periodically check the gate for signs of damage, wear, or missing 

components. Do not use if any part is missing, worn or damaged. 

Check the gate regularly to ensure all the hardware and mountings 

are tightened. Do not use abrasive cleaners or bleach. Clean by 

sponging with warm water and a mild detergent.

REMOVING YOUR GATE FROM THE WALL

CARE AND MAINTENANCE

IMPORTANT

0934 PW

29          51 in,    30 tall
29          44 in,    30 tall

• Never use more than two extensions per side of gate.

• If hardware mounting to a surface other than drywall or wood, 

please consult with a professional about installation.

• Base locks are to be used at all times, on both sides of the gate.

0937 PW

Summary of Contents for 0934 PW

Page 1: ...xtra Large avec Petite Chati re Valla de Acceso Extra Ancha con Puerta para Mascotas Peque as LEA TODAS LAS INSTRUCCIONES ANTES DE MONTAR Y USAR LA REJA GU RDELAS PARA UTILIZARLAS COMO REFERENCIA READ...

Page 2: ...from the wall rotate the adjustment wheels on each of the 4 threaded spindle rods to depressurize the gate from its doorway or opening Then gently pull or push the gate free from its doorway or openi...

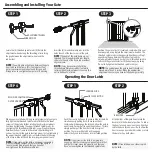
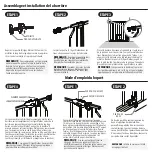
Page 3: ...d your gate safely NOTE If your secure slide latch is not properly engaging with the receiving component ensure that your gate is level mounted properly and that you have not over tightened the thread...

Page 4: ...rewing in your 4 wall cups B Center each of the wall cups within the guide circles and use the provided self tapping screws C to fasten them in place via the hole through the center of each wall cup S...

Page 5: ...onditions of maintenance it fails while owned by the original purchaser because of the quality of materials or workmanship of nish and assembly Carlson Pet Products Inc will replace or repair it at Ca...

Page 6: ...s des quatre 4 tiges let es pour lib rer la barri re de l embrasure de la porte ou de l ouverture Tirez ou poussez ensuite d licatement la barri re pour la d tacher de l embrasure de la porte ou de l...

Page 7: ...let es devraient tre espac es galement Effectuez le r glage appropri pour que la barri re install e soit s curitaire TAPE 4 Lorsque vous tes satisfait du placement g n ral de votre barri re serrez co...

Page 8: ...ez chaque coupelle murale dans les cercles guides puis utilisez les vis C taraudeuses fournies pour les serrer en place par leur trou central TAPE 3 Remontez votre barri re dans l embrasure de la port...

Page 9: ...i appartient encore l acheteur original s av re d fectueux en ce qui a trait la qualit des mat riaux ou aux travaux de nition et d assemblage Regalo International LLC le replacera ou le r parera son c...

Page 10: ...llas roscadas a n de a ojar la reja de su entrada o hueco de la puerta Luego empuje o tire ligeramente de la reja para liberarla de la entrada o hueco de la puerta Revise peri dicamente la reja para v...

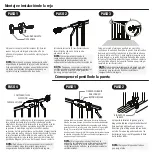
Page 11: ...stalado la compuerta de forma segura NOTA Debe haber el mismo espacio entre las cuatro 4 varillas roscadas Haga los ajustes necesarios para asegurarse de haber instalado la reja de forma segura PASO 4...

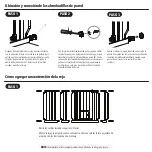
Page 12: ...Centre cada una de las almohadillas de pared en los c rculos gu a y utilice los tornillos C autorroscantes proporcionados para jarlas en su lugar a trav s del ori cio al centro de cada almohadilla de...

Page 13: ...AS Si durante los primeros 90 d as despu s de la fecha de compra bajo uso y condiciones de mantenimiento razonables y no comerciales y mientras permanece en manos del comprador original el art culo pr...

Page 14: ...omenzarlainstalaci nsiemprecerci resedequelapuertaest apoyadacontraelpiso Esta esunacompuertaparamascotas perocuandoseusaconni os lapuertaparamascotaspeque asdebepermanecercerraday rmementebloqueada P...

Reviews: