


3
29
English
28
English
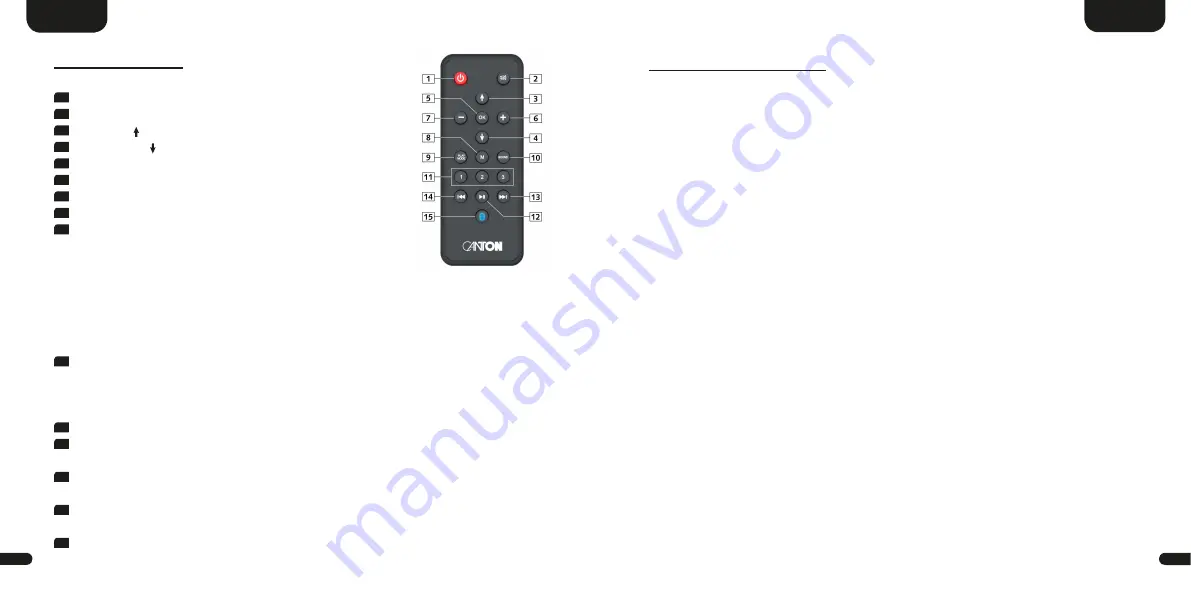
1
Power
Switches the Sound L ON/OFF (on/standby)
2
Mute
Mutes audio
3
Upwards [ ] Sets input resp. menu item upwards
4
Downwards [ ] Sets input resp. menu item downwards
5
OK
Enters next menu level
6
Plus [+]
Increases volume resp. menu value
7
Minus [-] Decreases volume resp. menu value
8
Menu
Enters settings menu resp. previous menu level
9
Play Mode Toggles btw. the several play modes:
Stereo
For music playback
Movie
Virtual surround sound for movies
Music
Virtual surround sound especially for music
videos, etc. (not available with connected surround speakers)
Party
Plays the front channels FL/FR also on (connected) surround speakers
Discrete Surround sound for movies, music, etc. without the use of a virtualizer
(only available with connected surround speakers)
10
Sound
Toggles btw. bass, midrange and treble tone control settings:
Bass
Bass adjustment from -6dB to +6dB
Midrange Midrange adjustment from -6dB to +6dB
Treble
Treble adjustment from -6dB to +6dB
11
Preset 1-3 Preset keys to store or recall (sound)settings
12
Play/Pause Play/Pause function during audio playback using Bluetooth
®
wireless
technology
13
Skip FW Skip forward function during audio playback using Bluetooth
®
wireless
technology
14
Skip BW Skip backward function during audio playback using Bluetooth
®
wireless technology
15
Bluetooth Initializes the pairing process with the (mobile) device
Pairing
SMART-REMOTE
DISPLAY INDICATIONS
The Sound L has an On-Screen Display (menu visible on the TV), a LED status
indicator (green or red) and a LED display (in the front of the Sound L).
On-Screen Display
All settings and the configuration of the Sound L can be conveniently performed
via the On-Screen Display on your TV screen. To do this, the Sound L must be
connected via a HDMI
®
cable to your TV. The menu is simple and structured and
all changes you make on the Sound L are displayed on your TV. By pressing the
menu button „M“ on the Smart-remote, you can access the main menu.
Practical tip:
•
To change the language of the On-Screen Display from German to English,
please go to the main menu by pressing the button „M“. Under „System-
einstellung“ [SYS] select the menu item „Displayeinstellungen“ [UIS] and
change the language under the menu item „Sprache“ [LAN].
LED status indicator
When you switch the Sound L on, the status LED lights up green. In standby
mode, the status LED lights red.
LED display
The LED display is located in the front of the Sound L and lights up for five
seconds when a command is received. It indicates the selected function as
abbreviation or scroll text. The most important display indications and their
meanings are listed here:


