7
-12
2
Adjusting the
S
mart
S
hade Control
When smart shade control is [On], set one of the 7
levels from [1] (weak) to [7] (strong).
Example: If the background is bright and the subject is
hard to see, this function brightens dark areas to make
the subject clearer.
In comparison to backlight compensation, smart shade
control can reduce overexposure of bright areas.
Note
• When [On] is selected for smart shade control, the image file
size increases.
• When [On] is selected for smart shade control, screen noise
may increase. If noise is noticeable, lower the control level.
Setting the Focus
Select [Manual] or [Fixed at Infinity] for focus setting.
[Manual]
: You can adjust the focus manually
by pushing the
(far) and
(near) buttons.
Clicking [One-shot AF] will use
autofocus to focus on a subject and
then stop in manual focus.
[Fixed at Infinity] : You can set the focus so that it is
fixed near infinity.
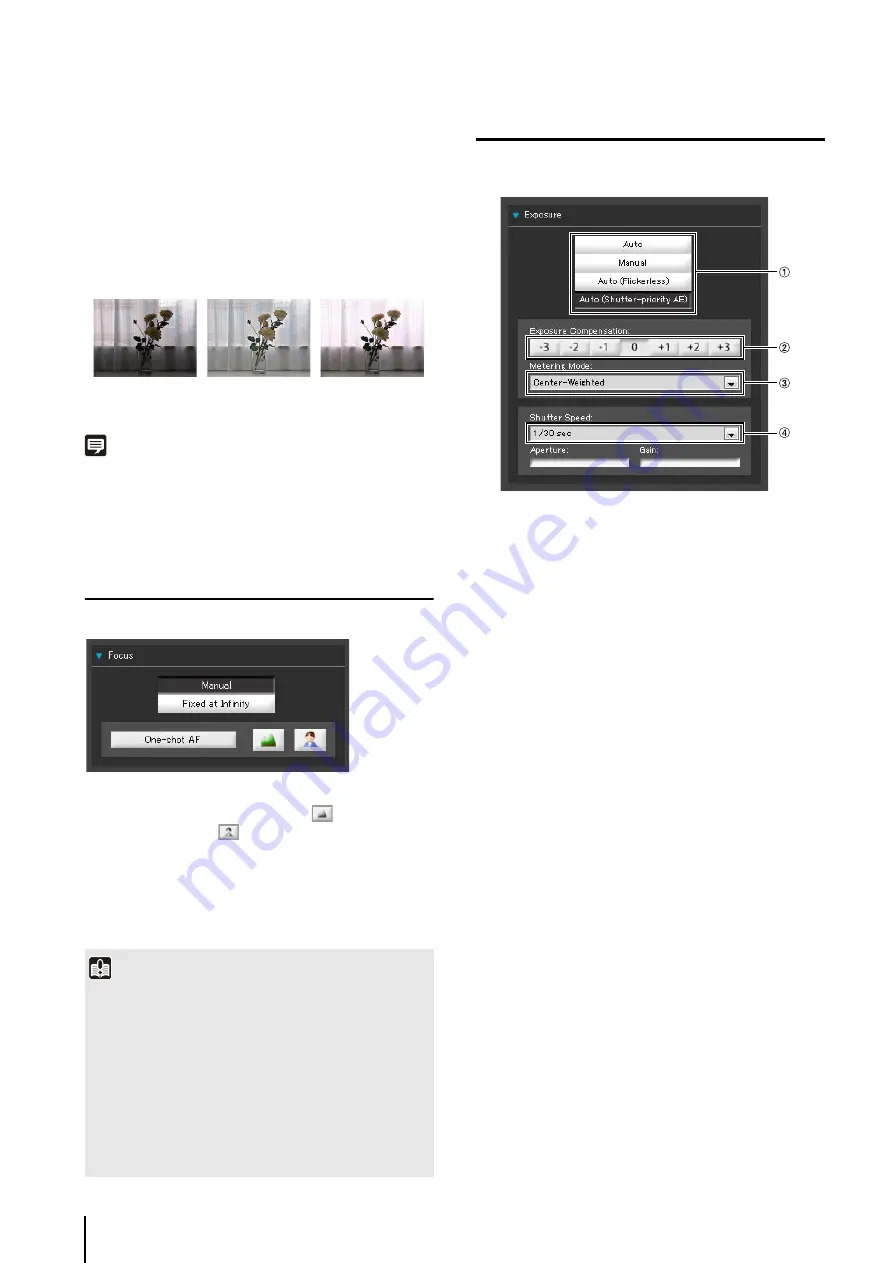
Setting the Exposure
You can set various options relating to exposure
operation.
1
Exposure Mode
Select from [Auto], [Manual], [Auto (Flickerless)] or
[Auto (Shutter-priority AE)].
If [Auto] is selected for [Day/Night] under [Camera] in
the Setting page (P. 5-10), select [Auto], [Auto
(Flickerless)] or [Auto (Shutter-priority AE)].
For an explanation on each item set in the exposure
mode, see the setting page (P. 5-9).
2
[Exposure Compensation]
When [Auto], [Auto (Flickerless)] or [Auto (Shutter-
priority AE)] is selected for the exposure mode, the
exposure compensation value desired can be selected
from seven levels (-3 to +3) using the applicable
button.
To darken the image, select a negative value. To
brighten the image, select a positive value.
3
[Metering Mode]
When [Auto], [Auto (Flickerless)] or [Auto (Shutter-
priority AE)] is selected for the exposure mode, the
metering mode can be selected from [Center-
Weighted], [Average] or [Spot].
[Center-Weighted]
The entire screen is metered by focusing on the
center of the screen.
Even when slightly darker/brighter areas are present
on the periphery of the screen, an appropriate
exposure can be achieved for the subject near the
center.
Use this mode if the subject is positioned near the
center of the screen.
Important
• Use focus operations in the Admin Viewer for temporarily
checking subjects at other focal points. To fix a long-term
focal point, use the Camera Angle Setting Tool.
• If it is set in the Admin Viewer, the same focus mode will
occur in the viewers of other users also.
• Setting the shutter speed at 1/1 to 1/4 in manual exposure
(P. 7-12) will disable the [One-shot AF] focus mode. Switch
the focus to [Manual] and adjust it to your subject.
• Refer to the notes on P. 3-7 for focus ranges when Night
Mode (P. 5-10, P. 7-14) is enabled.
OFF
S
mart
S
hade
Control
BLC (Back Light
Compensation)
Summary of Contents for VB-M700F
Page 12: ...xii...
Page 24: ...1 12...
Page 40: ...3 10...
Page 77: ...Chapter 6 Admin Tools Privacy Mask Setting Intelligent Function Setting Viewing Logs...
Page 94: ...6 18...
Page 110: ...7 16...


