View Recorded Images
6
-7
Day-
to
-Da
y
O
pera
tions
6
Note
• You can play recordings from more than one camera at the
same time.
• You can display recordings from one camera in multiple video
windows. You can also play images recorded at different times
simultaneously.
• Click [Live] on the timeline toolbar during playback to return to
the live image.
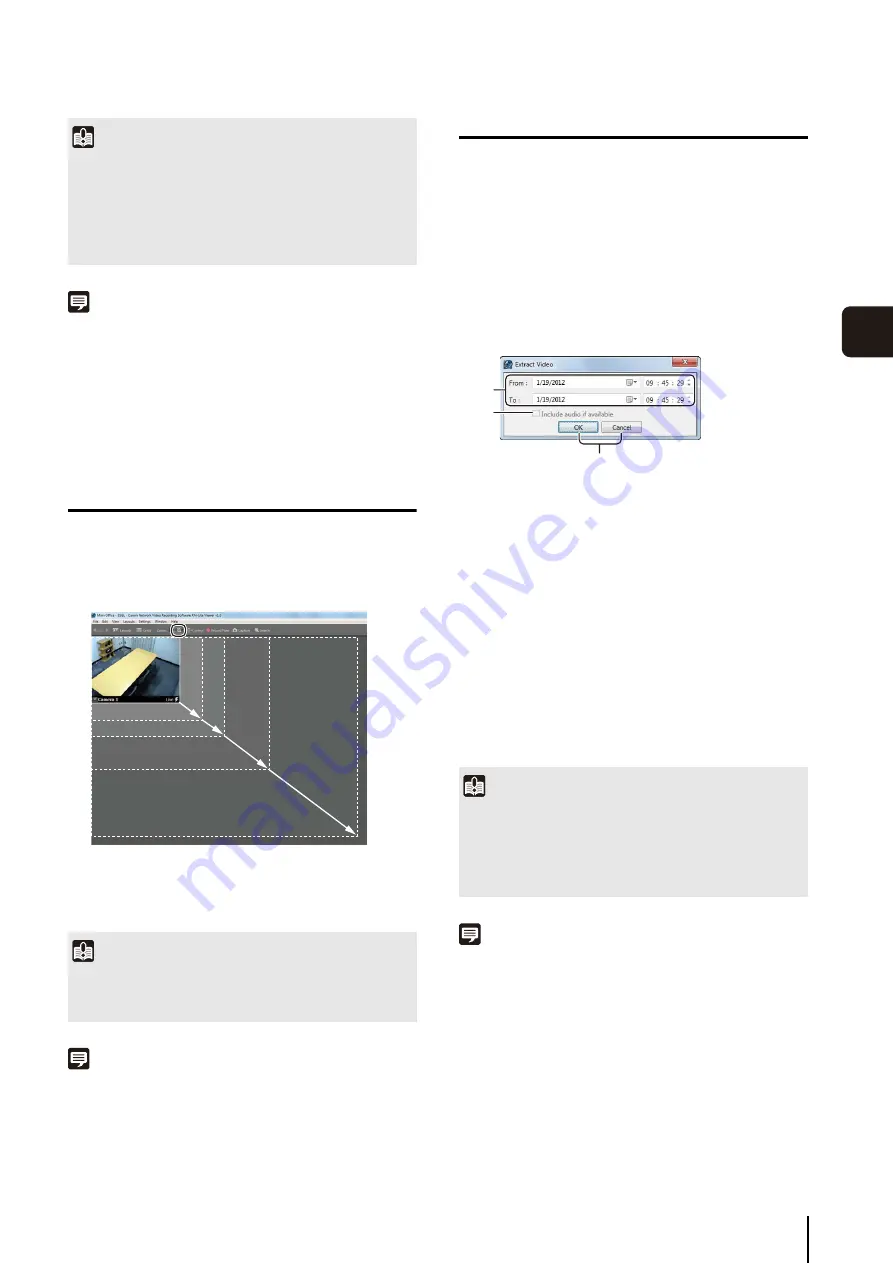
Zoom the Viewing Area In and Out
You can zoom the viewing area in and out in four levels.
Each click zooms further in on the viewing area.
Each click zooms further out of the viewing area.
Note
• Select [Actual Size] from the [View] menu to return the view to
the actual size.
• After selecting [Actual Size], you cannot zoom in further on the
viewing area.
Save Part of a Recording
You can save a part of a recording with a length of up to
one hour to a file.
➀
[From] and [To]
Specify the date and time of the start and end
positions.
➁
[Include audio if available] check box
This cannot be used with RM-Lite.
➂
[OK] and [Cancel]
Close the dialog box.
The [Save As] dialog box appears.
Note
Extracted images are saved in QuickTime format (with the .mov
file extension) and can be played with QuickTime Player (or other
players that support the .mov file format). If QuickTime Player is
not installed, you can download it for free from http://
www.apple.com/quicktime. We recommend that you use
QuickTime Player Version 6.5.1 or later.
Important
• Because image data is being sent from the Storage Server to
the Viewer during playback, playback response and
smoothness depends on factors such as the amount of
network traffic.
• The time displayed on the timeline corresponds to the clock
on the computer where the Viewer is running.
1
On the toolbar, click [+] next to [Zoom].
2
Click [-] to zoom out.
Important
The quality of the video image in the video window decreases
when you zoom in. To increase the image quality, increase the
resolution (P. 4-7).
1
S
elect a recording on the timeline.
2
Click [Extract] on the timeline to display the [Extract
Video] dialog box.
3
S
pecify the time range for the image to be extracted.
4
Click [OK].
5
S
pecify the file name and storage location and click
[
S
ave].
Important
• You can extract an image from only one video window at a
time.
• Do not specify the Windows folder or the Program Files folder
on the system drive as the destination for the snapshot
images. Images cannot be saved to these folders.
➀
➂
➁
Summary of Contents for RM-Lite 1.0
Page 7: ...vii ...
Page 12: ...xii ...
Page 22: ...1 10 ...
Page 23: ...Chapter 2 Setup How to install the software Settings after installation ...
Page 28: ...2 6 ...
Page 43: ...Chapter 4 Viewer Settings Configuring the Viewer Configuring a camera Creating a layout ...
Page 56: ...4 14 ...
Page 76: ...6 14 ...
Page 82: ...7 6 ...
Page 86: ...8 4 ...
Page 96: ...9 10 ...
Page 97: ...Appendix ...
Page 103: ...Index 10 7 Appendix ...


