


175
Network Settings on the Projector
Installation Manual
Connecting to a Networ
k
Turning DHCP Function On /
Off
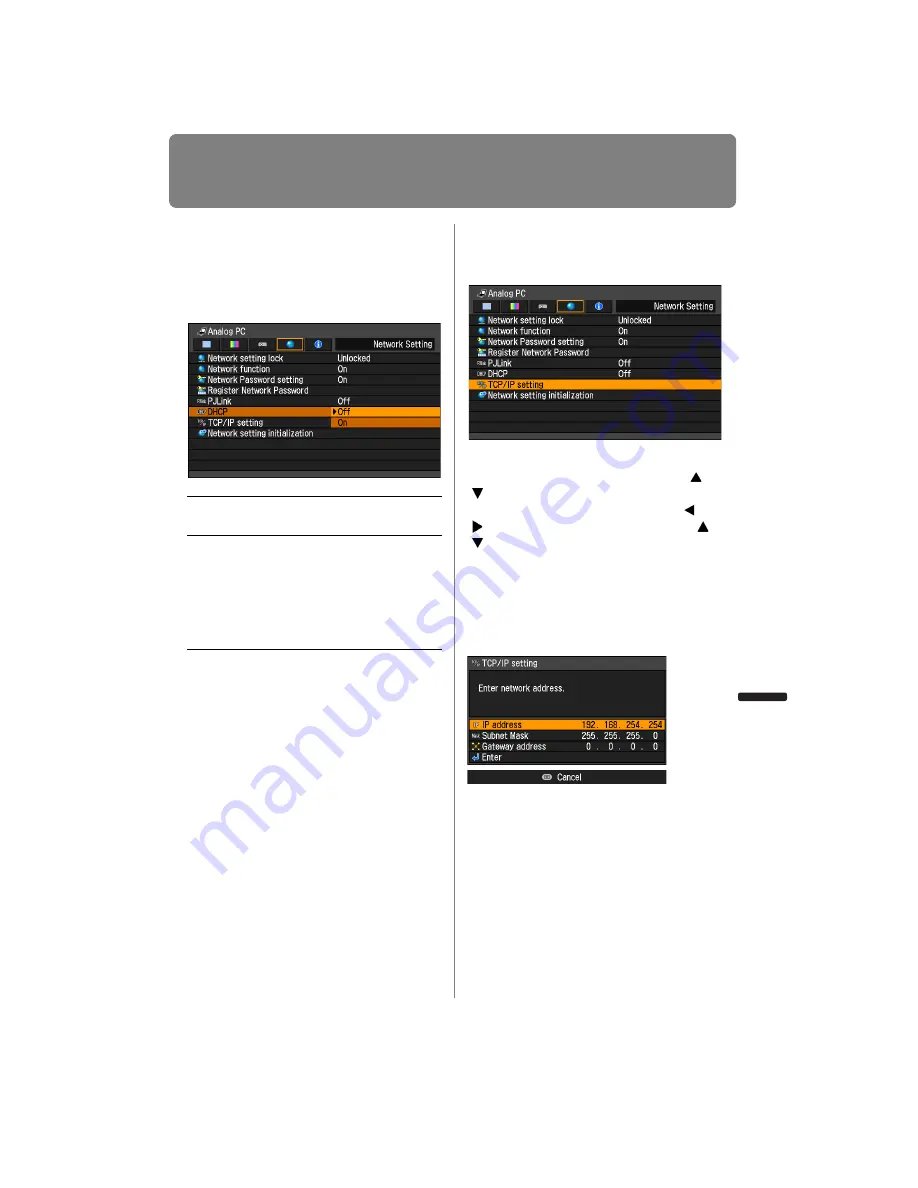
You can turn the projector DHCP function
on or off.
MENU > [Network Setting] > [DHCP]
Press the
OK
button to accept your setting
and then press the
MENU
button or
EXIT
button (WX6000 / SX6000).
• [Off] is the factory default.
TCP / IP Setting
Configure the projector TCP / IP settings.
MENU > [Network Setting] > [TCP/IP setting]
When [TCP/IP setting] is selected, the win-
dow shown below appears. Use the
[
]
/
[ ] buttons to select the IP address, then
press the
OK
button. Next, use the [ ] /
[ ] buttons to select the digit and the
[
]
/
[ ] buttons to change the value. For the
WX6000 / SX6000, numbers can be
entered using the numerical buttons on
the remote control. Press the
OK
button,
then set the subnet mask and gateway
address in the same way. Finally, select
[Enter].
• The factory defaults are shown below.
IP address
192.168.254.254
Subnet mask
255.255.255.0
Gateway address 0.0.0.0
• Settings cannot be made when [DHCP]
) is [On].
• If an invalid value is entered, the message
“Invalid entry” appears. If this occurs,
enter a valid value.
Off
Disables the DHCP function. TCP / IP
settings are possible.
On
Enables the DHCP function.
Searches the DHCP server
.
Because
the IP address is acquired from the
DHCP server, it is not necessary to
enter the TCP / IP settings (IP
address, subnet mask, gateway
address).
Summary of Contents for REALiS WUX4000 Pro AV
Page 42: ...42 ...
Page 43: ...43 MULTIMEDIA PROJECTOR User s Manual Operation ...
Page 44: ...44 ...
Page 86: ...86 ...
Page 142: ...142 ...
Page 144: ...144 ...
Page 199: ...199 MULTIMEDIA PROJECTOR Appendix ...
Page 200: ...200 ...
Page 227: ...227 Product Specifications Appendix Other Information ...
Page 239: ...239 Menu Configuration ...


