


2
2
1
(B)
(A)
1
2
6
1
2
3
4
5
6
1
2
2
BK:CLI-226BK
4546B001
M: CLI-226M
4548B001
C: CLI-226C
4547B001
PGBK: PGI-225PGBK 4530B001
Y: CLI-226Y
4549B001
Compruebe que la luz de
ENCENDIDO (POWER)
se ilumina
en verde.
66
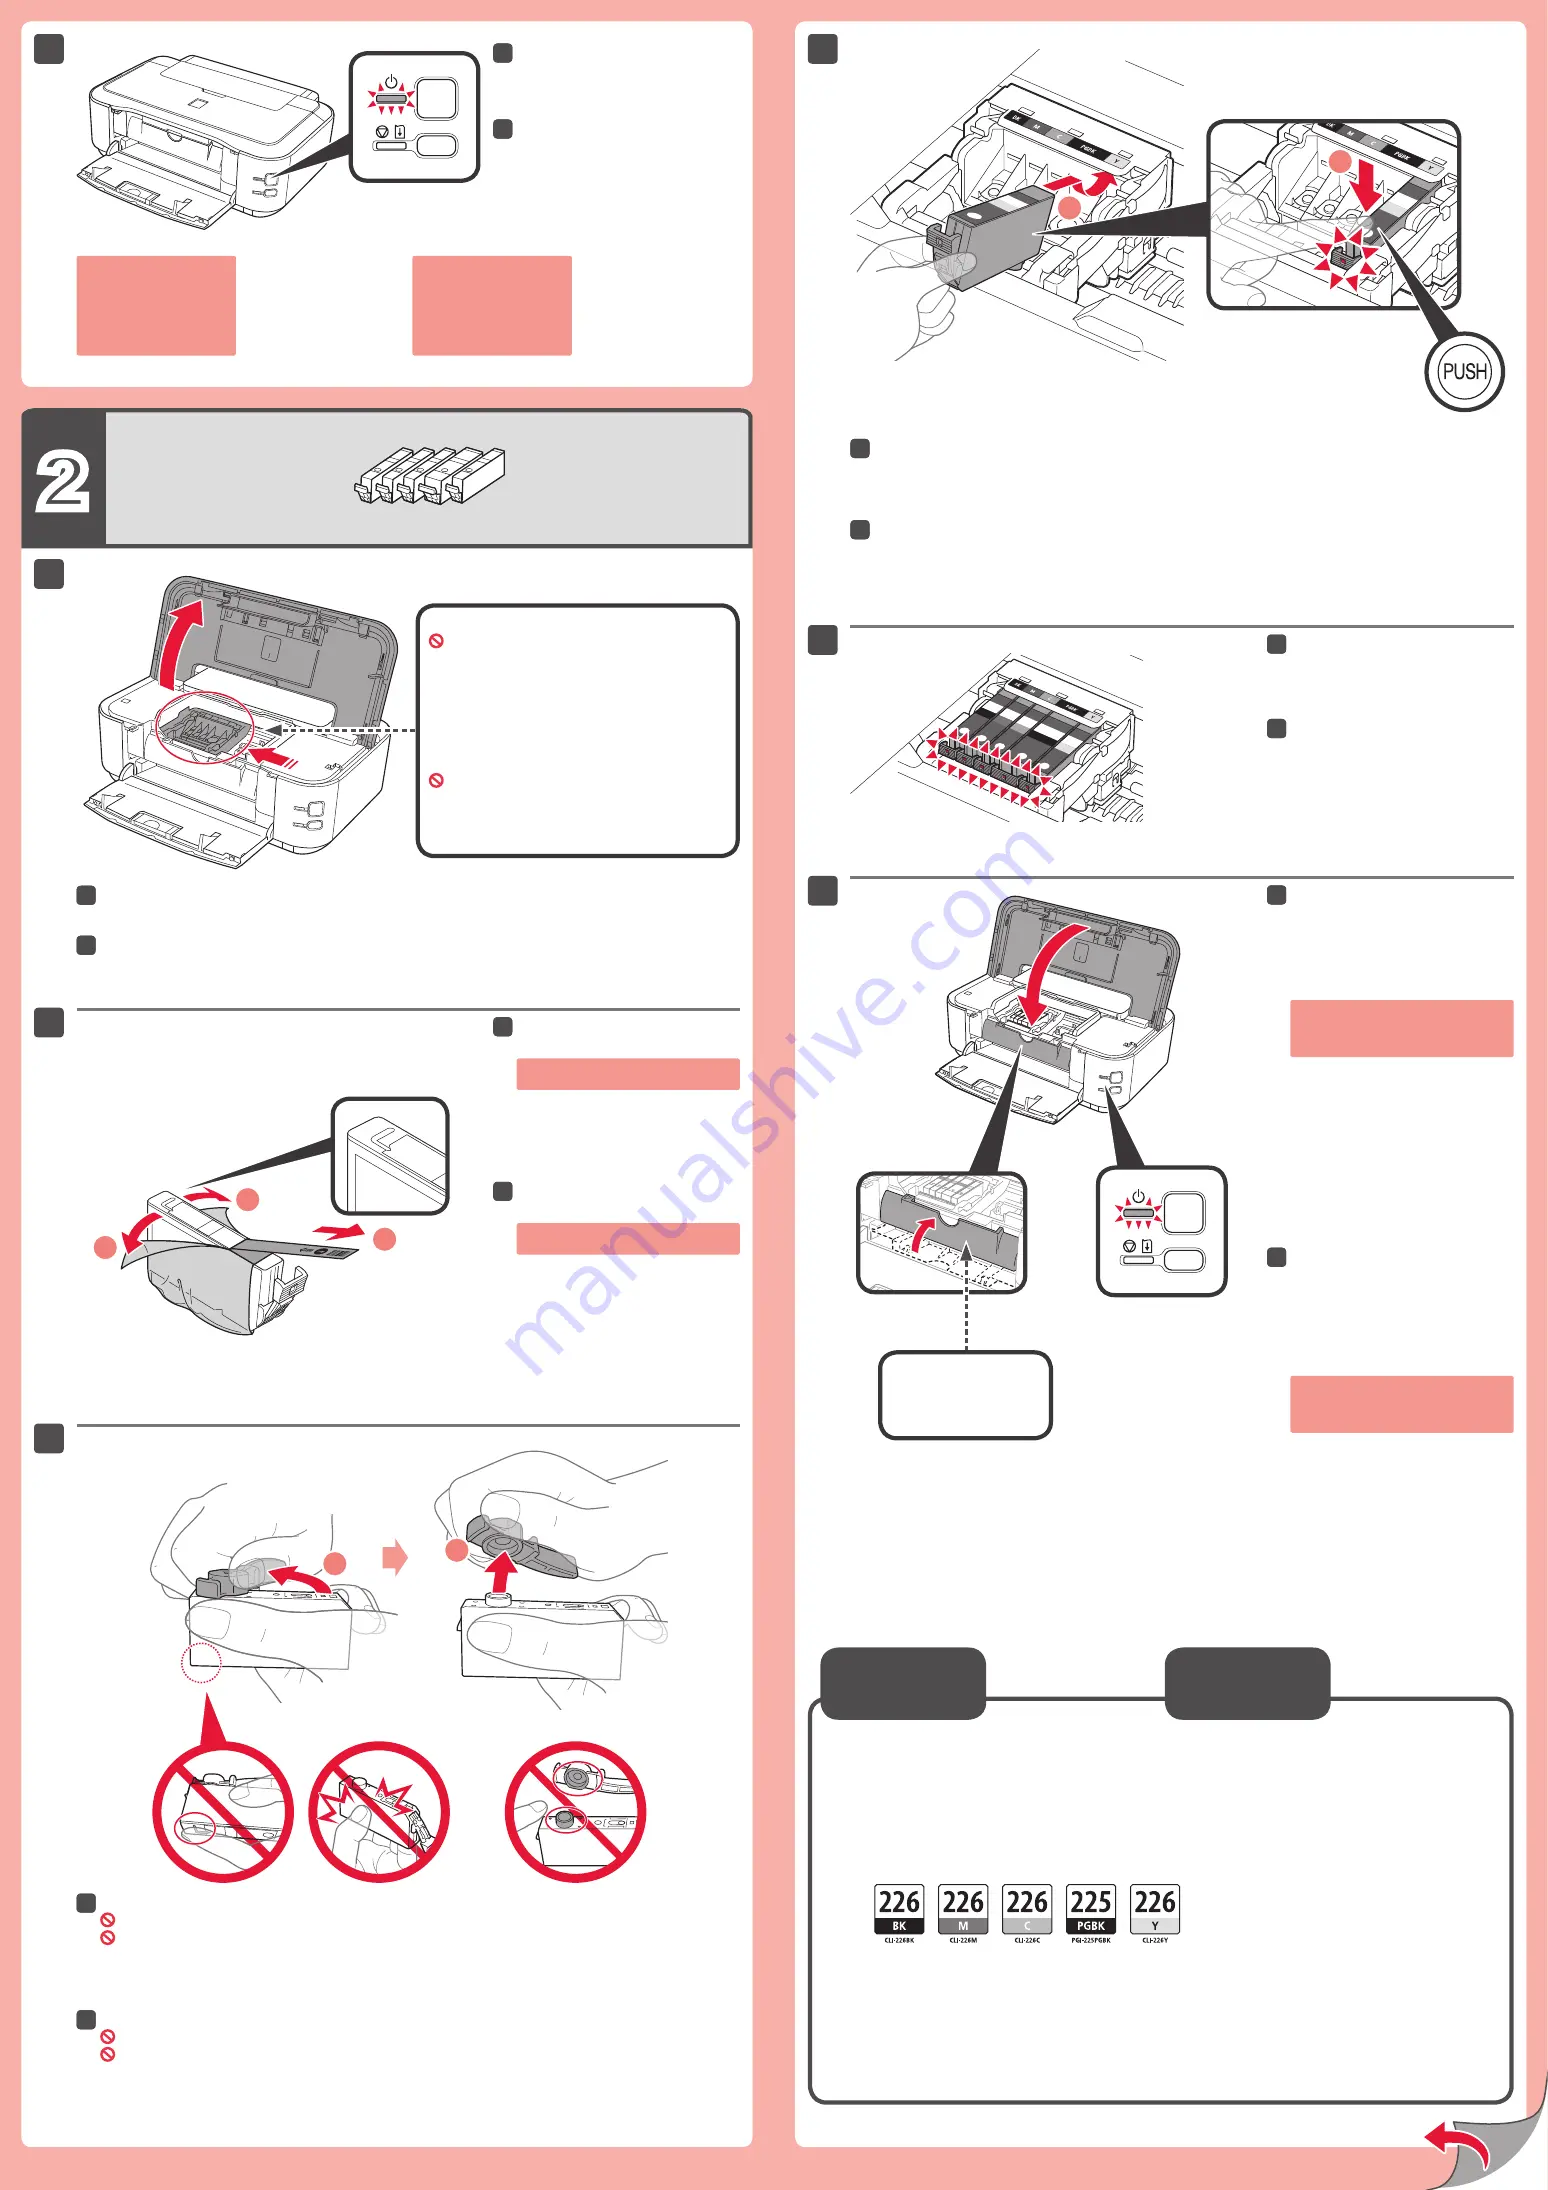
Abra la tapa superior (Top Cover).
11
Gire y retire la tapa naranja.
(A) No presione los laterales si la ranura en forma de L está bloqueada.
(B) ¡No tocar!
33
Introduzca y empuje hacia abajo el depósito de tinta (ink tank) en la ranura del color correspondiente.
Compruebe que la lámpara de tinta (ink lamp) está encendida y coloque el siguiente depósito de tinta (ink tank).
44
Compruebe que todas las
lámparas están encendidas.
55
Si la luz de
Alarma (Alarm)
parpadea
en naranja, compruebe que el depósito
de tinta (ink tank) están instalados
correctamente.
Compruebe que la cubierta interior
(Inner Cover) está cerrada y cierre la
tapa superior (Top Cover).
Espere aproximadamente 4 minutos,
hasta que la luz de
ENCENDIDO
(POWER)
parpadee y se quede
encendida en verde; continúe con el paso
siguiente.
66
Retire totalmente la cinta naranja
(orange tape).
Retire el envoltorio protector.
22
Cubierta interior
(Inner Cover)
Aquí deben instalarse los depósitos de tinta
(ink tanks).
No tocar hasta que se detenga.
Si la luz de
Alarma (Alarm)
parpadea en naranja, pulse
el botón
ACTIVADO (ON)
para apagar la impresora
y repita desde el paso 2.
Los depósitos de tinta (ink tanks) siguientes son compatibles con esta impresora.
Consulte en 1-800-OK-CANON cuáles son sus distribuidores más próximos o visite
la tienda en línea de Canon en www.shop.usa.canon.com
Número de pedido
Información
sobre pedidos
Open the Top Cover.
11
Twist and remove the orange cap.
(A) Do not press the sides when the L-shaped groove is blocked.
(B) Do not touch!
33
Insert and push down the ink tank into the matching color slot.
Check that the ink lamp is lit, then install the next ink tank.
44
Check that all lamps are lit.
55
If the
Alarm
lamp flashes orange,
check that the ink tank is installed
correctly.
Check that the Inner Cover is
closed, then close the Top Cover.
Wait for about 4 minutes until the
POWER
lamp flashes and stays lit green,
then proceed.
66
Check that the
POWER
lamp lights
green.
66
Remove the orange tape completely.
Remove the protective wrap.
22
Inner Cover
This is where the ink tanks are to be installed.
Do not touch it until it stops.
If the
Alarm
lamp flashes
orange, press the
ON
button to turn OFF the
printer, then redo from
step 2.
The following ink tanks are compatible with this printer.
Call 1-800-OK-CANON to locate a dealer near you, or visit the Canon online store at
www.shop.usa.canon.com
Order #
Ordering
Information


