


17
Details:
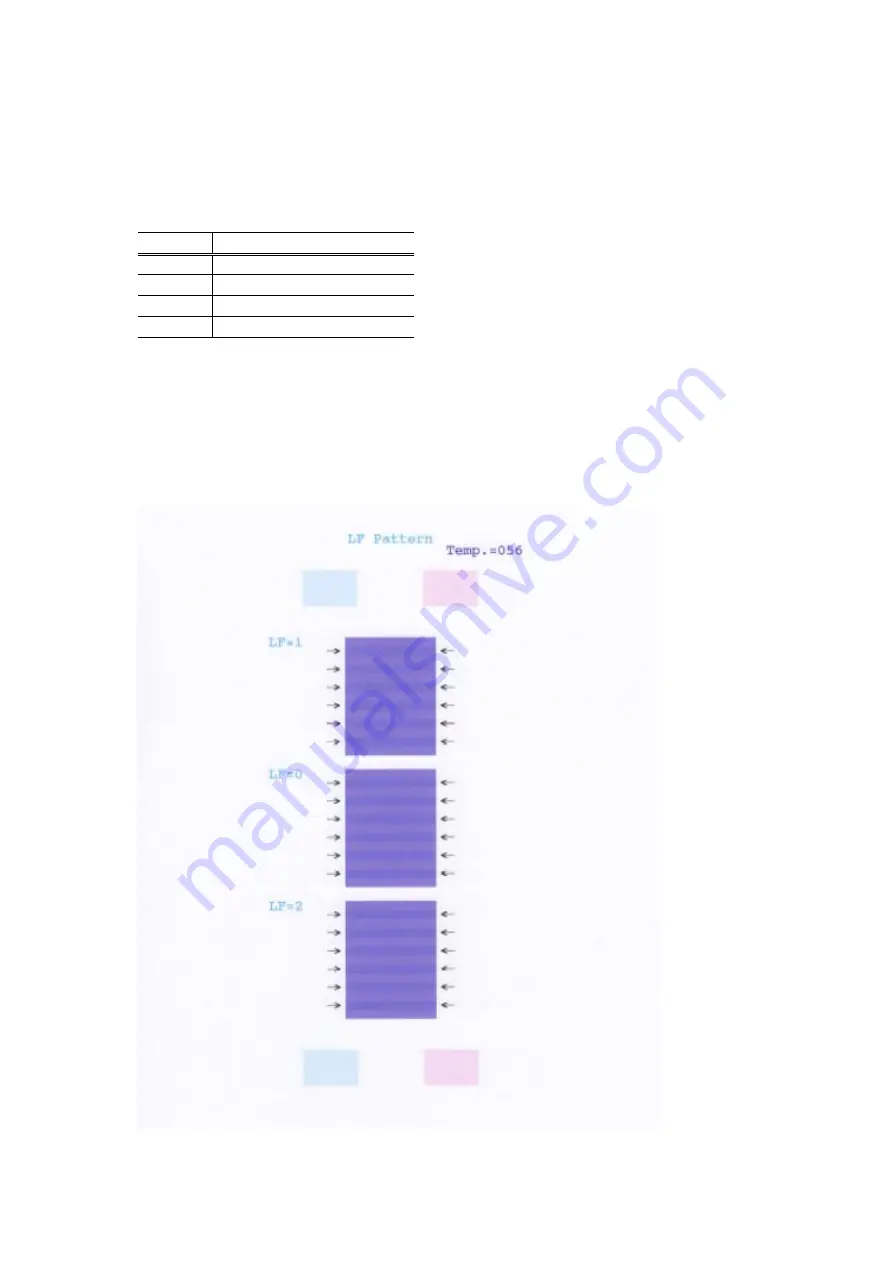
Print the LF correction pattern on a sheet of paper. Select the Pattern No. (0 to 2) in which
streaks or lines are the least noticeable, press the Resume/Cancel button the same number
of time(s) as the selected Pattern No., then press the Power button.
1) In the LF correction mode, press the Resume/Cancel button the specified number of times
according to the paper to be used in LF correction listed in the table below, then press the Power
button. (Set a sheet of selected paper in the ASF.)
Time(s) Paper
1 time
HR-101
2 times
GF-500, Office Planner
3 times
HP BrightWhite
4 times
Canon Extra, STEINBEIS
Note: - Each time the Resume/Cancel button is pressed, the Alarm and Power LEDs light
alternately, Alarm in orange and Power in green.
- If the Resume/Cancel button is NOT pressed, and only the Power button is pressed, the
printer remains in the LF correction mode.
- If the Resume/Cancel button is pressed 5 times or more, then the Power button is
pressed, the printer returns to the service mode menu selection.
2) The LF correction pattern for the selected paper is printed.
Summary of Contents for Pixma iP4300 Series
Page 13: ...13 ...
Page 23: ...FIGURE 1 PRINTER PRINT HEAD ...
Page 25: ...FIGURE 2 AC ADAPTER ...
Page 27: ...FIGURE 3 OPERATION PANEL UNIT MAIN CASE UNIT ...
Page 29: ...FIGURE 4 BOTTOM CASE UNIT INK ABSORBER ...
Page 31: ...FIGURE 5 LOGIC BOARD ASS Y ...
Page 32: ...FIGURE KEY No PART NUMBER RANK QTY DESCRIPTION REMARKS 5 1 QM3 1266 000 1 LOGIC BOARD ASS Y ...
Page 33: ...FIGURE 6 SHEET FEED UNIT ...
Page 35: ...FIGURE 7 CARRIAGE UNIT ...
Page 37: ...FIGURE 8 PLATEN UNIT ...
Page 39: ...FIGURE 9 PURGE UNIT ...
Page 41: ...FIGURE 10 PAPER FEED CARRIAGE LIFT PART ...
Page 43: ...FIGURE 11 OPTION CONSUMABLES ...
Page 45: ...FIGURE 12 TOOL ...


