


Forwarding Scanned Data to the Computer Using the Operation
Panel of the Machine
Before forwarding scanned data to the computer, confirm the following:
•
The scanner driver is installed.
If the scanner driver is not yet installed, install the scanner driver from our website.
•
The machine is connected to a computer correctly.
Make sure that the machine is connected to the computer correctly.
Do not plug in or unplug the USB cable while the machine is in operation, or when the computer is in the
sleep or standby mode.
If you perform scanning via a network connection, make sure that all the required settings have been
specified.
•
The destination and the file name are specified in Canon IJ Scan Utility.
You can specify the destination and the file name in Canon IJ Scan Utility. For details on settings of
Canon IJ Scan Utility:
Follow the procedure below to forward scanned data to the computer.
1.
Make sure that the machine is turned on.
2. Press the
SCAN
button.
If you forward the scanned data to a computer for the first time, the
Scan menu
screen is displayed. Go
to step 3.
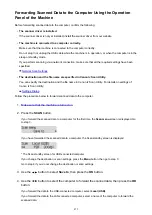
If you have forwarded the scanned data to a computer, the Scan standby screen is displayed.
* The Scan standby screen for USB-connected computer
If you change the destination or scan settings, press the
Menu
button, then go to step 3.
Go to step 8 if you do not change the destination or scan settings.
3. Use the
button to select
Save to
, then press the
OK
button.
4. Use the
button to select the computer to forward the scanned data, then press the
OK
button.
If you forward the data to the USB-connected computer, select
Local (USB)
.
If you forward the data to the LAN-connected computer, select a name of the computer to forward the
scanned data.
473
Summary of Contents for PIXMA E481
Page 15: ...B204 776...
Page 67: ...67...
Page 99: ...Safety Guide Safety Precautions Regulatory and Safety Information 99...
Page 108: ...Main Components Front View Rear View Inside View Operation Panel 108...
Page 124: ...Loading Paper Originals Loading Paper Loading Originals 124...
Page 141: ...Printing Area Printing Area Other Sizes than Letter Legal Envelopes Letter Legal Envelopes 141...
Page 153: ...Photo or thick paper 153...
Page 154: ...Replacing a FINE Cartridge Replacing a FINE Cartridge Checking the Ink Status 154...
Page 222: ...Information about Network Connection Useful Information about Network Connection 222...
Page 244: ...Note This machine supports WPA WPA2 PSK WPA WPA2 Personal and WPA2 PSK WPA2 Personal 244...
Page 272: ...272...
Page 282: ...PRO 10S 282...
Page 289: ...Paper Settings on the Printer Driver and the Printer Paper Size 289...
Page 314: ...Adjusting Brightness Adjusting Intensity Adjusting Contrast 314...
Page 371: ...Scanning Scanning from a Computer Scanning from the Operation Panel of the Machine 371...
Page 410: ...Defaults You can restore the settings in the displayed screen to the default settings 410...
Page 420: ...Defaults You can restore the settings in the displayed screen to the default settings 420...
Page 471: ...471...
Page 478: ...Scan resolution Select the resolution for scanning Ex 478...
Page 643: ...Telephone Problems Cannot Dial Telephone Disconnects During a Call 643...
Page 646: ...Problems with Scanning Problems with Scanning Scan Results Not Satisfactory 646...
Page 739: ...5B02 Cause Printer error has occurred Action Contact the service center 739...
Page 740: ...5B03 Cause Printer error has occurred Action Contact the service center 740...
Page 741: ...5B04 Cause Printer error has occurred Action Contact the service center 741...
Page 742: ...5B05 Cause Printer error has occurred Action Contact the service center 742...
Page 743: ...5B12 Cause Printer error has occurred Action Contact the service center 743...
Page 744: ...5B13 Cause Printer error has occurred Action Contact the service center 744...
Page 745: ...5B14 Cause Printer error has occurred Action Contact the service center 745...
Page 746: ...5B15 Cause Printer error has occurred Action Contact the service center 746...