background image

Specifications

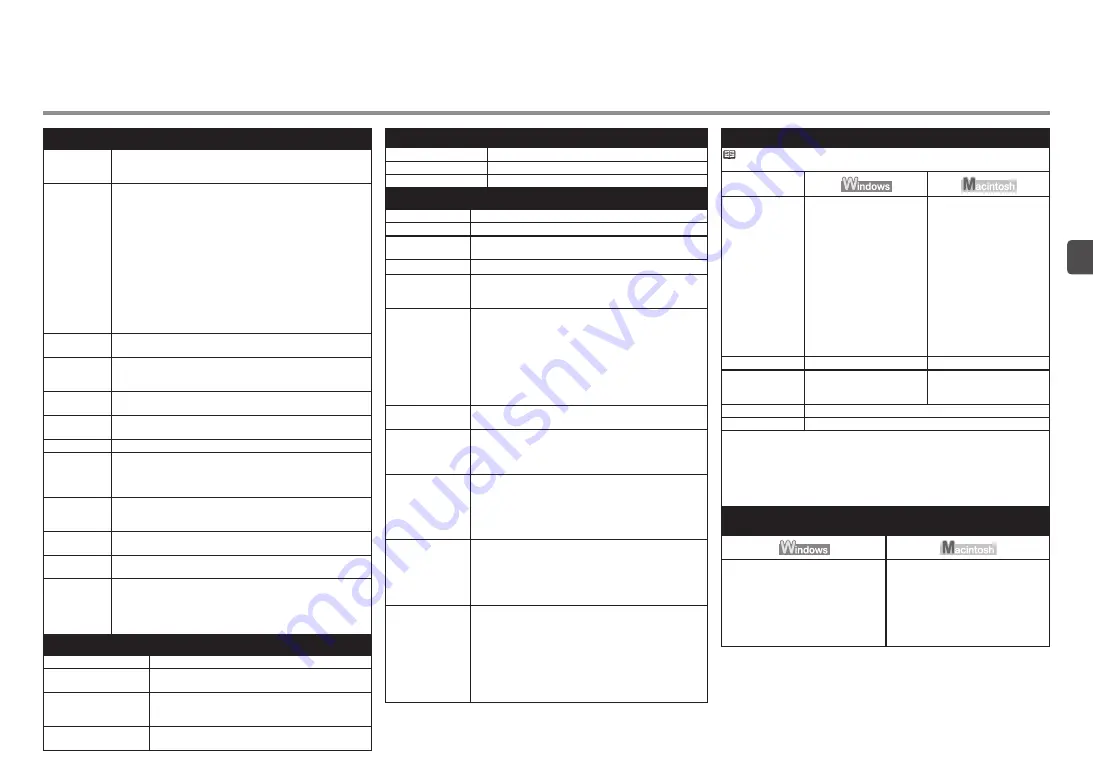
Minimum System Requirements

 Conform to the operating system’s requirements when higher than those 

given here.

Operating System 

Processor  

RAM

Windows Vista, Vista SP1

1 GHz processor

512 MB

Windows XP SP2, SP3

300 MHz processor

128 MB

Windows 2000 Professional 

SP4

300 MHz processor

128 MB

Mac OS X v.10.5

Intel processor, PowerPC G5, 

PowerPC G4

(867 MHz or faster)

512 MB

Mac OS X v.10.4

Intel processor, PowerPC G5, 

PowerPC G4, PowerPC G3

256 MB

Mac OS X v.10.3.9

PowerPC G5, PowerPC G4, 

PowerPC G3

128 MB

Browser

Internet Explorer 6.0 or later

Safari

Hard Disk Space

600 MB


Note: For bundled software 

installation.

700 MB


Note: For bundled software 

installation.

CD-ROM Drive

Required

Display

XGA 1024 x 768 

Windows: Note: Operation can only be guaranteed on a PC with Windows 

Vista, XP or 2000 pre-installed. 

Some functions may not be available with Windows Media Center

To upgrade from Windows XP to Windows Vista, first uninstall software bundled 

with the Canon inkjet printer.

Macintosh: Hard Disk must be formatted as Mac OS Extended (Journaled) or 

Mac OS Extended.

General Specifications

Printing 

resolution (dpi)

4800* (horizontal) x 2400 (vertical)

* Ink droplets can be placed with a pitch of 1/4800 inch at 

minimum.

Interface

USB Port:

  Hi-Speed USB*1

Direct Print Port:

  PictBridge

  Bluetooth v2.0 (Option)*2 *3 *4

  USB flash drive

*1 A computer that complies with Hi-Speed USB standard is 

required. Since the Hi-Speed USB interface is fully upwardly 

compatible with USB 1.1, it can be used at USB 1.1.

*2 Maximum speed: 1.44 Mbps

*3 JPEG/PNG only

*4 Bluetooth connection is for printing only.

Print width

8 inches/203.2 mm

(for Borderless Printing: 8.5 inches/216 mm)

Acoustic noise 

level

Approx. 47 db (A)

* When printing in the standard print quality mode on 

Photo 

Paper Plus Glossy II

.

Operating 

environment

Temperature: 5 to 35°C (41 to 95°F)


Humidity: 10 to 90% RH (no condensation)

Storage 

environment

Temperature: 0 to 40°C (32 to 104°F)


Humidity: 5 to 95% RH (no condensation)

Power supply

AC 100-240 V, 50/60 Hz

Power 

consumption

Printing (Copy): Approx. 11W 

Standby (minimum): Approx. 2.2W* 

OFF: Approx. 1W*

* USB connection to PC

External 

dimensions

Approx. 18.1 (W) x 16.2 (D) x 7.8 (H) inches


Approx. 458 (W) x 410 (D) x 198 (H) mm

* With the Paper Support and Paper Output Tray retracted.

Weight

Approx. 8.6 kg (Approx. 18.9 lb)

* With the FINE Cartridges installed.

Canon FINE 

Cartridge

Black: 320 nozzels

Color: 384 x 3 nozzels

ADF capacity

A4 or Letter size: Max. 30 sheets (20 lb/75 gsm paper), up to 0.16 

inches/4 mm in height

Legal size: Max. 5 sheets (20 lb/75 gsm paper), up to 0.04 

inches/1 mm in height

Other sizes: 1 sheet

Scan Specifications

Scanner driver

TWAIN/WIA (Windows Vista and Windows XP only)

Maximum scanning size

A4/Letter, 8.5” x 11.7”/216 x 297 mm (Platen Glass)/  

8.5 x 14.0 inches / 216 x 356 mm (ADF)

Scanning resolution

Optical resolution (horizontal vertical) max: 1200 dpi x 

2400 dpi 

Interpolated resolution max: 19200 dpi x 19200 dpi

Gradation (Input/Output) Gray: 16 bit/8 bit


Color: 48 bit/24 bit (RGB each 16 bit/8 bit)

Copy Specifications

Multiple copy

Max 99 pages

Intensity adjustment

9 positions, Auto intensity (AE copy)

Reduction/Enlargement

25% - 400% (1% unit)

Fax Specifications

Applicable line

Public Switched Telephone Network (PSTN)

Compatibility

G3/Super G3 (Mono & Color Fax)

Data compressing 

system

MH, MR, MMR, JPEG

Modem type

Fax modem

Modem speed

33600/31200/28800/26400/24000/21600/19200/16800/

14400/12000/9600/7200/4800/2400 bps

Automatic fallback

Transmission speed

Black & white: Approx. 3 seconds/page at 33.6 Kbps, 

ECM-MMR, transmitting from memory

(Based on ITU-T No.1 chart for US specifications and 

Canon FAX Standard chart No.1 for others, both in 

standard mode or Canon FAX Standard chart No.1, 

standard mode.)

Color: Approx. 1 minute/page at 33.6 Kbps, ECM-JPEG, 

transmitting from memory

(Based on Canon COLOR FAX TEST SHEET.)

Scanning image

processing

Halftones: 256 levels of gray

Density adjustment: 3 levels

Memory

Transmission/reception: 50 pages

(Based on ITU-T No.1 chart for US specifications and 

Canon FAX Standard chart No.1 for

others, both in standard mode.)

Fax resolution

Black & white Standard: 8 pels/mm x 3.85 lines/mm (203 

pels/inch x 98 lines/inch)

Black & white Fine, Photo: 8 pels/mm x 7.70 lines/mm (203 

pels/inch x 196 lines/inch)

Black & white Extra fine: 300 x 300 dpi

Color: 200 x 200 dpi

Dialing

Automatic dialing

  Coded speed dial (20 destinations)

  Group dial (max. 19 destinations)

Regular dialing (with Numeric buttons)

Automatic redialing

Manual redialing (with the Redial/Pause button)

Telephone 

networking

TTI (Transmit Terminal Identification)

ECM transmission

Activity report (after every 20 transactions)

Sequential broadcasting (max. 21 destinations)

Manual redialing (max. 10 transactions)

Automatic reception

Remote reception by telephone (Default ID: 25)

DM Preventive Function

etc.

Specifications are subject to change without notice.

About Consumables

Consumables (ink tanks / FINE Cartridges) are available for 

5 years after production has stopped.

Additional System Requirements for the on-screen 

manuals

Browser: Easy Guide Viewer

Note: Microsoft Internet Explorer 6.0 

or later must be installed. The on-

screen manual may not be displayed 

properly depending on your operating 

system or Internet Explorer version. We 

recommend that you keep your system 

up to date with Windows Update.

Browser: Help Viewer

Note: The on-screen manual may not 

be displayed properly depending on 

your operating system. We recommend 

that you keep your system up to date.

Summary of Contents for MX320

Page 1: ...po Cons rvelo a mano para utilizarlo como referencia en el futuro Gu a de inicio L ame en primer lugar Todo en uno para oficina Make sure to read this manual before using the machine Please keep it in...

Page 2: ...strada de Microsoft Corporation en EE UU y u otros pa ses Macintosh y Mac son marcas comerciales de Apple Inc registradas en EE UU y en otros pa ses Symbols The following symbols are used to mark impo...

Page 3: ...x Instalaci n de los cartuchos FINE Encendido del equipo Conexi n de la l nea telef nica Retirada del material protector Preparaci n After Installing the Machine Loading Paper Install the Software Set...

Page 4: ...mentos Podr a caer en la bandeja posterior al abrir la cubierta de documentos y provocar fallos en el funcionamiento Elecci n del emplazamiento Cable USB Preparation Before turning on the machine remo...

Page 5: ...ntinuaci n levante la unidad del esc ner cubierta B ligeramente y pliegue el soporte de la unidad del esc ner C para luego cerrar suavemente la unidad del esc ner cubierta B Remove the Protective Mate...

Page 6: ...ide Si utiliza el equipo como fax exclusivamente Conecte el equipo con una l nea telef nica mediante el cable de l nea telef nica suministrado A Vaya a 4 Encendido del equipo en la p gina 6 Connect th...

Page 7: ...aralelo a la misma l nea telef nica mediante un adaptador de distribuci n De lo contrario puede que el equipo no funcione correctamente Only when connecting a telephone Do not connect the machine and...

Page 8: ...de espera Si el idioma de la pantalla LCD no es el deseado pulse el bot n Atr s Back D para volver a la pantalla Selec idioma Language selection Turn the Power On Plug the power cord into the left si...

Page 9: ...a la derecha cierre la unidad del esc ner cubierta y vuelva a abrirla Si el contenedor del cartucho FINE no sale aseg rese de que el equipo est encendido Install the FINE Cartridges Be sure to use th...

Page 10: ...e Tenga cuidado de no mancharse las manos ni el rea de trabajo circundante con la tinta de la cinta protectora que ha quitado Open the Ink Cartridge Locking Cover on the right side Pinch G firmly and...

Page 11: ...ha y correctamente bloqueada que no est inclinada Inserte el cartucho FINE de color en el contenedor del cartucho FINE del mismo modo Push down of the Ink Cartridge Locking Cover until you hear a clic...

Page 12: ...extraerlos salvo que sea totalmente necesario Si aparece un mensaje de error en la pantalla LCD aseg rese de que los cartuchos FINE est n correctamente instalados Wait until the standby screen appear...

Page 13: ...a el equipo como fax exclusivamente Puede cambiar el modo de recepci n en cualquier momento Para obtener m s informaci n consulte el manual en pantalla Gu a b sica Basic Guide Set Up for Fax Reception...

Page 14: ...os faxes autom ticamente cuando el equipo detecta el patr n de sonido de fax Si utiliza un servicio DRPD detecci n de patr n del tono distintivo When using as both a fax and telephone When you want to...

Page 15: ...eceive mode set Utilice el bot n o C para seleccionar el modo de recepci n y pulse a continuaci n el bot n OK Se mostrar el modo de recepci n seleccionado Press the FAX button A then press the Menu bu...

Page 16: ...o durante el reinicio del ordenador Los entornos Mac OS 9 Mac OS X Classic o Mac OS X v 10 3 8 o anteriores no son compatibles Vaya a la p gina 15 Vaya a la p gina 22 Install the Software Quit all run...

Page 17: ...chando el ruido de funcionamiento Aseg rese de que el bot n de ACTIVADO ON A deja de parpadear Consulte la Informacion adicional para usuarios espa oles para instalar la version en espa ol If the Foun...

Page 18: ...clic en Ejecutar Msetup4 exe Run Msetup4 exe Aparece el cuadro de di logo Control de cuentas de usuario User Account Control Haga clic en Continuar Continue Si vuelve a aparecer el mismo cuadro de di...

Page 19: ...Si desea seleccionar los elementos que quiere instalar haga clic en Instalaci n personalizada Custom Install y siga las instrucciones en pantalla para continuar con la instalaci n Click Install Move...

Page 20: ...llow All Install Wizard Processes haga clic en Siguiente Next Se inicia la instalaci n Durante la instalaci n siga todas las instrucciones en pantalla para instalar el software Read the License Agreem...

Page 21: ...i n puede que necesite alinear el cabezal de impresi n Consulte Cuando la impresi n es borrosa o los colores no son los correctos en el manual en pantalla Gu a b sica Basic Guide When the Printer Conn...

Page 22: ...istrado aparecer la pantalla Registro del producto Product Registration Haga clic en Siguiente Next Puede que la siguiente pantalla tarde un momento en aparecer Haga clic en Siguiente Next s lo una ve...

Page 23: ...ci n haga clic en Reiniciar Restart Despu s de reiniciarlo extraiga el CD ROM de instalaci n Setup CD ROM y gu rdelo en un lugar seguro A continuaci n lea la secci n 8 Carga del papel en la p gina 27...

Page 24: ...n Setup CD ROM en la unidad de CD ROM Consulte la Informacion adicional para usuarios espa oles para instalar la version en espa ol Connect the machine to the computer with a USB cable Make sure the m...

Page 25: ...uaci n siga las instrucciones que aparecen en pantalla Haga doble clic en el icono Configuraci n Setup Si la carpeta CANON no se abre autom ticamente haga doble clic en el icono CANON_IJ del escritori...

Page 26: ...s la instalaci n puede que necesite alinear el cabezal de impresi n Consulte Cuando la impresi n es borrosa o los colores no son los correctos en el manual en pantalla Gu a b sica Basic Guide Click In...

Page 27: ...desde el icono Solution Menu Para obtener m s detalles consulte la secci n Solution Menu en la p gina 30 Si ya se ha registrado aparecer la pantalla Registro del producto Product Registration Click N...

Page 28: ...a haga clic en Aceptar Agree Si hace clic en No aceptar Do not agree no se instalar Extended Survey Program Esto no afecta al funcionamiento del equipo No aparece esta pantalla en Mac OS X v 10 3 9 Cl...

Page 29: ...B hacia ambos bordes Cargue el papel con orientaci n vertical con la superficie de impresi n hacia arriba Cargue el papel en el centro Loading Paper Open the Paper Support A Move the Paper Guides B to...

Page 30: ...papel que se puede utilizar consulte Carga de papel en el manual en pantalla Gu a b sica Basic Guide La instalaci n del equipo ha finalizado Slide the left and right Paper Guides B against both edges...

Page 31: ...r al m ximo todas las funciones del equipo Tambi n incluye informaci n sobre soluci n de problemas del equipo Para obtener m s informaci n sobre c mo abrir manuales en pantalla consulte la p gina 30 A...

Page 32: ...lutions to problems de Solution Menu para abrir My Printer s lo en Windows Para abrir el manual en pantalla haga clic en el bot n que aparece a la izquierda en Solution Menu Solution Menu is a gateway...

Page 33: ...c mo utilizar el software de las aplicaciones y el equipo consulte los manuales en pantalla Gu a b sica Basic Guide y Gu a avanzada Advanced Guide Various application software are installed on the co...

Page 34: ...cristal C No coloque un peso mayor de 4 4 lb 2 0 kg sobre el original ni ejerza una presi n que supere ese peso Si lo hace puede causar una aver a en el esc ner o romper la bandeja de cristal Try Cop...

Page 35: ...iciar Retire el documento cuando se haya imprimido No abra la cubierta de documentos A hasta que finalice la copia Close the Document Cover A press the COPY button D then press the Black button E or t...

Page 36: ...o de copias se establece en 1 Para obtener m s informaci n consulte el manual en pantalla Gu a avanzada Advanced Guide Para obtener detalles sobre c mo iniciar Solution Menu consulte Solution Menu en...

Page 37: ...pantalla Imprimir Print haga clic en Imprimir Print para empezar a imprimir Para obtener m s informaci n consulte 8 Carga de papel en la p gina 27 Load a sheet of photo paper in portrait orientation...

Page 38: ...l D hacia ambos bordes Para obtener informaci n sobre los documentos admitidos y la configuraci n de la calidad de imagen la densidad brillo etc consulte el manual en pantalla Gu a b sica Basic Guide...

Page 39: ...les sobre la informaci n del remitente consulte Especificaci n de la configuraci n b sica del equipo en el manual en pantalla Gu a b sica Basic Guide Insert the document until a beep sounds then slide...

Page 40: ...c ner cubierta se deja abierta durante m s de 10 minutos el contenedor del cartucho FINE se desplaza a la derecha autom ticamente After a period of use the inside of the machine may become stained wit...

Page 41: ...driver TWAIN WIA Windows Vista and Windows XP only Maximum scanning size A4 Letter 8 5 x 11 7 216 x 297 mm Platen Glass 8 5 x 14 0 inches 216 x 356 mm ADF Scanning resolution Optical resolution horiz...

Page 42: ...p Resoluci n interpolada m xima 19200 ppp x 19200 ppp Gradaci n Entrada Salida Gris 16 bits 8 bits Color 48 bits 24 bits RGB 16 bits 8 bits cada uno Especificaciones de copia Copia m ltiple 99 p ginas...

Page 43: ...XP o 2000 preinstalado Puede que algunas opciones no est n disponibles con Windows Media Center Para actualizar desde Windows XP a Windows Vista desinstale primero el software incluido con la impresor...

Page 44: ...n eStore en www canonestore com PG 210XL Negro opcional CL 211XL Color opcional PG 210 Negro CLI 211 Color 2973B001 2975B001 29188002 2974B001 N de referencia Email Tech Support www canontechsupport c...

Reviews: